


To construct belief in your on-line group or weblog, one essential aspect you’ll need is a well-designed Laravel reside commenting system.
Nevertheless, it’s not simple to get it proper on the primary strive until you depend on self-hosted commenting techniques corresponding to Disqus or Commento, every of which comes with its personal set of disadvantages. They personal your information, provide restricted designs and customizations, and most significantly, they aren’t free.
With these limitations, if the thought of constructing your real-time commenting system — with the advantages of controlling your information, designing and customizing the feel and appear to suit into your weblog — appeals to you, maintain studying.
This text will train you tips on how to develop a well-designed and real-time commenting system with totally different commenting functionalities. Following the ideas of constructing a real-time chat software with Vue.js and Socket.io, we’ll use Laravel, Pusher, and React to develop the real-time commenting system.
Let’s dive in!
What We’ll Construct
We’ll construct a real-time commenting system that may be built-in into any web site or weblog to construct belief locally.
physique a.novashare-ctt{show:block;background:#00abf0;margin:30px auto;padding:20px 20px 20px 15px;colour:#fff;text-decoration:none!essential;box-shadow:none!essential;-webkit-box-shadow:none!essential;-moz-box-shadow:none!essential;border:none;border-left:5px stable #00abf0}physique a.novashare-ctt:hover{colour:#fff;border-left:5px stable #008cc4}physique a.novashare-ctt:visited{colour:#fff}physique a.novashare-ctt *{pointer-events:none}physique a.novashare-ctt .novashare-ctt-tweet{show:block;font-size:18px;line-height:27px;margin-bottom:10px}physique a.novashare-ctt .novashare-ctt-cta-container{show:block;overflow:hidden}physique a.novashare-ctt .novashare-ctt-cta{float:proper}physique a.novashare-ctt.novashare-ctt-cta-left .novashare-ctt-cta{float:left}physique a.novashare-ctt .novashare-ctt-cta-text{font-size:16px;line-height:16px;vertical-align:center}physique a.novashare-ctt .novashare-ctt-cta-icon{margin-left:10px;show:inline-block;vertical-align:center}physique a.novashare-ctt .novashare-ctt-cta-icon svg{vertical-align:center;top:18px}physique a.novashare-ctt.novashare-ctt-simple{background:0 0;padding:10px 0 10px 20px;colour:inherit}physique a.novashare-ctt.novashare-ctt-simple-alt{background:#f9f9f9;padding:20px;colour:#404040}physique a.novashare-ctt.novashare-ctt-simple-alt:hover,physique a.novashare-ctt.novashare-ctt-simple:hover{border-left:5px stable #008cc4}physique a.novashare-ctt.novashare-ctt-simple .novashare-ctt-cta,physique a.novashare-ctt.novashare-ctt-simple-alt .novashare-ctt-cta{colour:#00abf0}physique a.novashare-ctt.novashare-ctt-simple-alt:hover .novashare-ctt-cta,physique a.novashare-ctt.novashare-ctt-simple:hover .novashare-ctt-cta{colour:#008cc4}To construct belief in your on-line group or weblog, one essential aspect you’ll need is a well-designed Laravel reside commenting system. 


Constructing Blocks Overview: Laravel, Pusher, and Vue
Earlier than we dive into the development, let’s talk about the applied sciences we’ll use to develop our real-time commenting system.
Laravel
Laravel is an open-source MVC-oriented PHP framework. It’s used to construct easy to complicated PHP net purposes identified for his or her elegant syntax. Studying what Laravel is important to constructing this commenting system.
Pusher
Pusher allows builders to create real-time options at scale. This text will mix Laravel Echo to create a real-time broadcast occasion to the Pusher server and show the content material on the frontend with Vue.js.
Vue.js
Vue.js is our frontend framework of selection. Vue.js is a progressive JavaScript frontend framework identified for its easy-to-learn and easy method to frontend development. We’ll be utilizing Vue.js to develop our real-time commenting system.
Constructing the Commenting System
If the commenting system we’ve outlined above seems like what you need, let’s transfer on to constructing it out.
1. Set up and Setup Laravel, Pusher, and Echo
The set up and establishing of Laravel, Echo, and Pusher is simple as Laravel has achieved all of the background duties by establishing and configuring Laravel Echo to work with Pusher completely.
Firstly, we’ll begin by putting in and configuring Laravel, our backend PHP framework. You possibly can seize a brand new occasion of Laravel with this command, offered you’ve put in the Laravel CLI globally:
laravel new commenterYour new Laravel occasion shall be put in in a folder referred to as commenter. Let’s open the folder in our VSCode and navigate to it in our terminal:
cd commenter

code .
Earlier than we begin our development server, let’s set up and configure some crucial packages that shall be used for the challenge.
Run this command to put in the Pusher PHP SDK:
composer require pusher/pusher-php-serverRun this command to put in the required NPM packages for the Vue.js frontend:
npm set up --save laravel-echo pusher-jsSubsequent, we’ll configure the Laravel Echo and Pusher. Open your assets/js/bootstrap.js file and paste within the following scripts:
window._ = require("lodash");
window.axios = require("axios");
window.second = require("second");
window.axios.defaults.headers.widespread["X-Requested-With"] = "XMLHttpRequest";
window.axios.defaults.headers.publish["Content-Type"] =
    "software/x-www-form-urlencoded";
window.axios.defaults.headers.widespread.crossDomain = true;
window.axios.defaults.baseURL = "/api";
let token = doc.head.querySelector('meta[name="csrf-token"]');
if (token) {
    window.axios.defaults.headers.widespread["X-CSRF-TOKEN"] = token.content material;
} else {
    console.error("CSRF token not discovered");
}


/**
 * Echo exposes an expressive API for subscribing to channels and listening
 * for occasions that Laravel broadcasts. Echo and occasion broadcasting
 * permits your staff to construct sturdy real-time net purposes shortly.
 */
import Echo from "laravel-echo";
window.Pusher = require("pusher-js");
window.Echo = new Echo({
    broadcaster: "pusher",
    key: course of.env.MIX_PUSHER_APP_KEY,
    cluster: course of.env.MIX_PUSHER_APP_CLUSTER,
    forceTLS: true
});
You’ll discover from the script above that we’re simply configuring Axios occasion with our default configurations. Subsequent, we’ll configure Laravel Echo to make use of Pusher and its configurations.
2. Database Setup and Migration
Subsequent, we’re going to create and arrange our database to retailer the feedback for persistence. We’ll be utilizing SQLite, although you should utilize any database shopper of your selection.
Create a database.sqlite file contained in the database folder and replace your .env file as follows:
DB_CONNECTION=sqlite
DB_DATABASE=/Customers/all/paths/to/challenge/commenter_be/database/database.sqlite
DB_HOST=127.0.0.1
DB_PORT=3306
DB_USERNAME=root
DB_PASSWORD=
Subsequent, run this command to create the Remark migration and replace it with the next scripts:
php artisan make:migration create_comments_tableOpen the database/migrations/xxxx_create_comments_table_xxxx.php file and paste on this code:
<?php
use IlluminateDatabaseMigrationsMigration;
use IlluminateDatabaseSchemaBlueprint;
use IlluminateSupportFacadesSchema;
class CreateCommentsTable extends Migration
{
    /**
     * Run the migrations.
     *
     * @return void
     */
    public operate up()
    {
        Schema::create('feedback', operate (Blueprint $desk) {
            $table->id();
            $table->string('content material');
            $table->string('creator');
            $table->timestamps();
        });
    }
    /**
     * Reverse the migrations.
     *
     * @return void
     */
    public operate down()
    {
        Schema::dropIfExists('feedback');
    }
}
This may create a brand new feedback database desk and add content material and creator columns.
Lastly, to create the migration, run this command:
php artisan migrate3. Creating Fashions
In Laravel, fashions are important — they’re the surest option to talk with our database and deal with information administration.
To create a mannequin in Laravel, we’ll run the next command:
php artisan make:mannequin RemarkSubsequent, open the app/fashions/Remark.php file and paste within the following code:
<?php
namespace AppModels;
use IlluminateDatabaseEloquentFactoriesHasFactory;
use IlluminateDatabaseEloquentModel;
class Remark extends Mannequin
{
    use HasFactory;
    protected $fillable = ['content', 'author'];
}

The $fillable array permits us to create and replace the mannequin in mass.
4. Creating Controllers
Controllers are essential as a result of they home all of the logic, enterprise, and in any other case, of our purposes, so let’s create one to deal with the commenting logic:
Signal Up For the E-newsletter
php artisan make:controller CommentControllerSubsequent, open the app/Http/Controllers/CommentController.php file and paste within the following code:
<?php
namespace AppHttpControllers;
use AppModelsComment;
use AppEventsCommentEvent;
use IlluminateHttpRequest;

class CommentController extends Controller
{
    //
    public operate index()
    {
        return view('feedback');
    }
    public operate fetchComments()
    {
        $feedback = Remark::all();
        return response()->json($feedback);
    }
    public operate retailer(Request $request)
    {
        $remark = Remark::create($request->all());
        occasion(new CommentEvent($remark));
        return $remark;
    }
}
The controller has three totally different strategies: return a remark view, fetch all of the feedback, and retailer a brand new remark, respectively. Most significantly, we fireplace up an occasion every time we retailer a brand new remark, which the frontend will pay attention for to replace the related web page with the brand new remark in real-time utilizing Pusher and Laravel Echo.
5. Creating Routes
To configure our routes correctly, we’ll have to replace a number of recordsdata, so let’s get began.
Firstly, we’re going to replace the api.php file within the routes folder. Open the file and add the next code:
use AppHttpControllersCommentController;
//...

Route::get('/', [CommentController::class, 'index']);
Route::get('/feedback', [CommentController::class, 'fetchComments']);
Route::publish('/feedback', [CommentController::class, 'store']);
Subsequent, open the channels.php file in the identical folder and add the next code to authorize the occasion we fired earlier:
Broadcast::channel('remark', operate ($person) {
    return true;
});
Subsequent, open the net.php file in the identical folder and add the next code to redirect our request to the homepage, the place Vue.js will decide it up:
use AppHttpControllersCommentController;
//...

Route::get('/', [CommentController::class, 'index']);
Lastly, we’ll create a brand new blade file within the assets/views folder referred to as feedback.blade.php and add the next code:
<!DOCTYPE html>
<html lang="en">
<head>
    <meta charset="UTF-8" />
    <title>Commenter</title>
    <meta identify="csrf-token" content material="{{ csrf_token() }}">
    <meta identify="viewport" content material="width=device-width, user-scalable=no, initial-scale=1.0, maximum-scale=1.0, minimum-scale=1.0">

    <hyperlink rel="stylesheet" href="https://cdnjs.cloudflare.com/ajax/libs/bulma/0.7.1/css/bulma.min.css" />
    <fashion>
        .container {
            margin: 0 auto;
            place: relative;
            width: unset;
        }
        #app {
            width: 60%;
            margin: 4rem auto;
        }
        .question-wrapper {
            text-align: heart;
        }
    </fashion>
</head>
<physique>


    <div id="app">
        <div class="container">
            <div class="question-wrapper">
                <h5 class="is-size-2" fashion="colour: #220052;">
                    What do you concentrate on <span fashion="colour: #47b784;">Canine</span>?</h5>
                <br>
                <a href="#Type" class="button is-medium has-shadow has-text-white" fashion="background-color: #47b784">Remark</a>
            </div>
            <br><br>
            <feedback></feedback>
            <new-comment></new-comment>
        </div>
    </div>
    <script async src="{{combine('js/app.js')}}"></script>
</physique>
</html>
The script provides a publish title and a Vue element to show and add new feedback to the publish title created above.
Run the next instructions to check in the event you get every thing appropriately:
npm run watch

php artisan serve
In case you’re offered with this web page, you’re prepared to maneuver to the following step on this article.
Want a internet hosting resolution that provides you a aggressive edge? Kinsta’s received you lined with unimaginable velocity, state-of-the-art safety, and auto-scaling. Try our plans

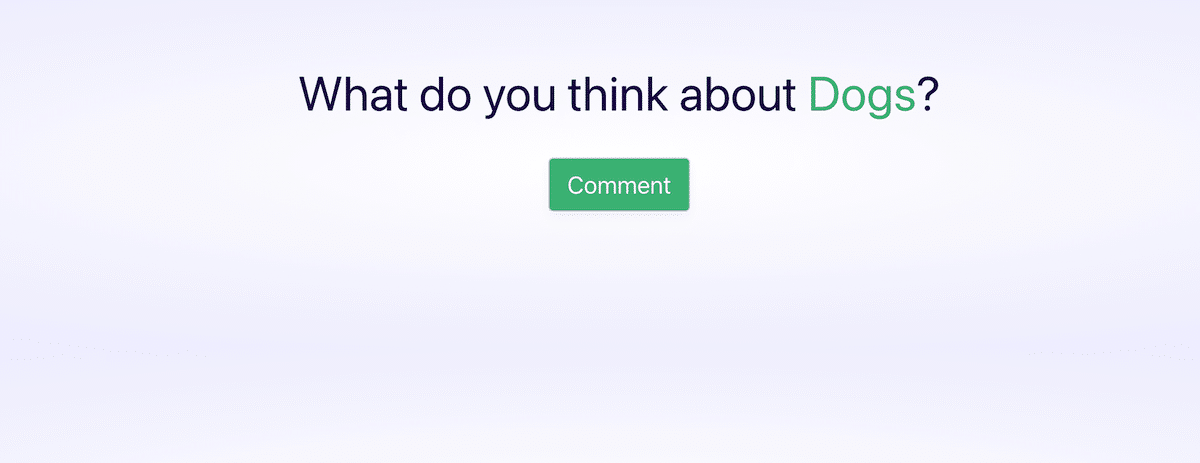
Dwell commenting system in Laravel
6. Setting Up Vue (Frontend)
We’ll create and arrange our Vue occasion to create and show all of the feedback made on this publish.
We’ll begin with establishing our Vuex retailer. Create the next recordsdata within the useful resource/js/retailer folder.
Create Remark State
Create actions.js and add the next code:
let actions = {
    ADD_COMMENT({ commit }, remark) {
        return new Promise((resolve, reject) => {
            axios
                .publish(`/feedback`, remark)
                .then(response => {
                    resolve(response);
                })
                .catch(err => {
                    reject(err);
                });
        });
    },
    GET_COMMENTS({ commit }) {
        axios
            .get("/feedback")
            .then(res => {
                {
                    commit("GET_COMMENTS", res.information);
                }
            })
            .catch(err => {
                console.log(err);
            });
    }
};
export default actions;
The Motion file makes a name to the remark endpoint within the backend.
Subsequent, create a getters.js file and add the next code:
let getters = {
    feedback: state => {
        return state.feedback;
    }
};
export default getters;
The Getter file is used to retrieve all of the feedback within the state.
Create the mutations.js file and paste it into the next code:
let mutations = {
    GET_COMMENTS(state, feedback) {
        state.feedback = feedback;
    },
    ADD_COMMENT(state, remark) {
        state.feedback = [...state.comments, comment];
    }
};
export default mutations;
Subsequent, create a state.js file and paste it into the next code:
let state = {
    feedback: []
};
export default state;
Lastly, we’ll add every thing to the index.js file exported to the Vue occasion, create an index.js file and add the next:
import Vue from "vue";
import Vuex from "vuex";
import actions from "./actions";
import mutations from "./mutations";
import getters from "./getters";
import state from "./state";
Vue.use(Vuex);
export default new Vuex.Retailer({
    state,
    mutations,
    getters,
    actions
});
Create Parts
Lastly, we’re going to create our remark parts to show and add new feedback. Let’s begin by creating the one remark element.
Create a folder within the useful resource/js folder referred to as parts, add the remark.vue and add the next code:
<template>
  <li class="comment-wrapper animate slideInLeft">
    <div class="profile">
    </div>
    <div class="msg has-shadow">
      <div class="msg-body">
        <p class="identify">
          {{ remark.creator }} <span class="date">{{ posted_at }}</span>
        </p>
        <p class="content material">{{ remark.content material }}</p>
      </div>
    </div>
  </li>
</template>

    <script>
export default {
  identify: "Remark",
  props: ["comment"],
  computed: {
    posted_at() {
      return second(this.remark.created_at).format("MMMM Do YYYY");
    },

  },
};
</script>

    <fashion lang="scss" scoped>
.comment-wrapper {
  list-style: none;
  text-align: left;
  overflow: hidden;
  margin-bottom: 2em;
  padding: 0.4em;
  .profile {
    width: 80px;
    float: left;
  }
  .msg-body {
    padding: 0.8em;
    colour: #666;
    line-height: 1.5;
  }
  .msg {
    width: 86%;
    float: left;
    background-color: #fff;
    border-radius: 0 5px 5px 5px;
    place: relative;
    &::after {
      content material: " ";
      place: absolute;
      left: -13px;
      prime: 0;
      border: 14px stable clear;
      border-top-color: #fff;
    }
  }
  .date {
    float: proper;
  }
  .identify {
    margin: 0;
    colour: #999;
    font-weight: 700;
    font-size: 0.8em;
  }
  p:last-child {
    margin-top: 0.6em;
    margin-bottom: 0;
  }
}
</fashion>
Subsequent, create the next file referred to as feedback.vue in the identical folder and add the next code:
<template>
  <div class="container">
    <ul class="comment-list">
      <Remark
        :key="remark.id"
        v-for="remark in feedback"
        :remark="remark"
      ></Remark>
    </ul>
  </div>
</template>

    <script>
import { mapGetters } from "vuex";
import Remark from "./Remark";
export default {
  identify: "Feedback",
  parts: { Remark },
  mounted() {
    this.$retailer.dispatch("GET_COMMENTS");
    this.pay attention();
  },
  strategies: {
    pay attention() {
      Echo.channel("remark").pay attention("remark", (e) => {
        console.log(e);
        this.$retailer.commit("ADD_COMMENT", e);
      });
    },
  },
  computed: {
    ...mapGetters(["comments"]),
  },
};
</script>

    <fashion scoped>
.comment-list {
  padding: 1em 0;
  margin-bottom: 15px;
}
</fashion>
Lastly, create a file referred to as NewComment.vue and add the next code:
<template>
  <div id="commentForm" class="field has-shadow has-background-white">
    <type @keyup.enter="postComment">
      <div class="discipline has-margin-top">
        <div class="discipline has-margin-top">
          <label class="label">Your identify</label>
          <div class="management">
            <enter
              kind="textual content"
              placeholder="Your identify"
              class="enter is-medium"
              v-model="remark.creator"
            />
          </div>
        </div>
        <div class="discipline has-margin-top">
          <label class="label">Your remark</label>
          <div class="management">
            <textarea
              fashion="top: 100px"
              identify="remark"
              class="enter is-medium"
              autocomplete="true"
              v-model="remark.content material"
              placeholder="lorem ipsum"
            ></textarea>
          </div>
        </div>
        <div class="management has-margin-top">
          <button
            fashion="background-color: #47b784"
            :class="{ 'is-loading': submit }"
            class="button has-shadow is-medium has-text-white"
            :disabled="!isValid"
            @click on.stop="postComment"
            kind="submit"
          >
            Submit
          </button>
        </div>
      </div>
    </type>
    <br />
  </div>
</template>

    <script>
export default {
  identify: "NewComment",
  information() {
    return {
      submit: false,
      remark: {
        content material: "",
        creator: "",
      },
    };
  },
  strategies: {
    postComment() {
      this.submit = true;
      this.$retailer
        .dispatch("ADD_COMMENT", this.remark)
        .then((response) => {
          this.submit = false;
          if (response.information) console.log("success");
        })
        .catch((err) => {
          console.log(err);
          this.submit = false;
        });
    },
  },
  computed: {
    isValid() {
      return this.remark.content material !== "" && this.remark.creator !== "";
    },
  },
};
</script>

    <fashion scoped>
.has-margin-top {
  margin-top: 15px;
}
</fashion>
Now, open the app.js file and add the next code to register the Vue parts you created earlier:
// useful resource/js/app.js

require("./bootstrap");
window.Vue = require("vue");
import retailer from "./retailer/index";

Vue.element("remark", require("./parts/Remark"));
Vue.element("feedback", require("./parts/Feedback"));
Vue.element("new-comment", require("./parts/NewComment"));

const app = new Vue({
    el: "#app",
    retailer
});
Abstract
And that’s it! You’ve simply realized tips on how to construct a reside commenting system on your web site.
We’ve mentioned the advantages of making and managing a commenting system in your quest to construct belief in your group or weblog. We’ve additionally explored tips on how to develop a well-designed and real-time commenting system from the bottom up, using totally different commenting functionalities.
You possibly can clone the supply code of this challenge in this Github repo.
What do you consider the Laravel reside commenting system we’ve constructed collectively? Tell us within the feedback!
The publish Construct a Laravel Dwell Commenting System appeared first on Kinsta.