


It’s easy to add your site’s logo to any footer made with the Divi Builder. However, if you only display it as an image, you’d have to edit your footer every time you changed your logo. The solution is to use a dynamic logo. A dynamic logo changes to match the site’s logo automatically. In this article, we’ll see how to add a dynamic logo to your Divi footer.
Let’s get started.
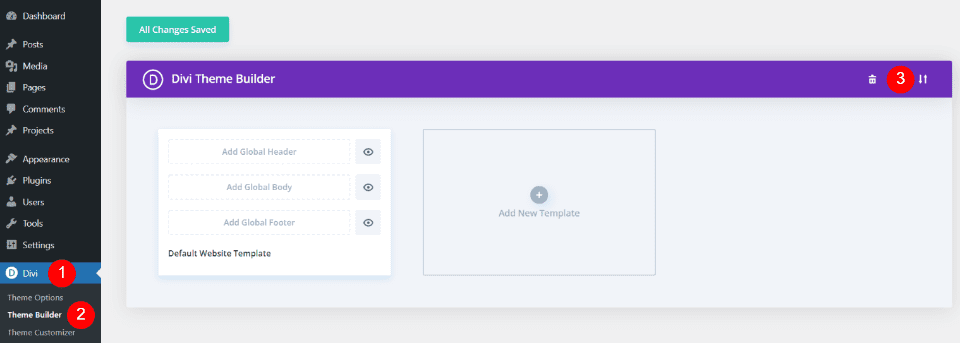
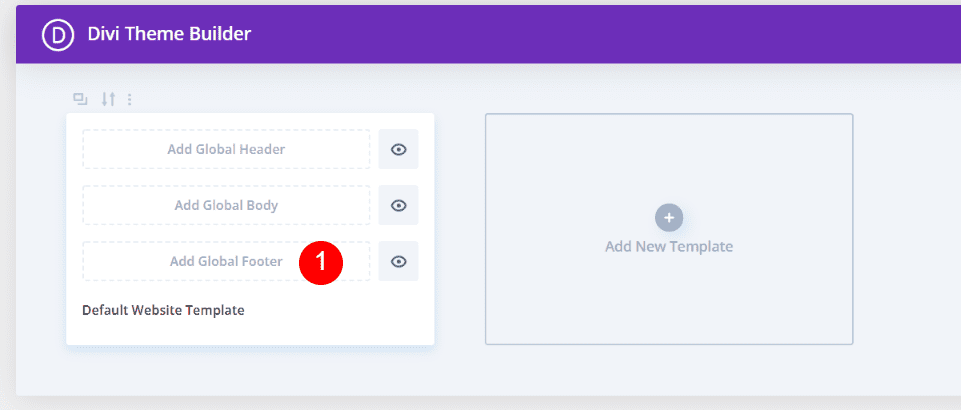
1. Create New Footer Template
Go to Divi Theme Builder & Add New Global or Custom Footer
It doesn’t make any difference if you build the footer from scratch or download one of the free templates for this tutorial. You will only need to make sure to include an image module. We’ll use this image module to connect to the dynamic logo.
Download a Footer Template
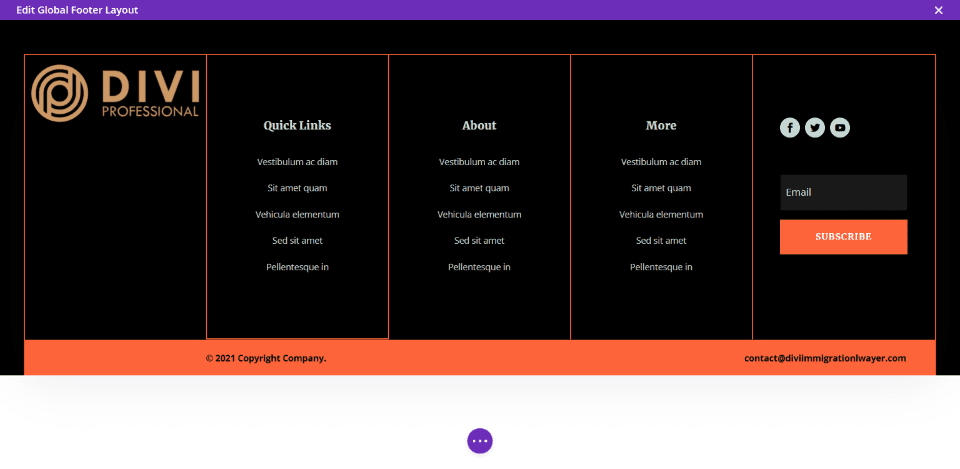
For my examples, I’m using the free footer for Divi’s Immigration Lawyer Layout Pack. The Elegant Themes blog contains lots of free footer templates. Find them in the blog by entering “free header & footer” in the blog’s search box. Download the template to your computer and unzip the file. You’ll need to upload the JSON file, not the zipped file.
Upload the Footer Template

For this tutorial, we’ll use the Divi Theme Builder to apply the footer to every page and post. You can upload the template to the Theme Builder or use a template from your Divi Library. To upload to the Theme Builder, go to the Divi Theme Builder in the Divi menu and select the Portability option in the upper right corner. This is the icon with the up and down arrows.
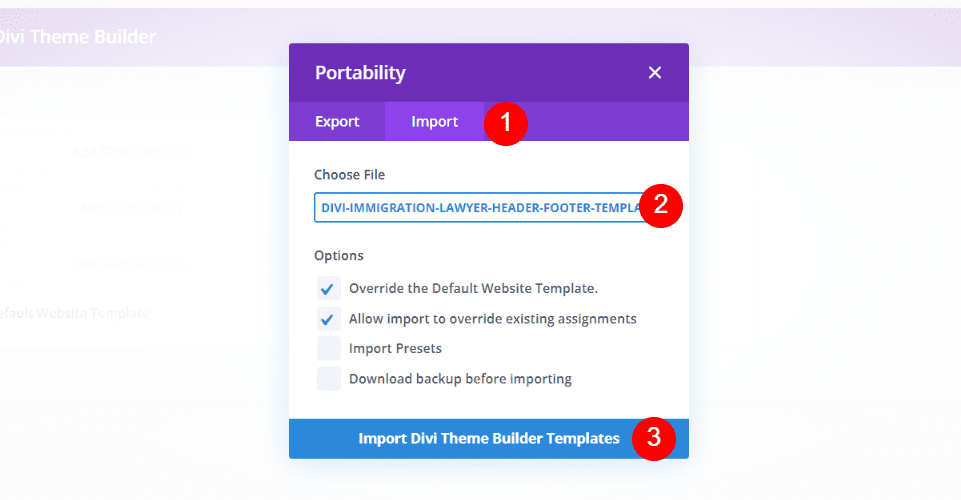

You’ll then see a modal with several options. Select the Import tab in the modal. Navigate to and choose the JSON file from your computer. Select any of the options you want. I’m leaving it at the default options. Next, select the import button. Wait for the import to finish.
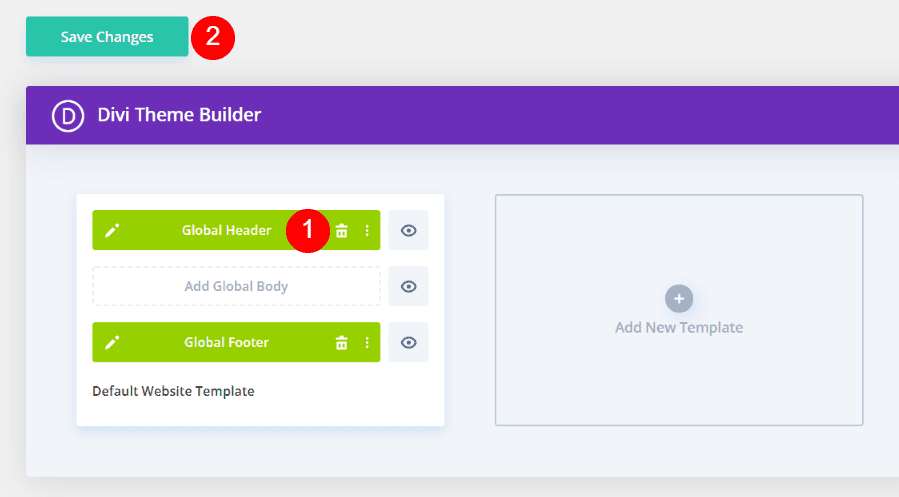

Next, delete the header file if you don’t want to use it and click to save your changes. You now have a global footer. If you’ve used the template that I used, you’ll have a static logo already in place. We’ll need to make it dynamic. If your template doesn’t include a logo, simply add an image module.
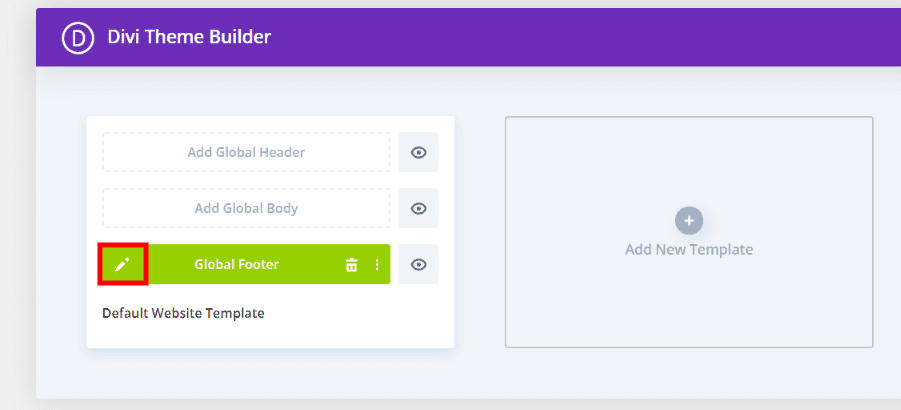

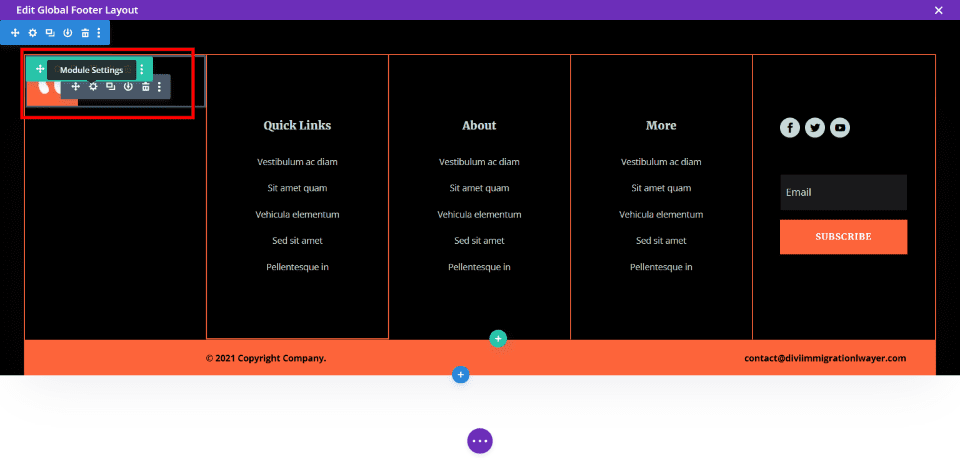
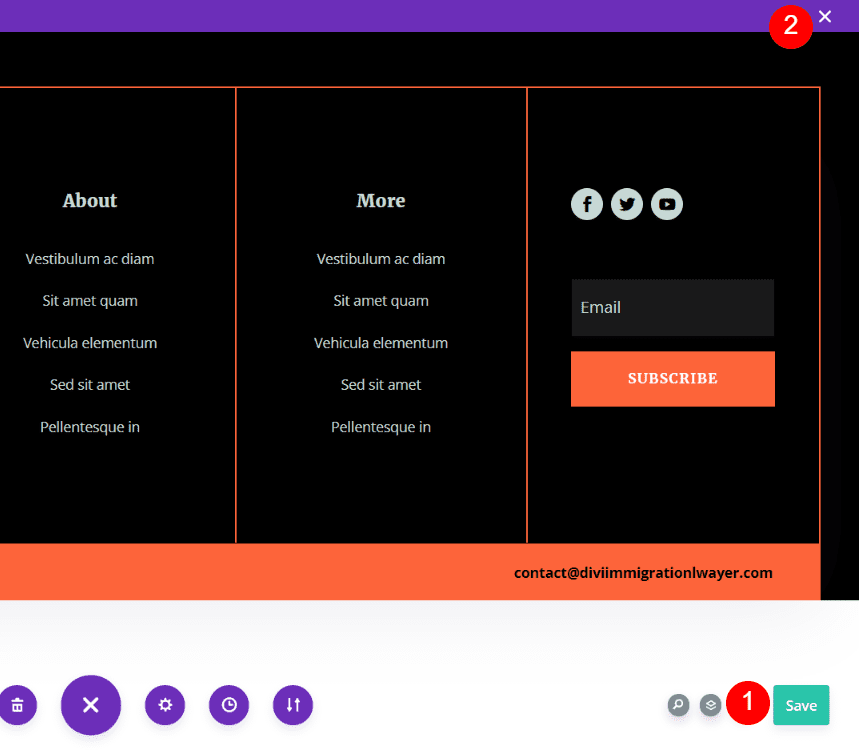
Next, click the Edit icon on the footer to open the template.
Alternate Method: Loading from the Divi Library

Alternately, you can upload the layout to your Divi Library. Then, in the Divi Theme Builder, you can click to add a global footer and select it from your library.


When you click to add a global footer, you can choose to build the global footer from scratch or select it from the library.
2. Add a Dynamic Logo
Add a Logo
![]()

If the template you’re using does not include a logo, add an image module where you want the logo to appear. Leave Open in Lightbox disabled (this is the default setting). For the URL, you can leave it blank or add your homepage URL to make it clickable.
- Open in Lightbox = No
- Image Link URL = Leave blank or add homepage URL
![]()

Open the Design tab. Under spacing, leave Show Space Below the Image enabled (this is the default setting). Under Margin, add 50px to the bottom margin.
- Show Space Below the Image = Yes
- Margin – Bottom = 50px
Dynamic Image Settings

The layout that I’m using already contains a logo image, so I will customize this image module. It’s set up with the same adjustments we saw in the previous section.


First, we’ll need to delete the image that it already has. Hover over the image and click the trashcan icon when it appears. The reset icon to its right will also work.
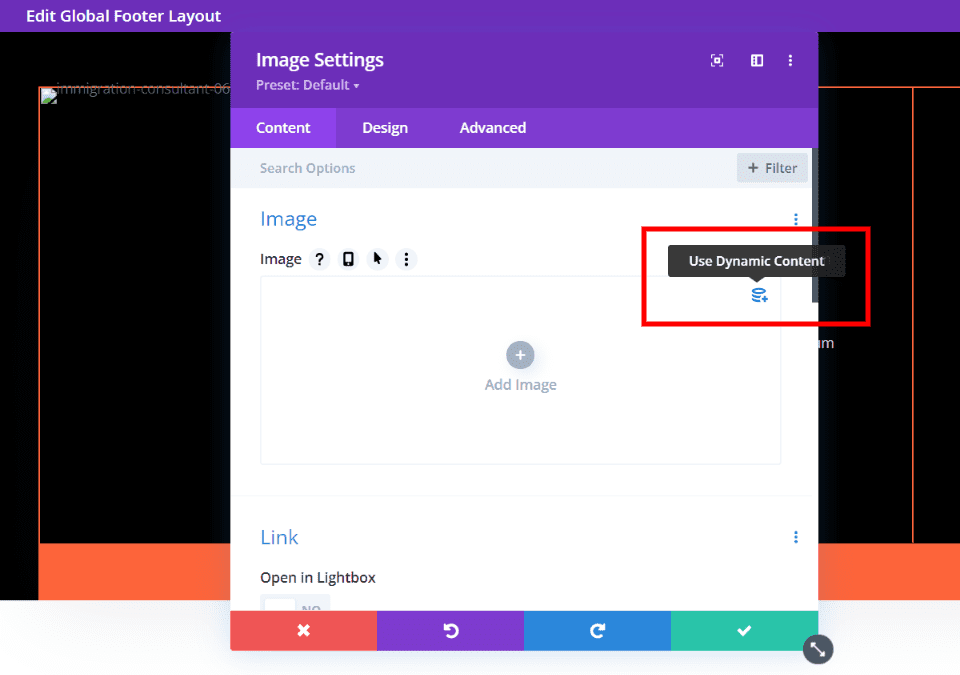

Now, when you hover over the image area, you’ll see the icon to choose dynamic content. Select this icon.
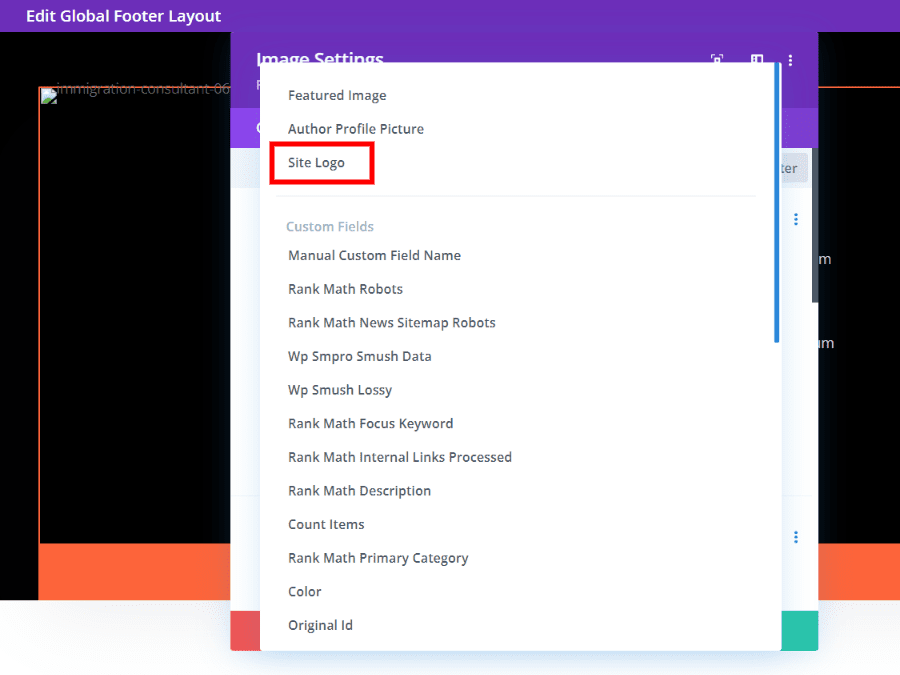

A modal will appear with lots of options that pertain to your content. Select the third option from the top: Site Logo.
- Site Logo
Your site’s logo will then display within the image module. It’s that easy.
3. Save All Template and Theme Builder Changes
Once you’ve replaced the logo with a dynamic logo, you’ll need to save the changes for it to take effect across your website.

Click the Save button in the Visual Builder menu and then click the X in the upper right corner to exit the builder. Now, any logo that’s set as the site’s logo in the Divi Theme Options will automatically display in this image module.
Preview Your Dynamic Logo
Here’s how the dynamic logo looks on desktop and mobile screens. I only had to change the logo in the Divi Theme Settings screen.
Desktop
![]()

Here’s how the dynamic logo looks on a desktop. The logo in the footer matches the logo in the header.
Mobile
![]()

Here’s how the dynamic logo looks on mobile.
Changing the Site’s Logo
![]()

To use a different logo in your footer, simply change the site’s logo. Go to the Divi Theme Options in the Divi menu. Click the Upload button to select a new logo and save the changes. Your new site logo will change, and your footer’s logo will match it.
- Divi > Theme Options > General tab > Logo
- Upload new logo
Ending Thoughts
That’s our look at how to add a dynamic logo to your Divi footer. Without a dynamic logo, you’d have to change the footer’s logo manually if you want it to match the site’s logo. A dynamic logo matches the site’s logo automatically. We can change the logo in one place, and it’s automatically applied to the footer of every page or post that uses a dynamic logo.
We want to hear from you. Do you use dynamic logos in your Divi footers? Let us know about it in the comments below.
The post How to Add a Dynamic Logo to Your Divi Footer appeared first on Elegant Themes Blog.