

Post excerpts provide the reader with a small teaser about the content. They can be automatically generated from the content or manually created for each post. Regardless of how they’re created, it’s important to have control over their length. In this article, we’ll see how to limit the excerpt length of your Divi Blog module. We’ll also see how to style it to work great with your site’s design.
Let’s get started.
Preview
First, let’s see what we’re going to build.
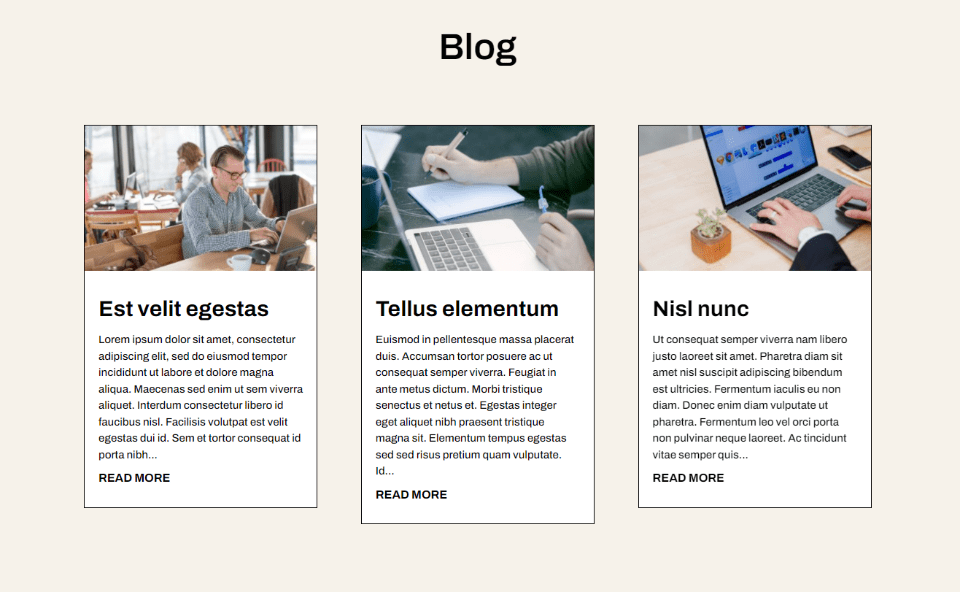
Limited Excerpt Length on Desktop

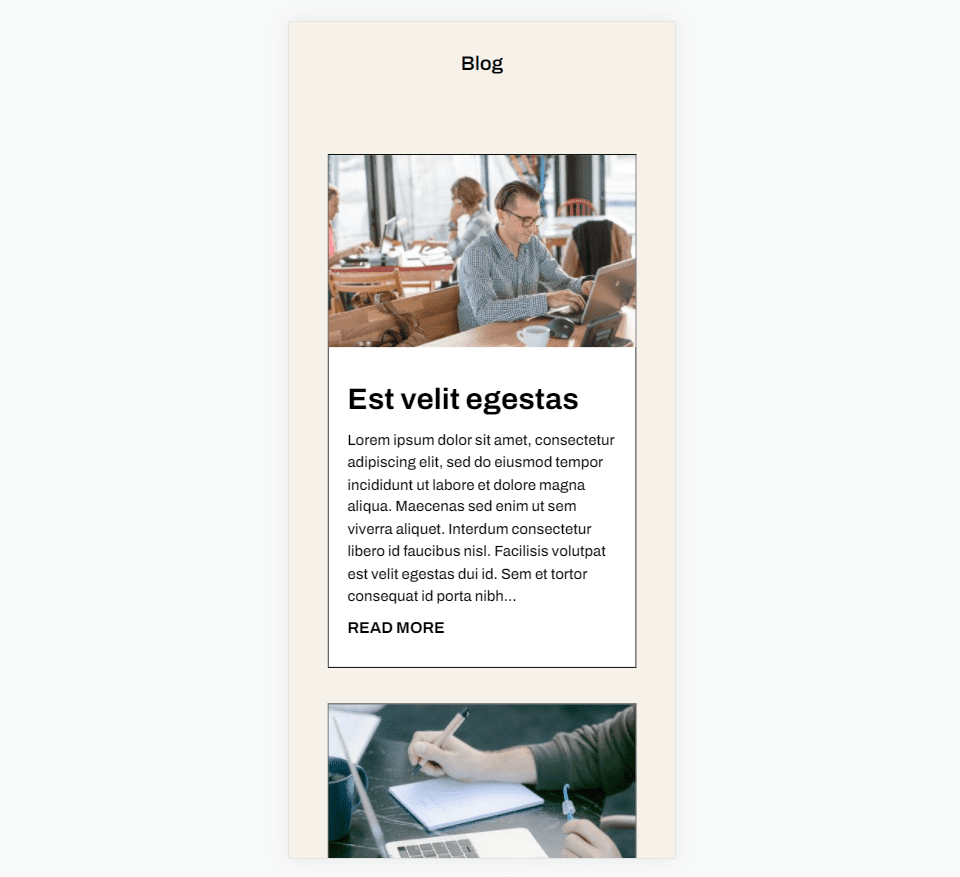
Limited Excerpt Length on Phone

Why Include a Post Excerpt?

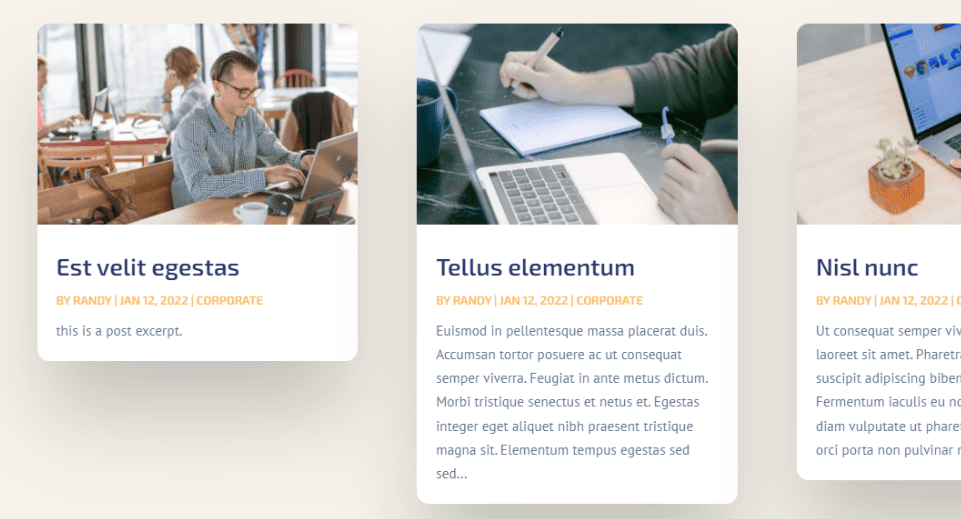
A post excerpt provides a sentence or two from the content to help the reader understand what the post is about. Rather than showing all of the blog post content, WordPress shows a small snippet of the content. This helps control the size of the post within the feed, creating a cleaner design that’s easier to use. It gives your layout a consistent look throughout the page.

This snippet can be specified by the author, or WordPress can grab a certain number of characters from the first paragraph to display as an excerpt. WordPress can use this snippet to control what is displayed in the blog feed. Search engines use it to display a portion of the content in the search results.
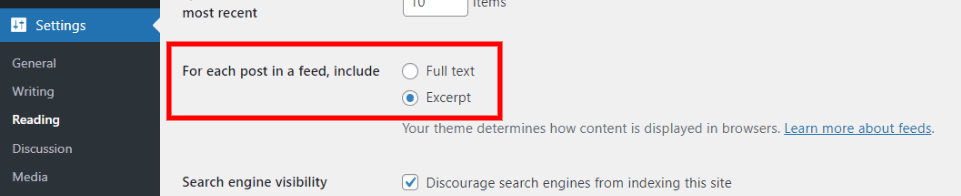

For posts in the WordPress blog feed pages, the ability to show the excerpt has to be enabled in the Reading Settings. We can enable this option, but it doesn’t give us control over the excerpt length.

The Divi Blog module shows the blog post excerpts by default. There’s no need to adjust your WordPress settings. The module provides lots of options including a field to specify the post excerpt length.
How to Limit the Post Excerpt Length
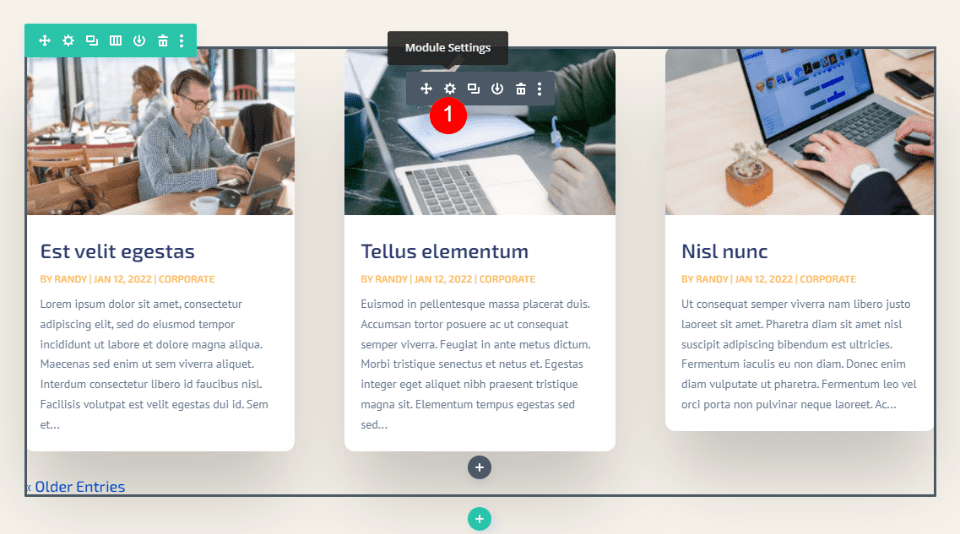

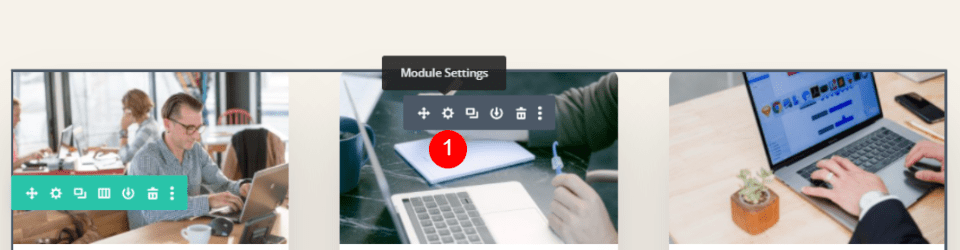
Limiting the post excerpt length in the Divi Blog module is simple. First, hover over the module and click the gear icon to open the module’s settings.
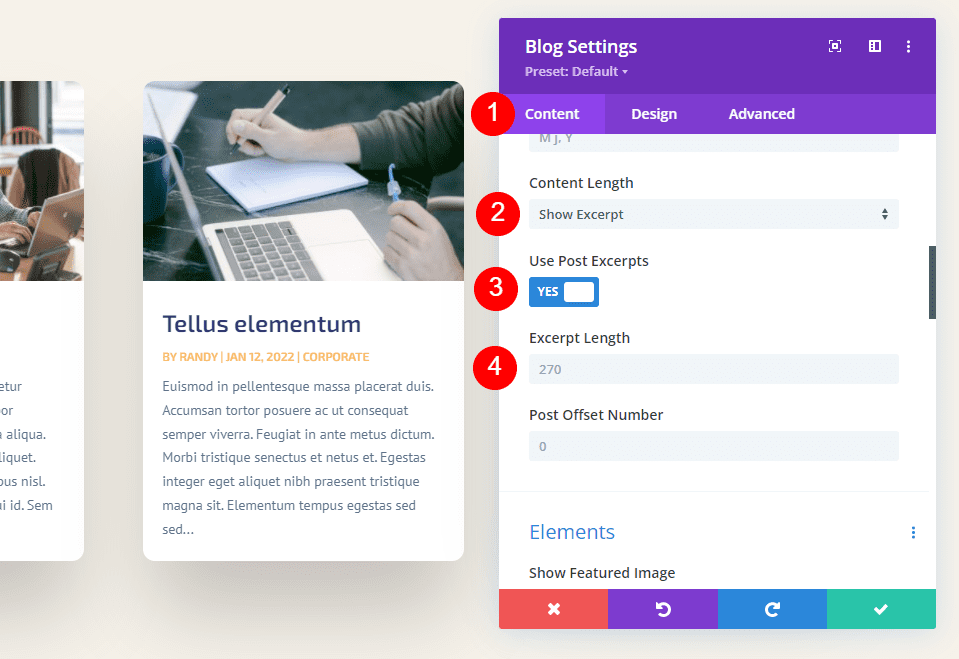

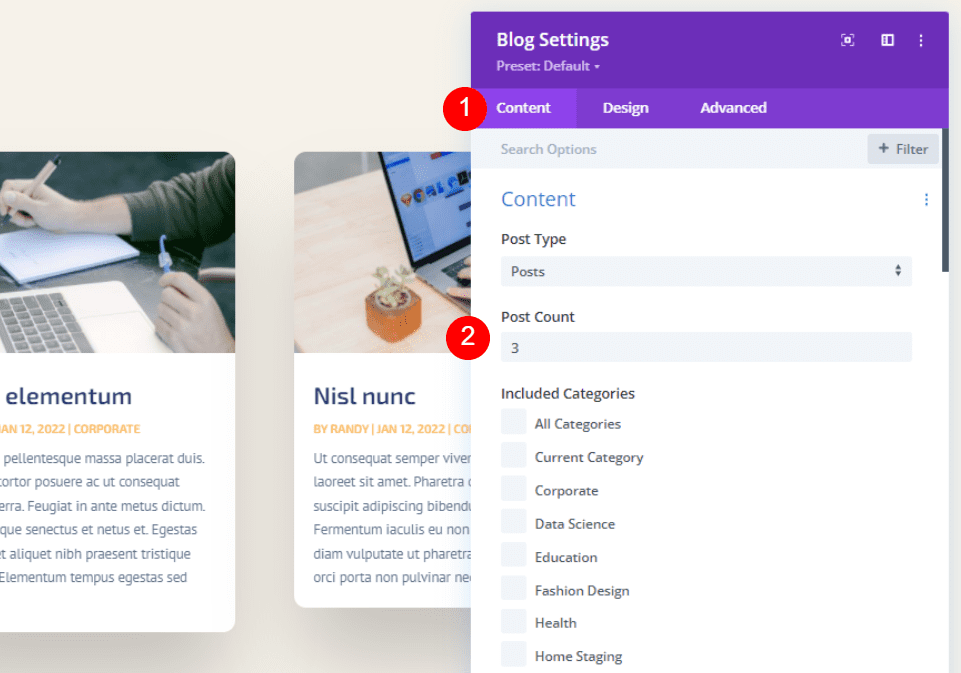
In the Content settings, scroll down until you see Content Length. Here, we have several options to control the post excerpt. These are the default settings. To limit the excerpt length, simply choose to show the excerpt and enter the number of characters to show in the Excerpt Length field.
- Content Length: Show Excerpt
- Excerpt Length: enter number
Let’s take a closer look at what each setting does.
Content Length
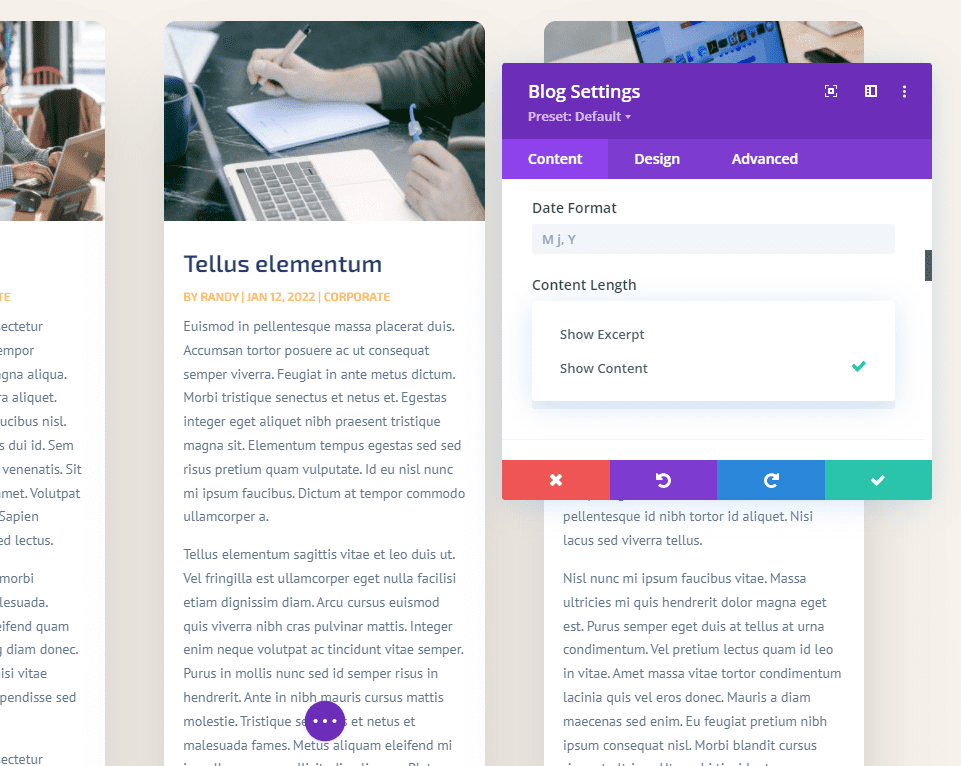

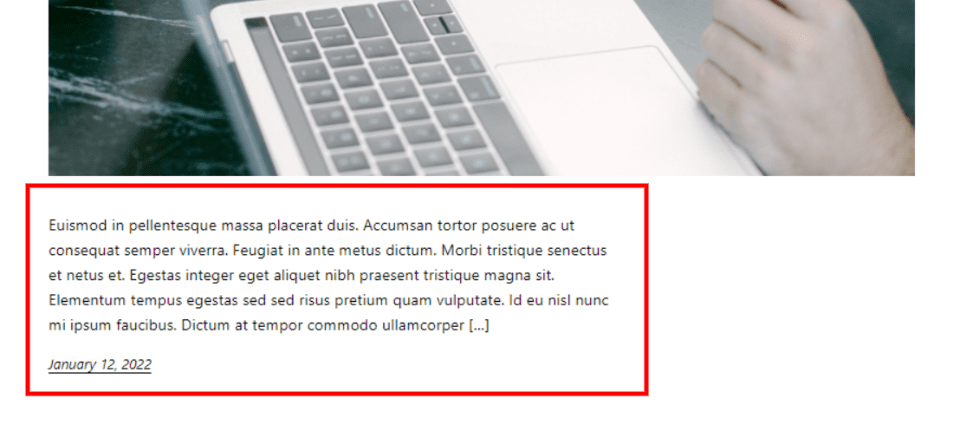
Content Length lets you choose between showing an excerpt and showing the entire content. Select Show Excerpt to specify an excerpt length. This example shows the content.
- Content Length: Show Excerpt
Use Post Excerpts
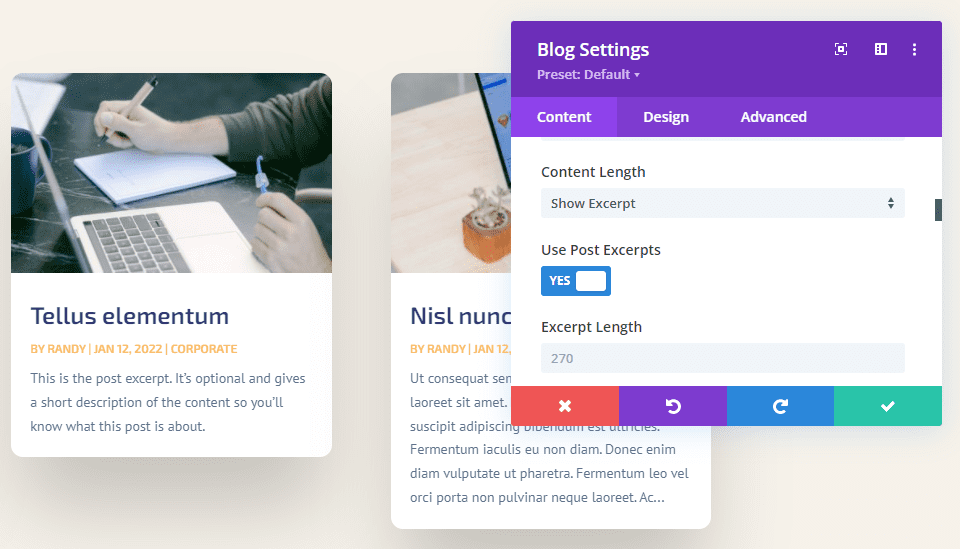

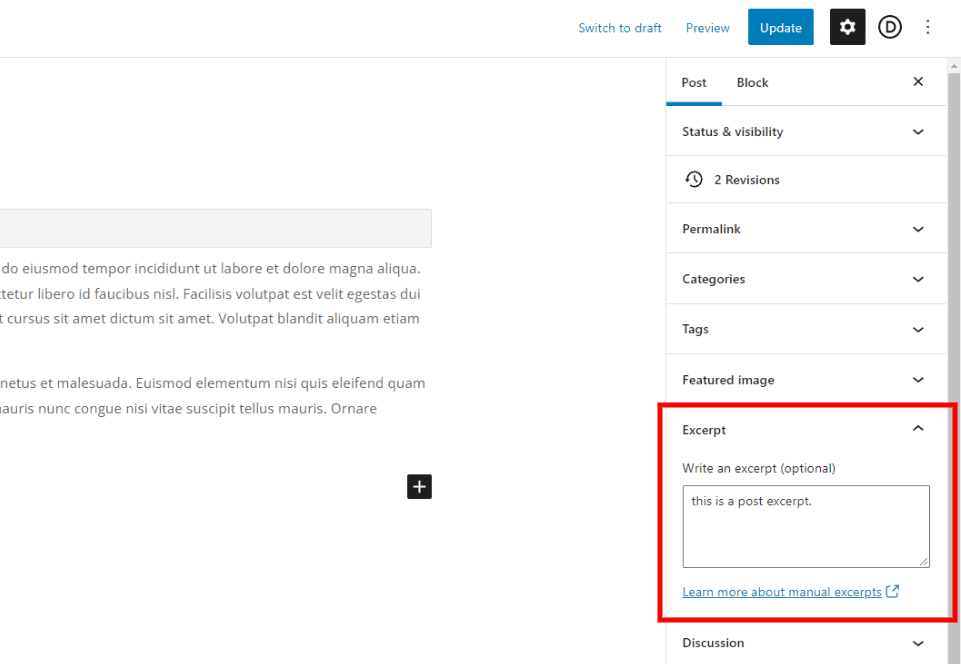
Use Post Excerpts displays the optional excerpt that’s specified by the post author in the WordPress post editor. If the post does not include a manually created excerpt, it automatically generates an excerpt from the first paragraph.
Excerpt Length
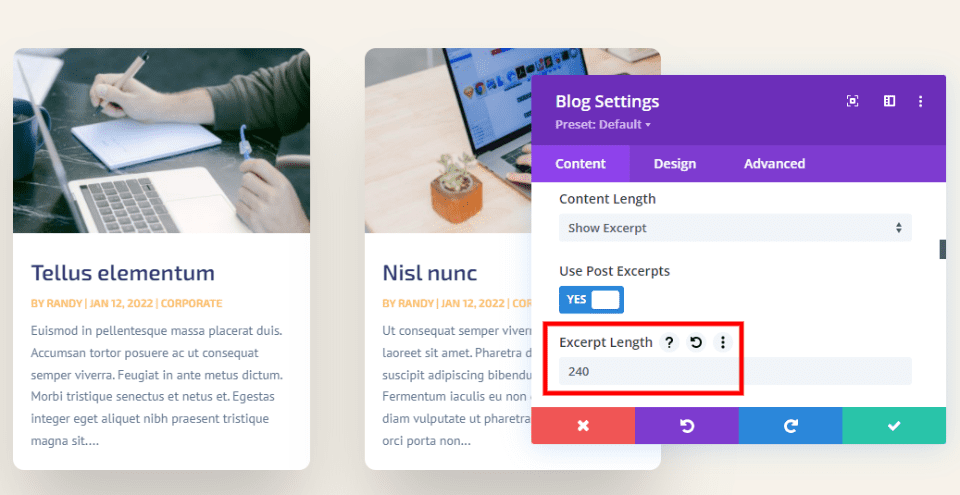

Excerpt Length allows you to specify the number of characters that display for the excerpt. This is the second setting for limiting the excerpt length. Enter any amount you want into the field. The default is 270. You can enter any amount you want to display.
There isn’t a certain excerpt character number that’s always the best to choose. Content is different, audiences are different, and your design is different. I recommend using a number that best matches the design of the page. You can even do some a/b split testing to see which excerpt length works best for your audience.
Hide the Excerpt
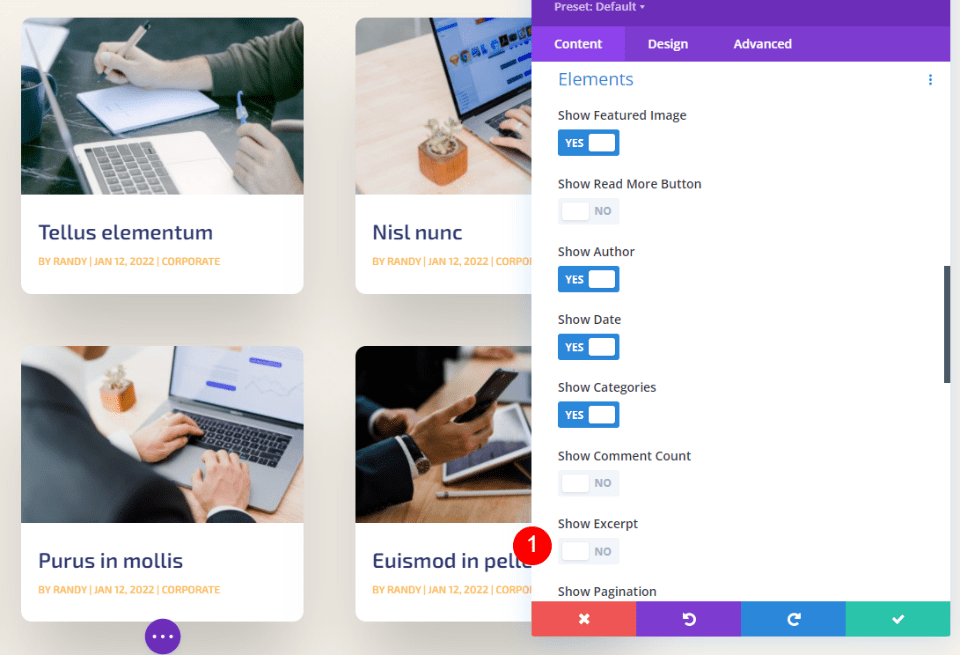

It’s also possible to hide the excerpt completely. Simply scroll down to Elements and disable Show Excerpt.
How to Style the Post Excerpt

Now that we’ve seen how to limit the post excerpt, let’s see how to style it to match your website. For my examples, I’ve added the Blog module to the Home page of the Software Layout Pack. This page doesn’t include a Blog module. I’ll show how to style it to match the page and select an excerpt that works with the page design.
Note – to save time, I would normally copy the module from the Landing page of this layout pack. Instead, I’ll start from scratch and follow design queues from the Home page and create my own styling.
Add a New Section, Row, and Blog Module
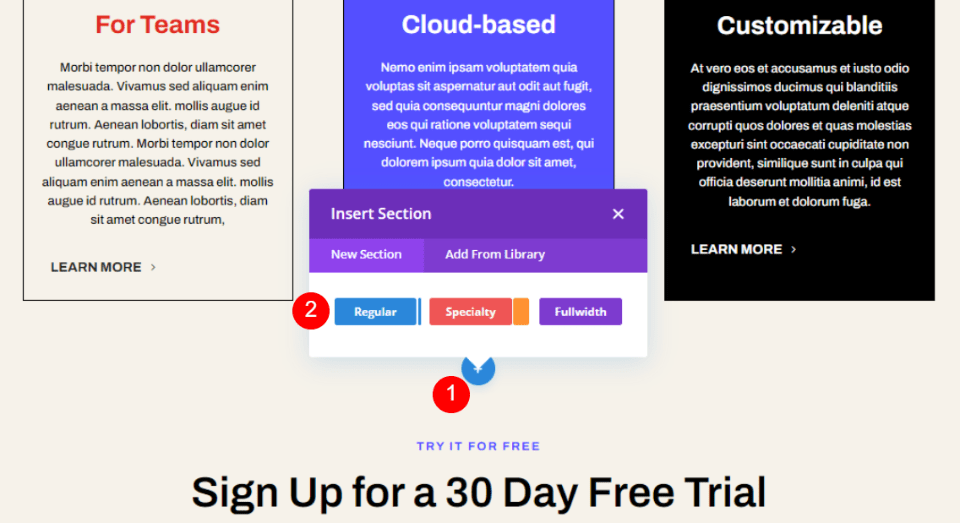

First, add a new Regular Section under the Teams Features Section. Click the blue plus icon and select Regular.


Select a single column Row.
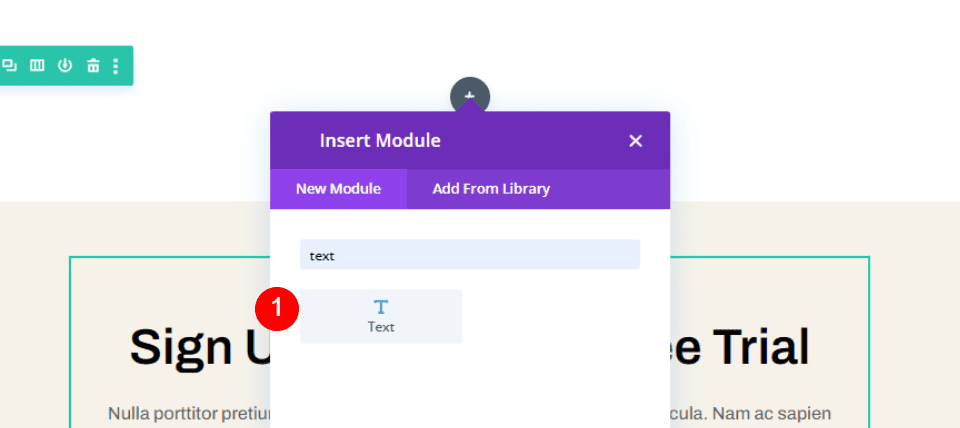

Add a Text module to the Row. This will create a title for the blog section.
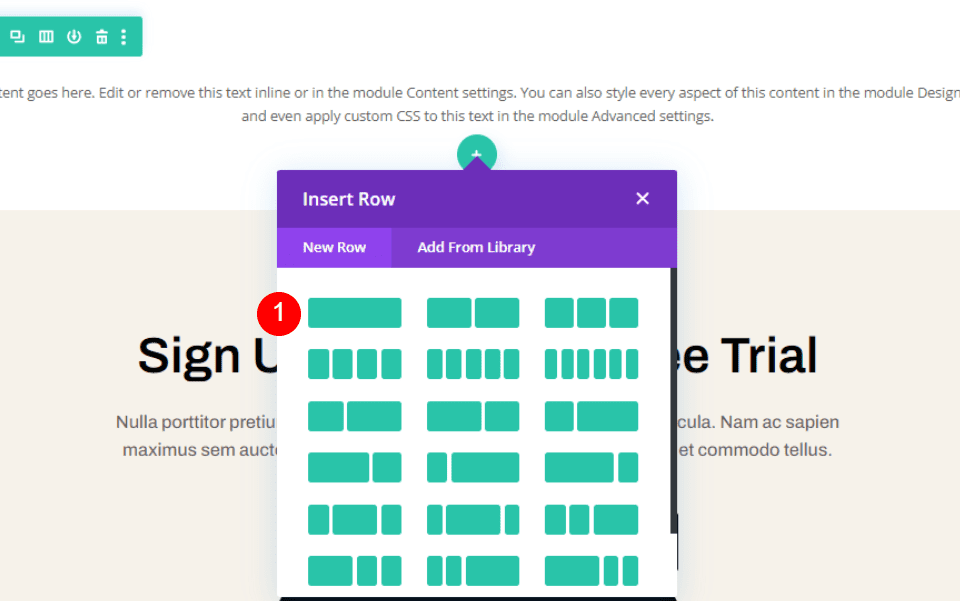

Next, add a new Row under the first one. This Row will hold our Divi Blog module.
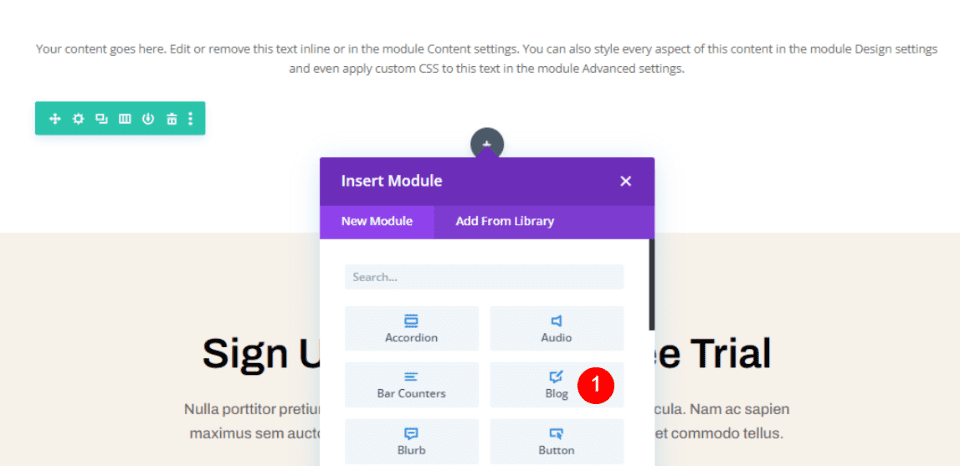

Finally, add a Blog module to the second Row. This module appears over the Text module, so we won’t see the Title until we make adjustments to the Blog module.
Now it’s time to style them. We’ll set up the Blog module as we style it.
Style the Section
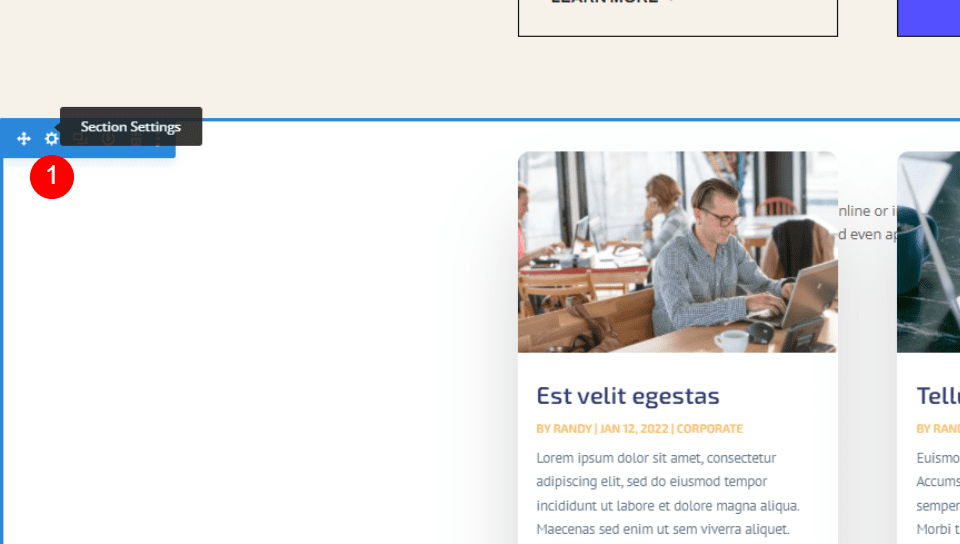

First, let’s style the Section. Open the Section’s options by clicking the gear icon.
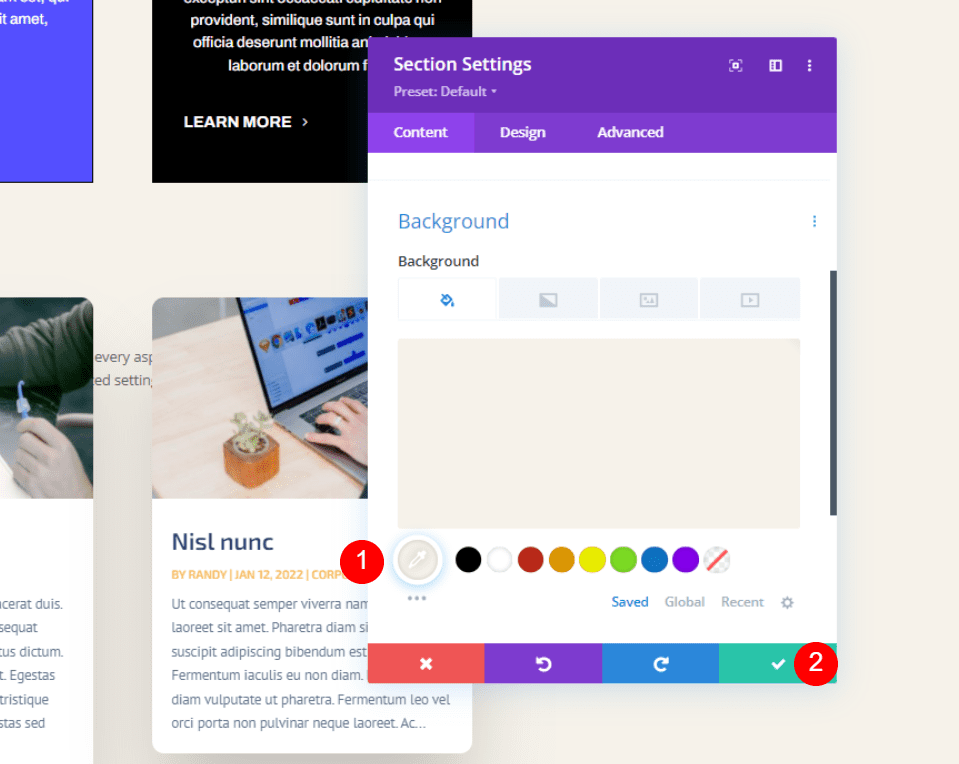

Scroll to Background and set the color to #f6f2ea. Close the settings.
- Background: #f6f2ea
Style the Row
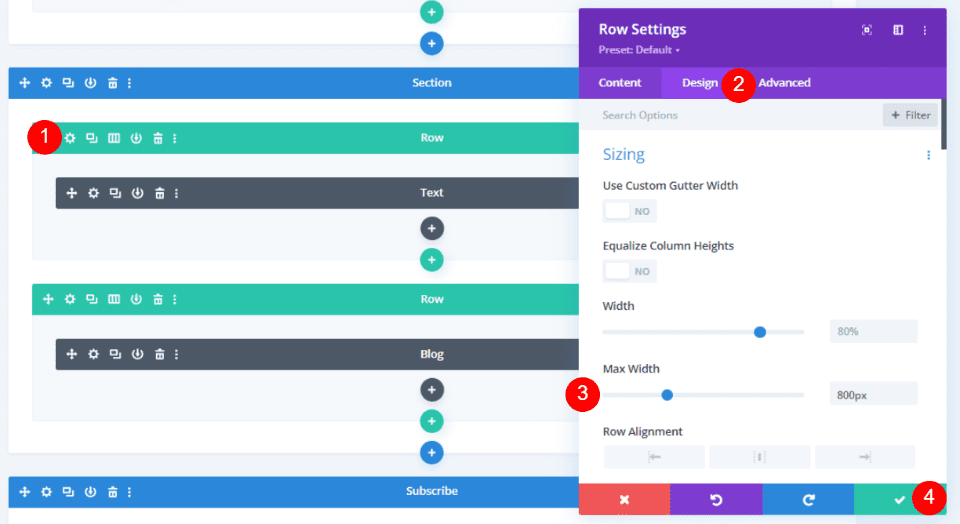

Open the Row with the Text module. If the Text module appears behind the Blog module, you can switch to the wireframe view to click its gear icon. Go to the Design tab and change the Max Width to 800px. Close the Row settings.
- Max Width: 800px
Style the Text Module
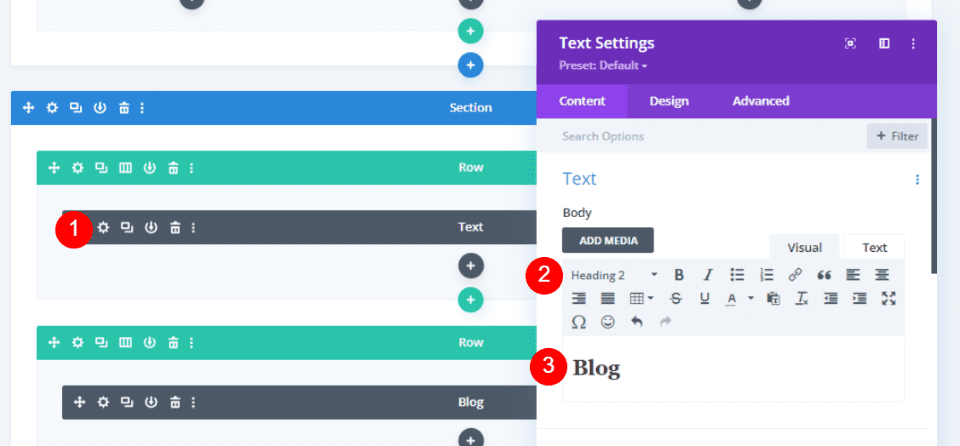

Open the Text module, select Heading 2, and enter Blog as the title for the section.
- Text Style: Heading 2
- Text: Blog
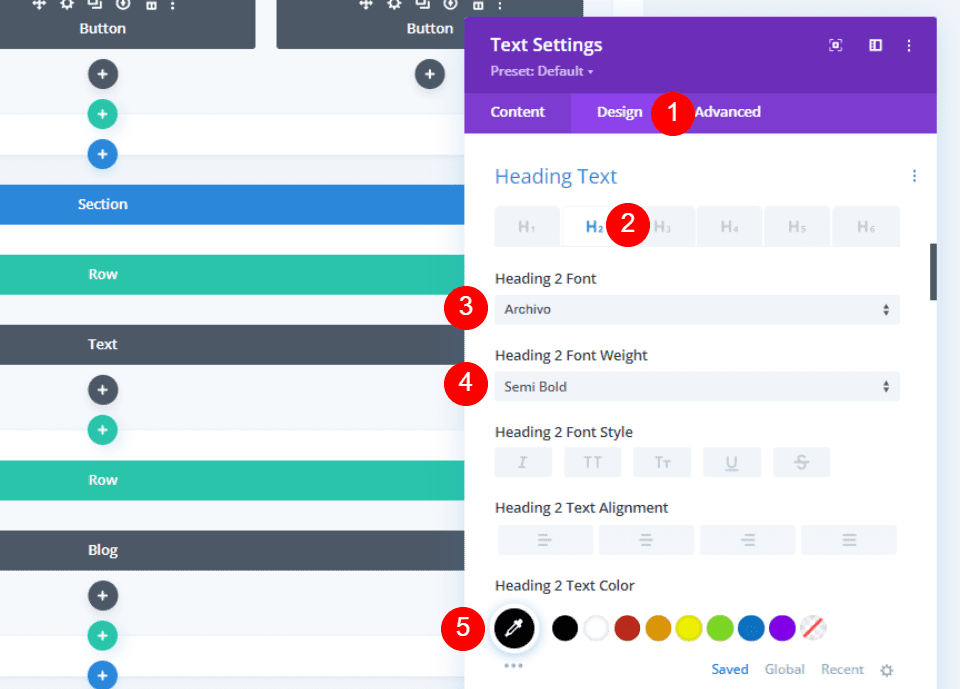

Go to the Design tab and scroll down to Heading Text. Select H2 and choose Archivo, semi bold, and set the color to #010101.
- Heading: H2
- Font: Archivo
- Weight: Semi Bold
- Color: #010101
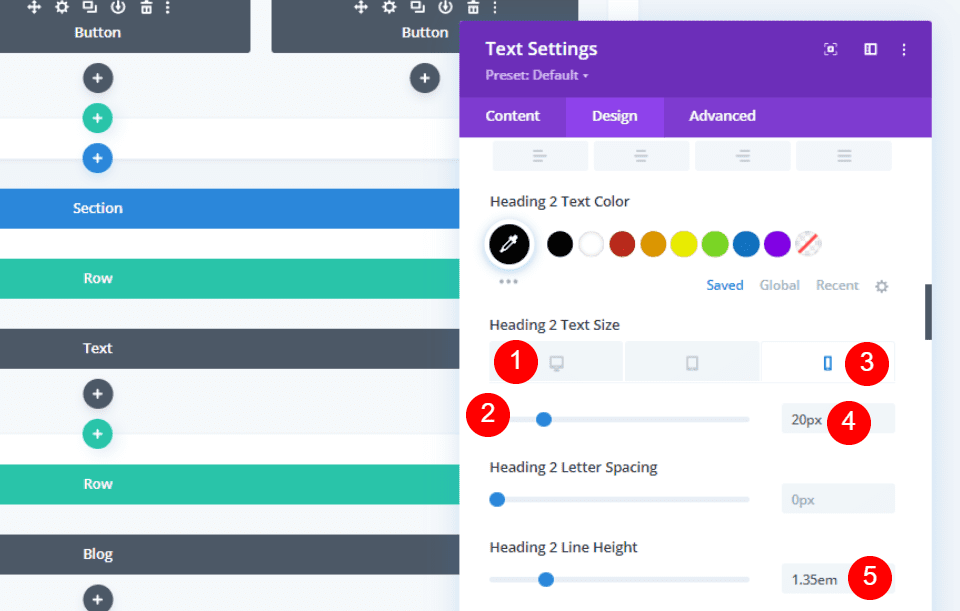

Set the Desktop Font Size to 50px and the Phone Font Size to 20px. Set the Line Height to 1.35em.
- Font Size: 50px Desktop, 20px Phone
- Line Height: 1.35em
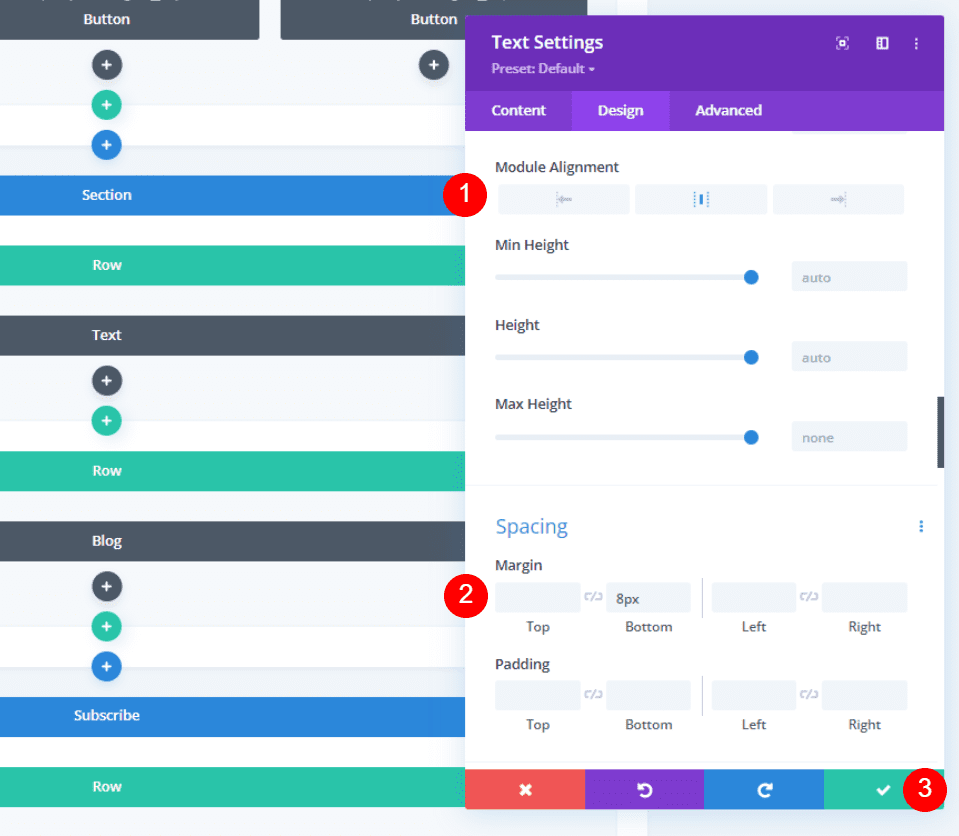

Set the Module Alignment to Center and add 8px of Bottom Margin. Close the settings.
- Module Alignment: Center
- Margin Bottom: 8px
Style the Blog Module

Now we can move on to the Blog module. I’ve gone back to the desktop visual view. Open to module’s settings.
Blog Module Content Settings

In the Content tab, enter 3 for the Post Count.
- Post Count: 3
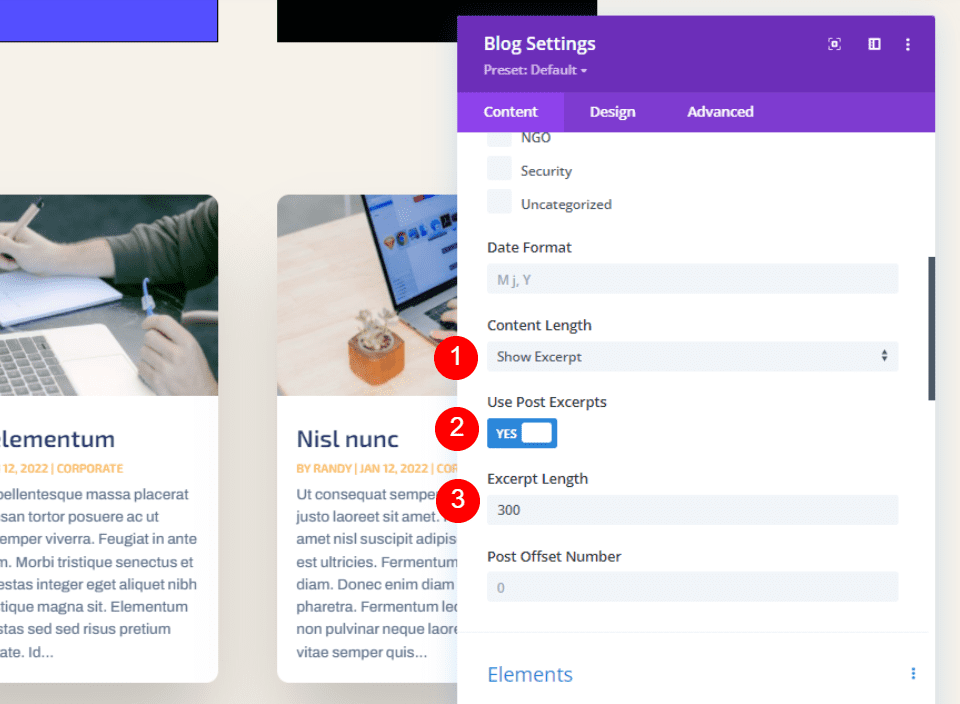

Choose to Show Excerpt for the Content Length, select to Use Post Excerpts, and set the Excerpt Length to 300.
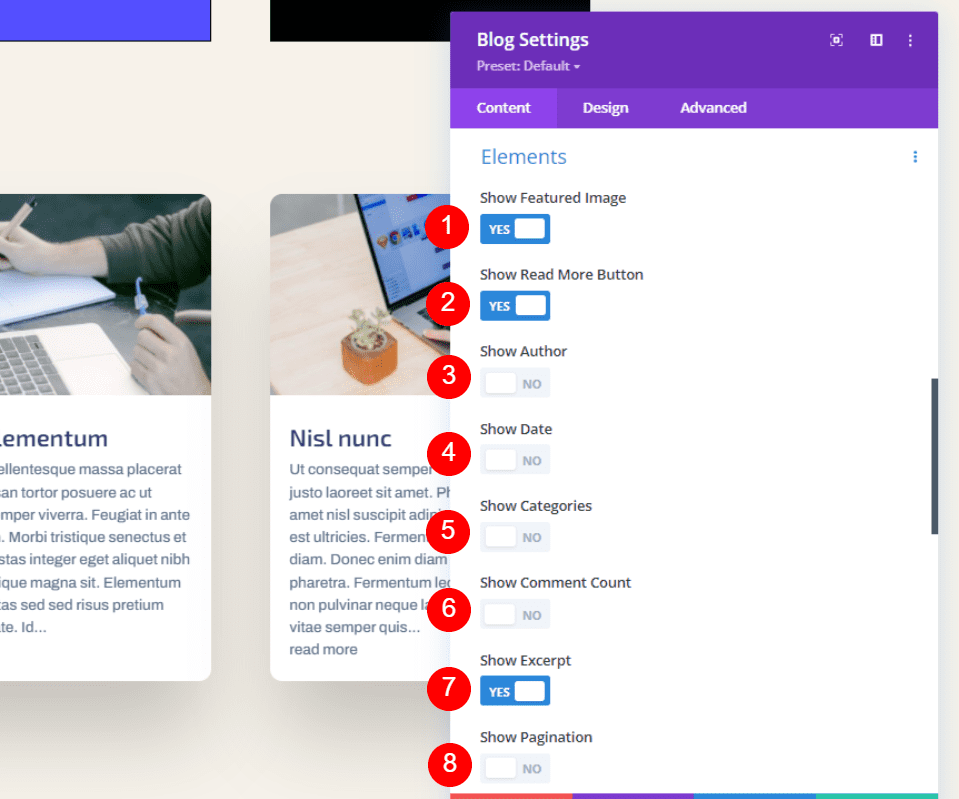

Under Elements, enable Show Featured Image, Show Read More Button, and Show Excerpt. Disable all the rest.
- Show Featured Image: Yes
- Show Read More Button: Yes
- Show Author: No
- Show Date: No
- Show Categories: No
- Show Comment Count: No
- Show Excerpt: Yes
- Show Pagination: No
Blog Module Design Settings
Title Text
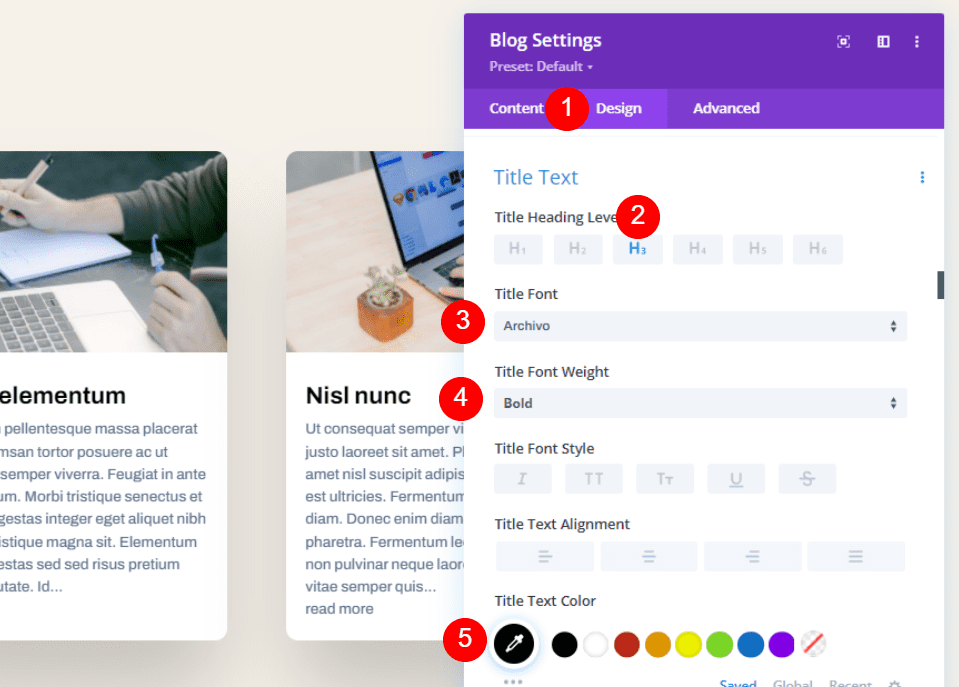

Go to the Design tab. Normally, I’d customize the overlay, but the default overlay works perfectly with this layout. Scroll down to Title Text and select H3. Set the Font to Archivo, Bold, and the color to #010101.
- Title Heading Level: H3
- Font: Archivo
- Weight: Bold
- Color: #010101
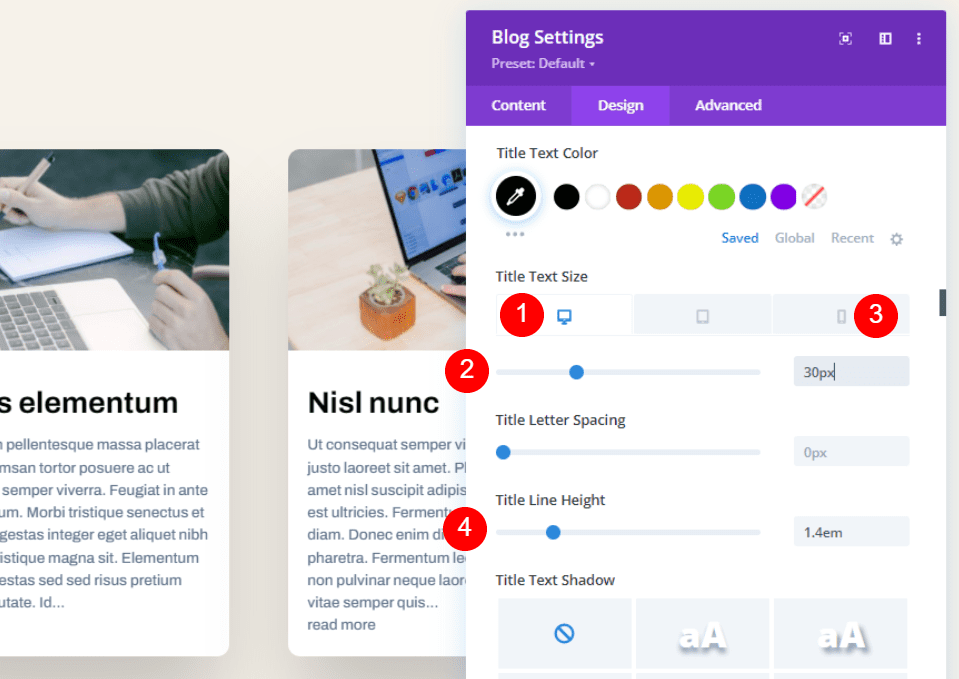

Set the Desktop Text Size to 30px, the Phone Text Size to 16px, and the Line Height to 1.4em.
- Font Size: Desktop 30px, Phone 16px
- 4em
Body Font
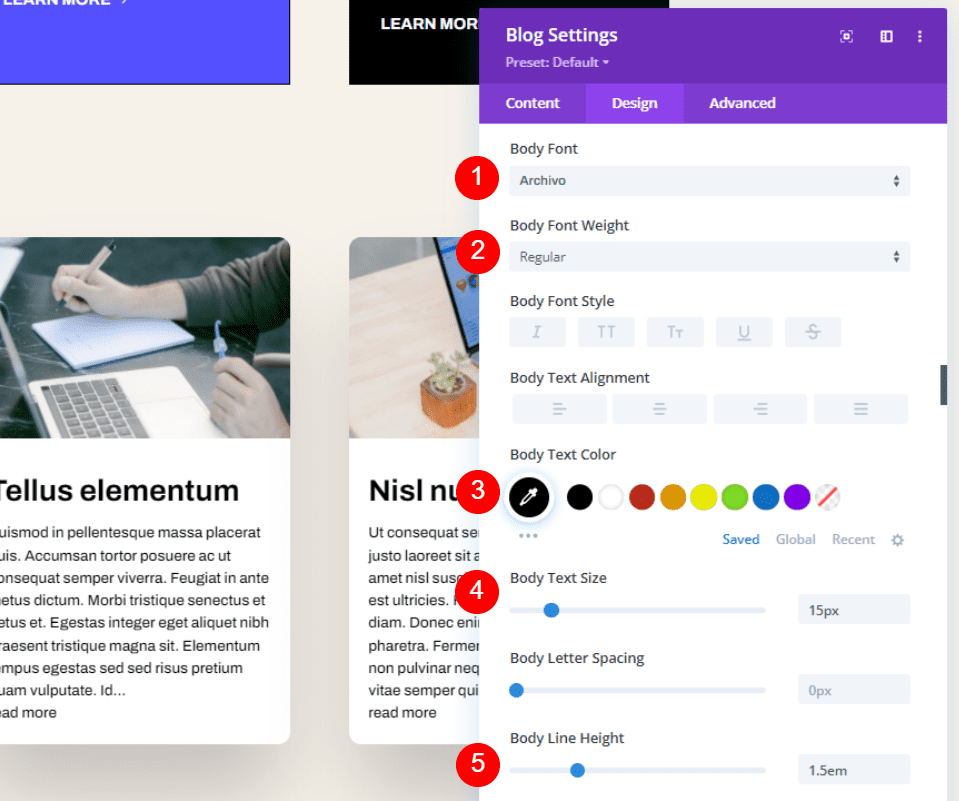

For the Body Text, choose Archivo, set it to regular, select black, set the size to 15px, and the Body Line Height to 1.5em.
- Font: Archivo
- Weight: Regular
- Color: #000000
- Size: 15px
- Line Height: 1.5em
Read More Text


Scroll down to the settings for the Read More Text. Choose Archivo, Bold, TT, set it to black, 16px size, and set the Line Height to 2.6em.
- Font: Archivo
- Weight: Bold
- Style: TT
- Color: #000000
- Size: 16px
- Line Height: 2.6em
Spacing


Scroll down to Spacing and place 0vw to the Top margin. This brings the content below the title so we can now see Blog above the Blog module.
- Top Margin: 0vw
Border
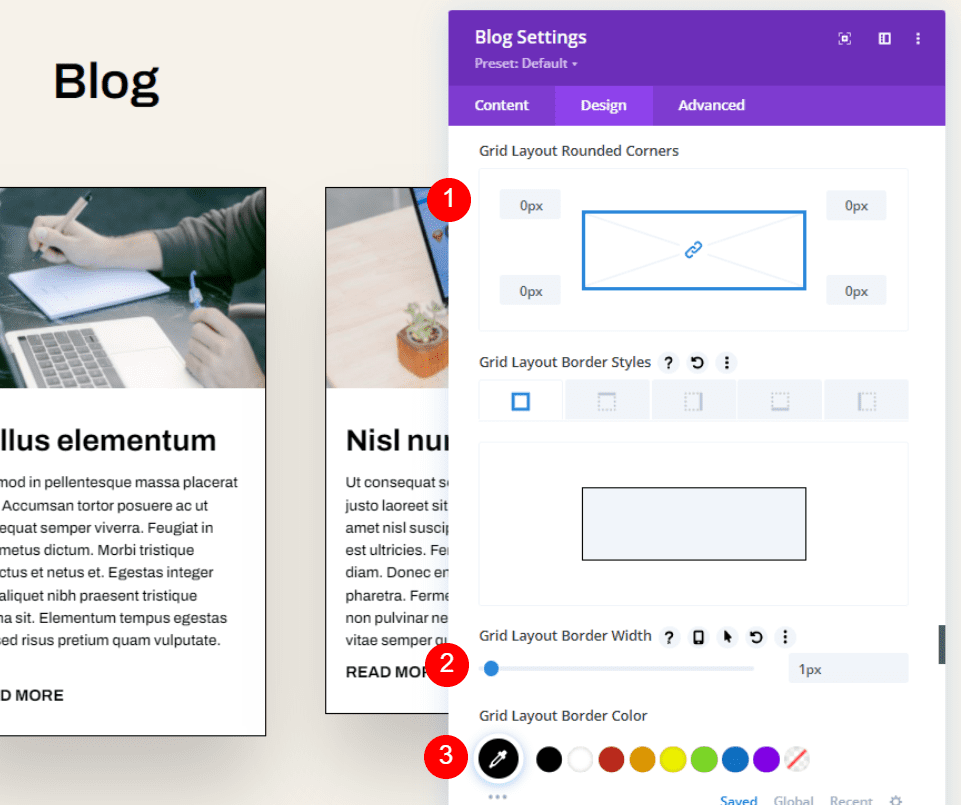

Next, scroll down to Border. Set the Corners to 0px, the width to 1px, and the Color to black.
- Rounded Corners: 0px
- Border Width: 1px
- Color: #000000
Box Shadow
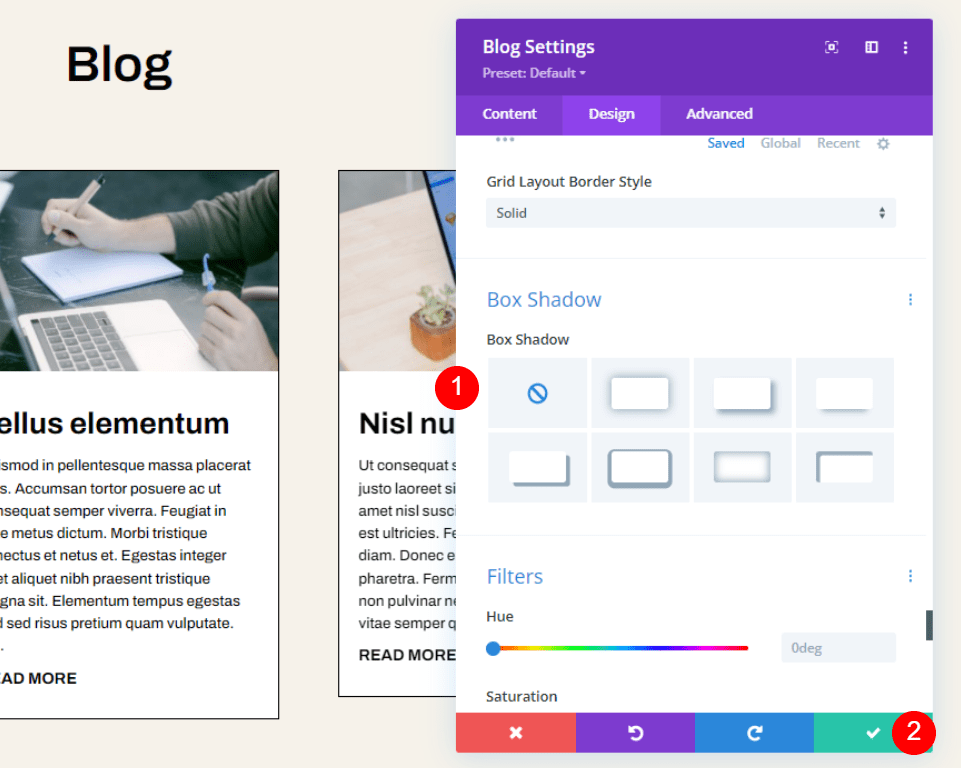

Lastly, scroll to Box Shadow and disable it. Save your settings. You’re done.
- Box Shadow: None
How it Looks in the Layout


Here’s how it looks added to the layout. Now, let’s see it up close for both desktop and phone.
Results
Limited Excerpt Length on Desktop
Limited Excerpt Length on Phone
Ending Thoughts
That’s our look at how to limit the excerpt length of your Divi Blog module. Limiting the excerpt length can have an impact on your layout’s design. Fortunately, Divi’s Blog module gives you lots of options for limiting and controlling your excerpt length. Styling the excerpt is also easy with the Divi Blog module’s styling options.
We want to hear from you. Do you limit the post excerpts in your Divi blog module? Let us know about it in the comments.
The post How to Limit the Excerpt Length of Your Divi Blog Module appeared first on Elegant Themes Blog.