

With one hundred million downloads, plenty of people are happy with the Joomla platform. However, at some point, you may need to migrate to a more powerful, flexible system, like WordPress.
Fortunately, it is possible to migrate from Joomla to WordPress. In fact, with the right tools, moving your entire site can be a stress-free experience.
In this post, we’ll explore why you may want to upgrade from Joomla to WordPress. We’ll then show you how to plan and complete this migration in nine straightforward steps.
Let’s get started!
Why You May Want to Migrate From Joomla to WordPress
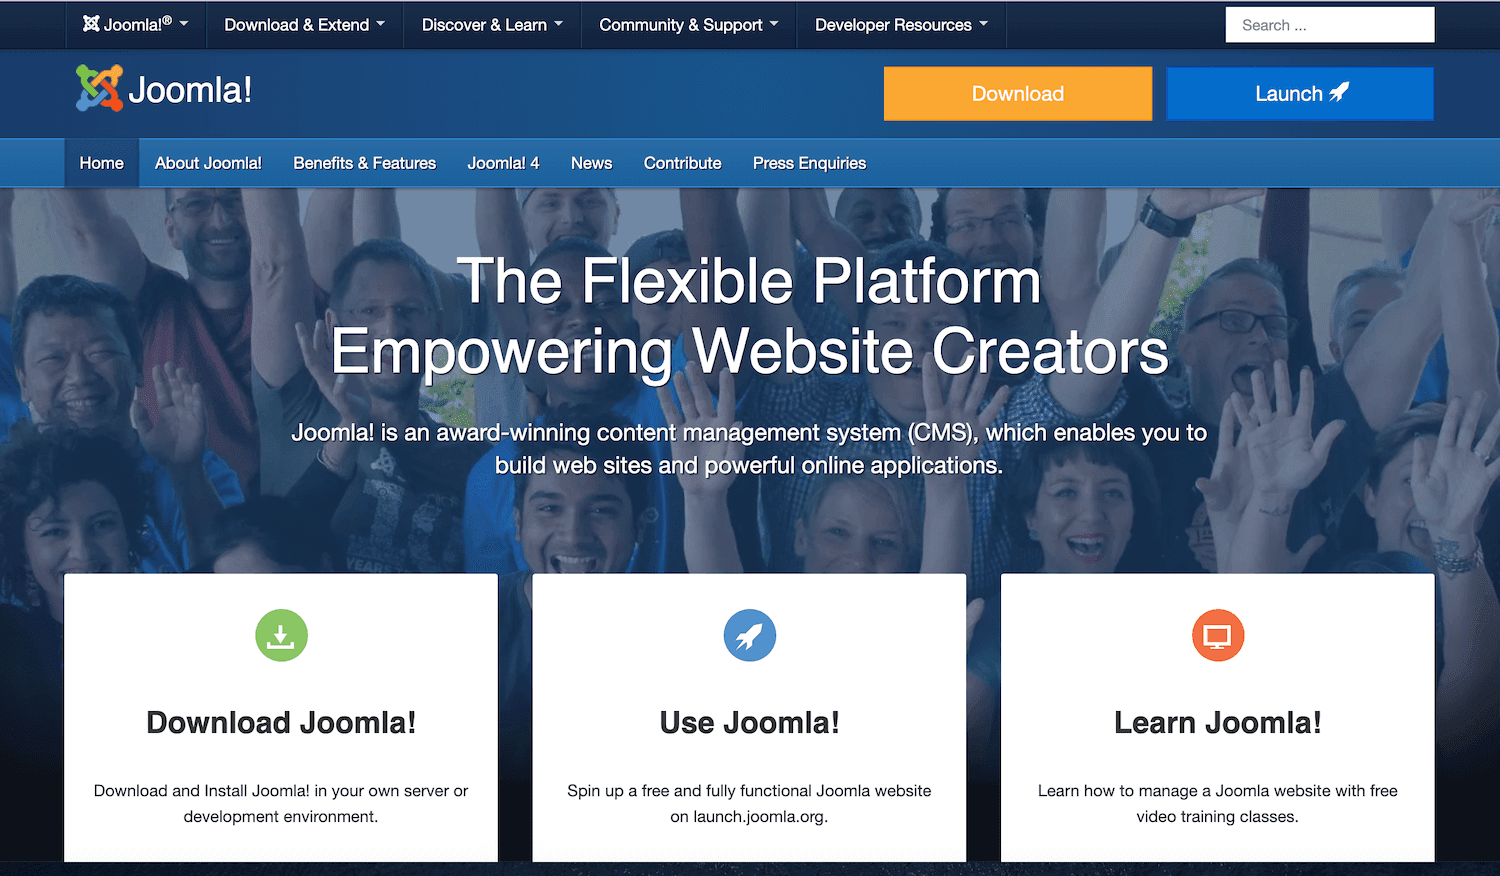
Used by over two million websites, Joomla is a popular Content Management System (CMS). This CMS is optimized for the search engines and boasts over 70 translation packs plus built-in support for multilingual content management:

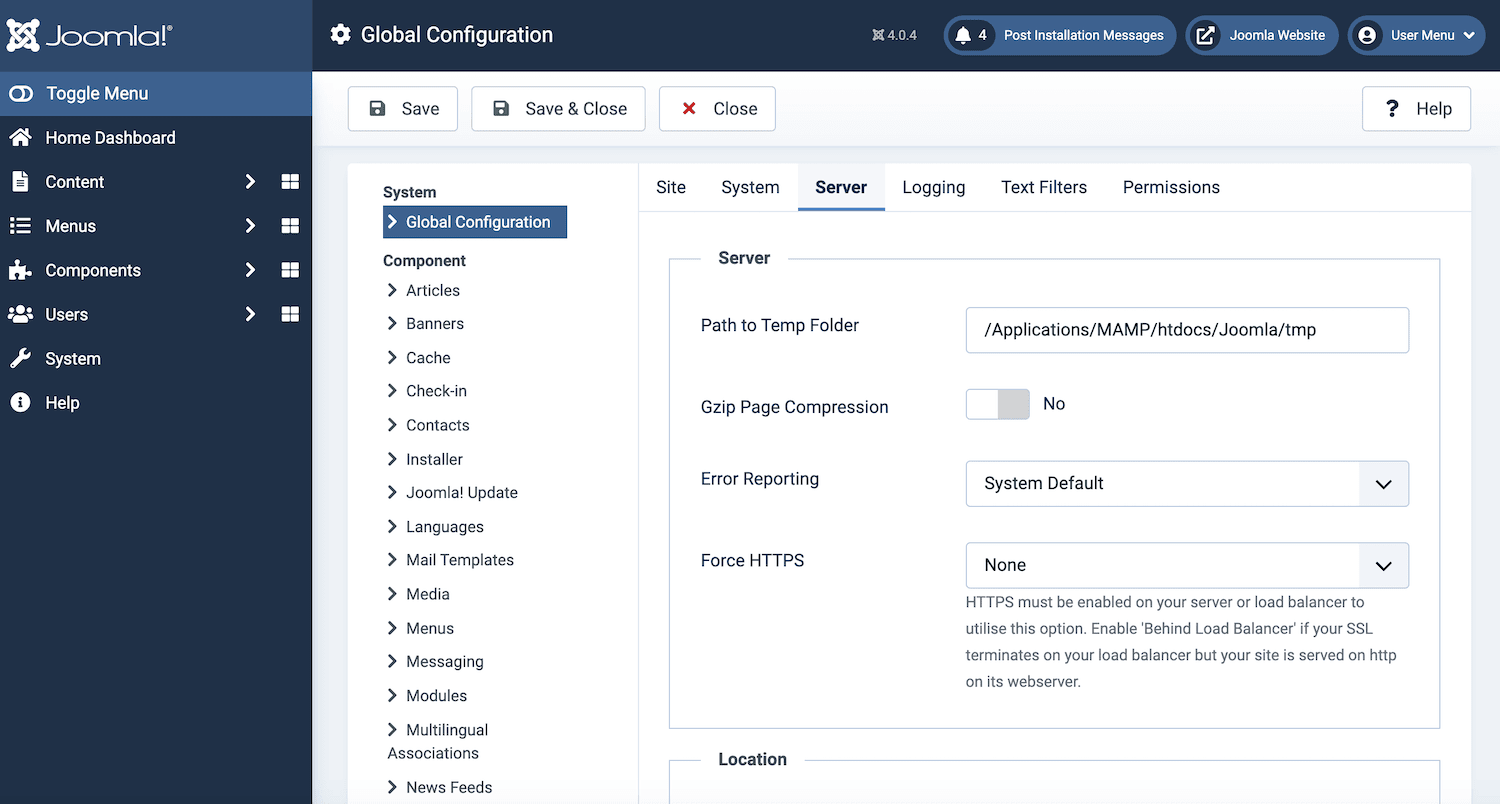
While Joomla does have its strengths, it’s not as user-friendly as the WordPress platform. In particular, the Joomla dashboard can be confusing due to its sheer number of menus, sub-menus, and settings:

Furthermore, although Joomla does have some content management features, these aren’t ideal for blogs. For example, Joomla doesn’t have a particular page type for blog posts. If you’re a blogger, you could almost certainly benefit by migrating from Joomla to WordPress.
body a.novashare-ctt{display:block;background:#00abf0;margin:30px auto;padding:20px 20px 20px 15px;color:#fff;text-decoration:none!important;box-shadow:none!important;-webkit-box-shadow:none!important;-moz-box-shadow:none!important;border:none;border-left:5px solid #00abf0}body a.novashare-ctt:hover{color:#fff;border-left:5px solid #008cc4}body a.novashare-ctt:visited{color:#fff}body a.novashare-ctt *{pointer-events:none}body a.novashare-ctt .novashare-ctt-tweet{display:block;font-size:18px;line-height:27px;margin-bottom:10px}body a.novashare-ctt .novashare-ctt-cta-container{display:block;overflow:hidden}body a.novashare-ctt .novashare-ctt-cta{float:right}body a.novashare-ctt.novashare-ctt-cta-left .novashare-ctt-cta{float:left}body a.novashare-ctt .novashare-ctt-cta-text{font-size:16px;line-height:16px;vertical-align:middle}body a.novashare-ctt .novashare-ctt-cta-icon{margin-left:10px;display:inline-block;vertical-align:middle}body a.novashare-ctt .novashare-ctt-cta-icon svg{vertical-align:middle;height:18px}body a.novashare-ctt.novashare-ctt-simple{background:0 0;padding:10px 0 10px 20px;color:inherit}body a.novashare-ctt.novashare-ctt-simple-alt{background:#f9f9f9;padding:20px;color:#404040}body a.novashare-ctt.novashare-ctt-simple-alt:hover,body a.novashare-ctt.novashare-ctt-simple:hover{border-left:5px solid #008cc4}body a.novashare-ctt.novashare-ctt-simple .novashare-ctt-cta,body a.novashare-ctt.novashare-ctt-simple-alt .novashare-ctt-cta{color:#00abf0}body a.novashare-ctt.novashare-ctt-simple-alt:hover .novashare-ctt-cta,body a.novashare-ctt.novashare-ctt-simple:hover .novashare-ctt-cta{color:#008cc4}Ready to make the switch from Joomla 


Things to Consider Before Migrating to WordPress
Before you move from Joomla to WordPress, there are a few things you need in place. Firstly, your new WordPress site will require a domain name and hosting.
Chances are you already have these for your Joomla website. Depending on your provider, you may be able to re-use these resources for your WordPress site. However, for the best results, we recommend avoiding cheaper hosting alternatives and instead investing in managed WordPress hosting.
Managed WordPress hosting providers can perform much of the heavy lifting for you. They may even help you install the WordPress software — perfect when you’re new to the platform.
Once you’re up and running, a well-managed provider will handle much of your site’s day-to-day maintenance and optimization. Since the host specializes in WordPress, it should also have no problems answering any questions and resolving any issues you encounter with this new platform.
Even if you’re already familiar with WordPress, a managed partner can help lighten your maintenance load. This leaves you free to focus on more high-value tasks, such as growing your new WordPress website.
Providers specializing in WordPress are also more likely to supply tools designed specifically for this CMS.
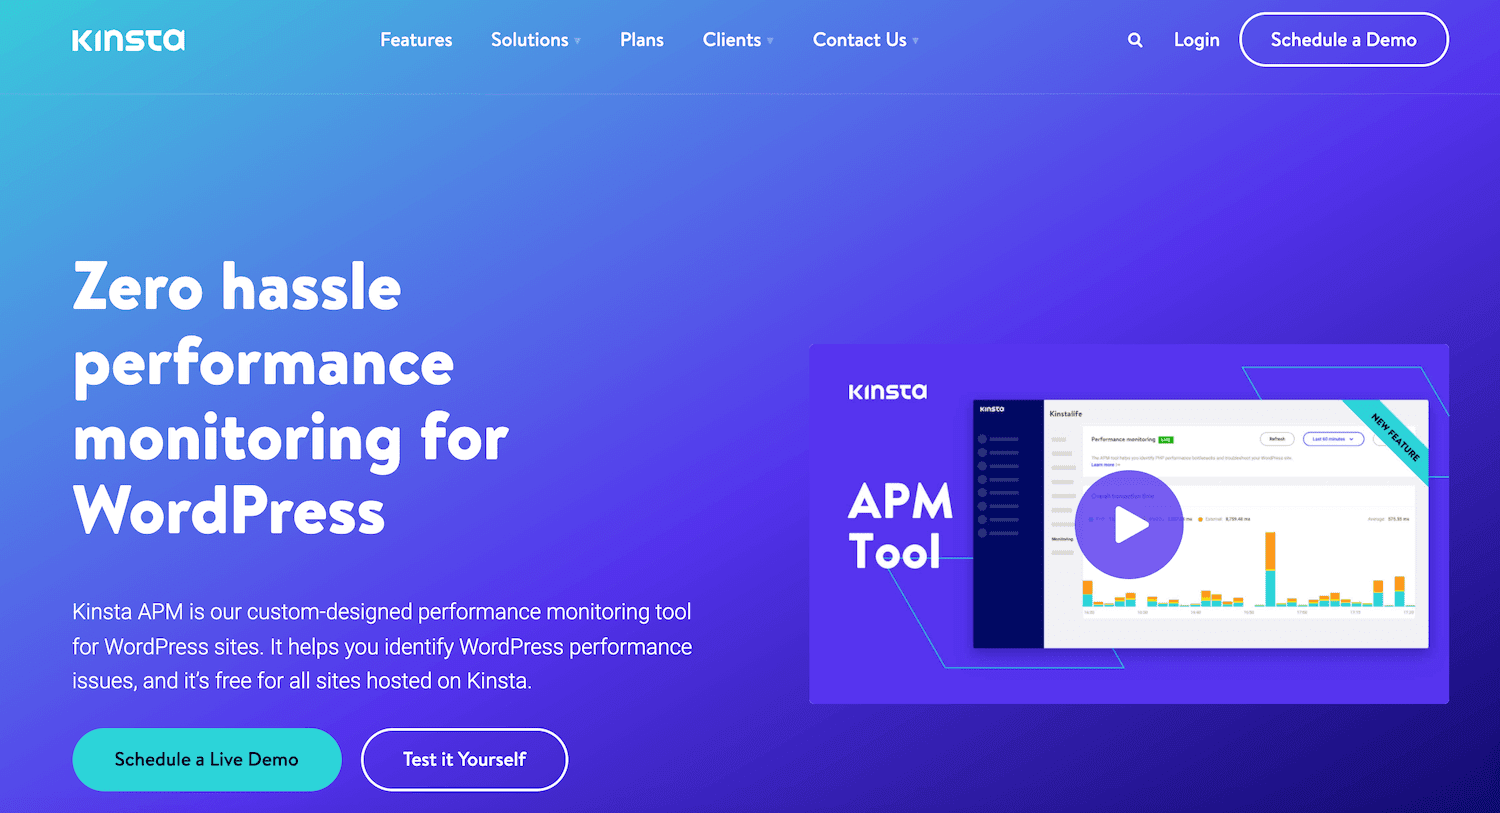
For example, Kinsta APM is a custom-designed performance monitoring tool that we created exclusively for WordPress. It can be invaluable for building a high-performing and secure website:

If you already have a hosting account, migrating to a new provider doesn’t have to be complicated. At Kinsta, we offer free migrations from a long list of popular web hosts:


We include these free migrations in all of our hosting plans. Complete a straightforward form, and our specialist team will be in touch to help arrange your move.
How to Migrate From Joomla to WordPress in 9 Steps
With a 60.8 percent share in the CMS market, there’s a reason why WordPress is so popular. If you’re convinced that it’s time for an upgrade, here’s how to migrate to WordPress in nine easy steps!
Step 1: Set Up WordPress
WordPress is famously easy to install. However, you can make the installation process even simpler by partnering with a managed WordPress hosting provider.
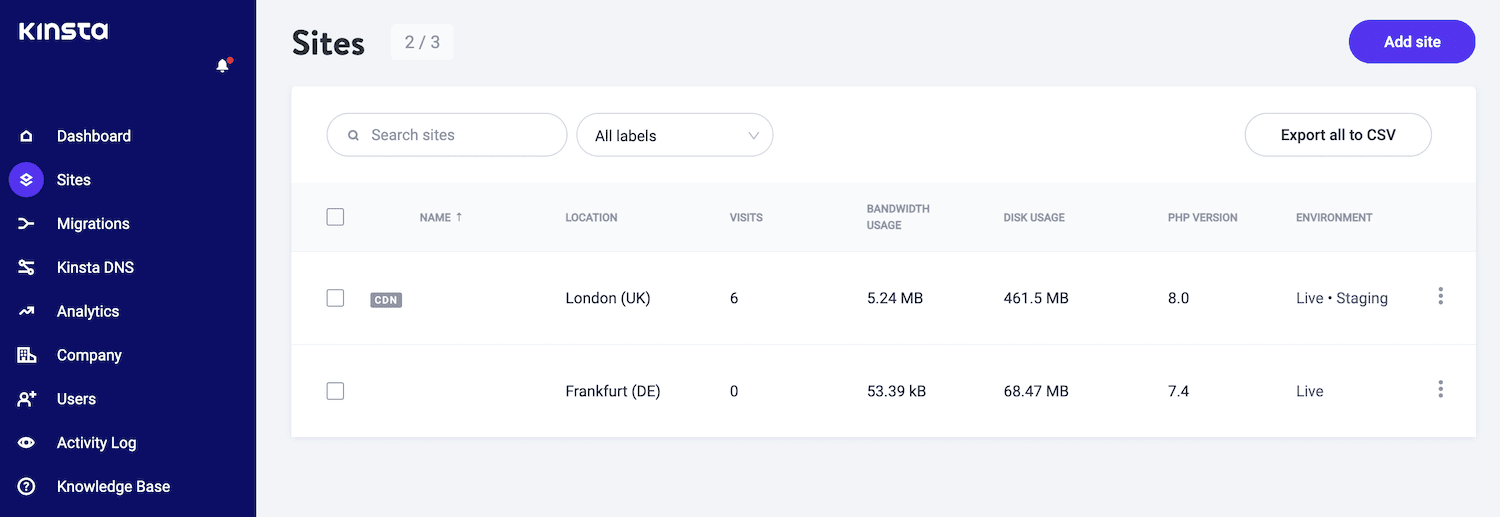
If you’re a Kinsta customer, you can set up WordPress by logging into your MyKinsta dashboard. Then, select Sites in the left-hand menu:

In the upper-right corner, click on Add Site. Then, opt to Install WordPress:
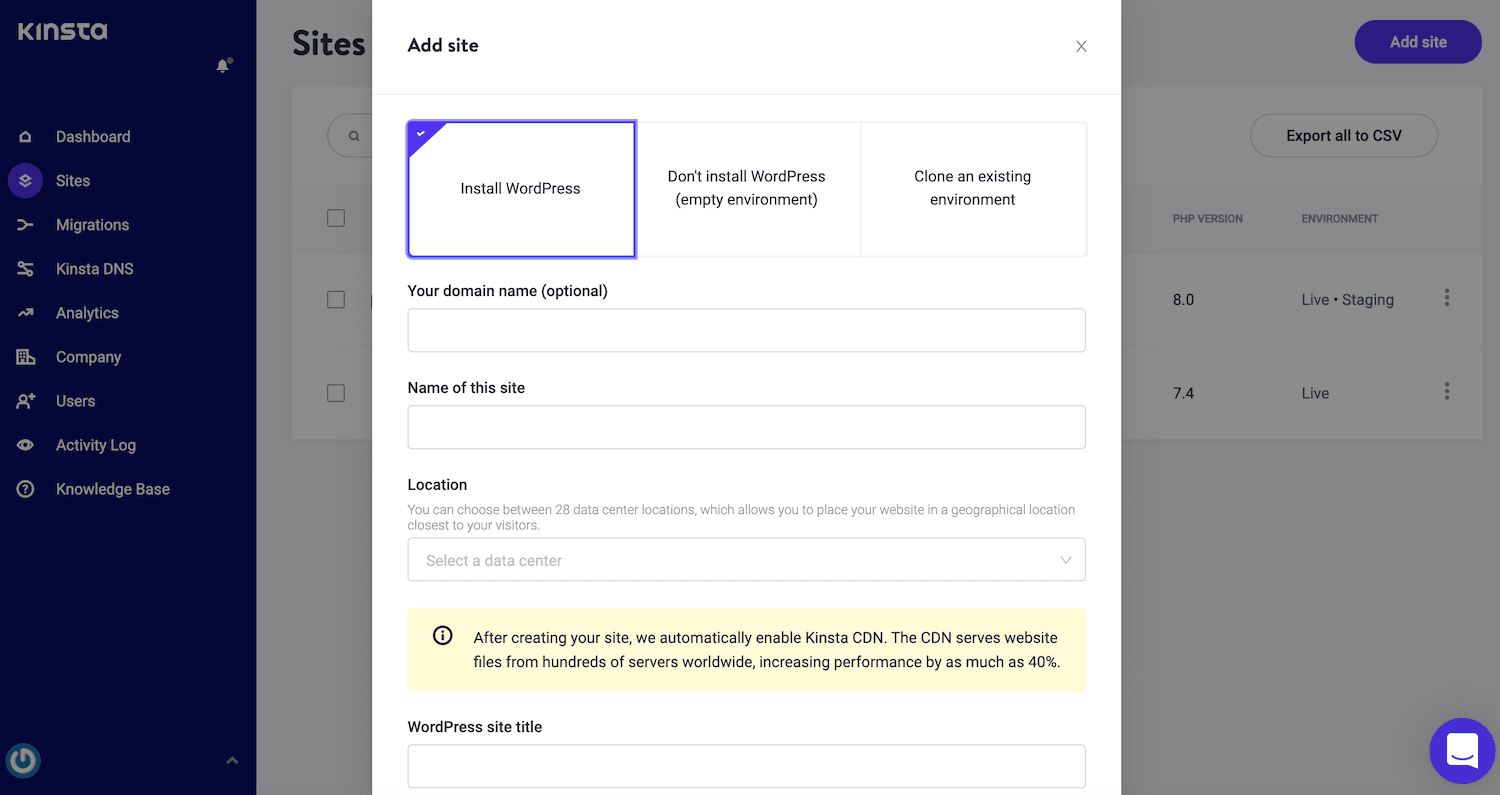

Doing this installs a fully functional WordPress site ready for you to use immediately. Follow the on-screen instructions, and you’ll have a new website within minutes.
Unfortunately, WordPress doesn’t support Joomla migration natively. The good news is that you can add this functionality by using a migration plugin such as FG Joomla to WordPress.
Using this plugin, you can easily migrate all of your Joomla site’s sections, categories, posts, media, and tags into WordPress:


Log in to your WordPress dashboard and navigate to Plugins > Add New to install this plugin. You can now search for the FG Joomla to WordPress add-on. When this item appears, click on Install > Activate.
Step 2: Back Up Your Joomla Site
Before migrating your Joomla website, it’s a good idea to create a backup. Doing this ensures that you won’t lose all your Joomla content if you encounter any issues during the migration.
You can back up your Joomla site using the Akeeba Backup extension:


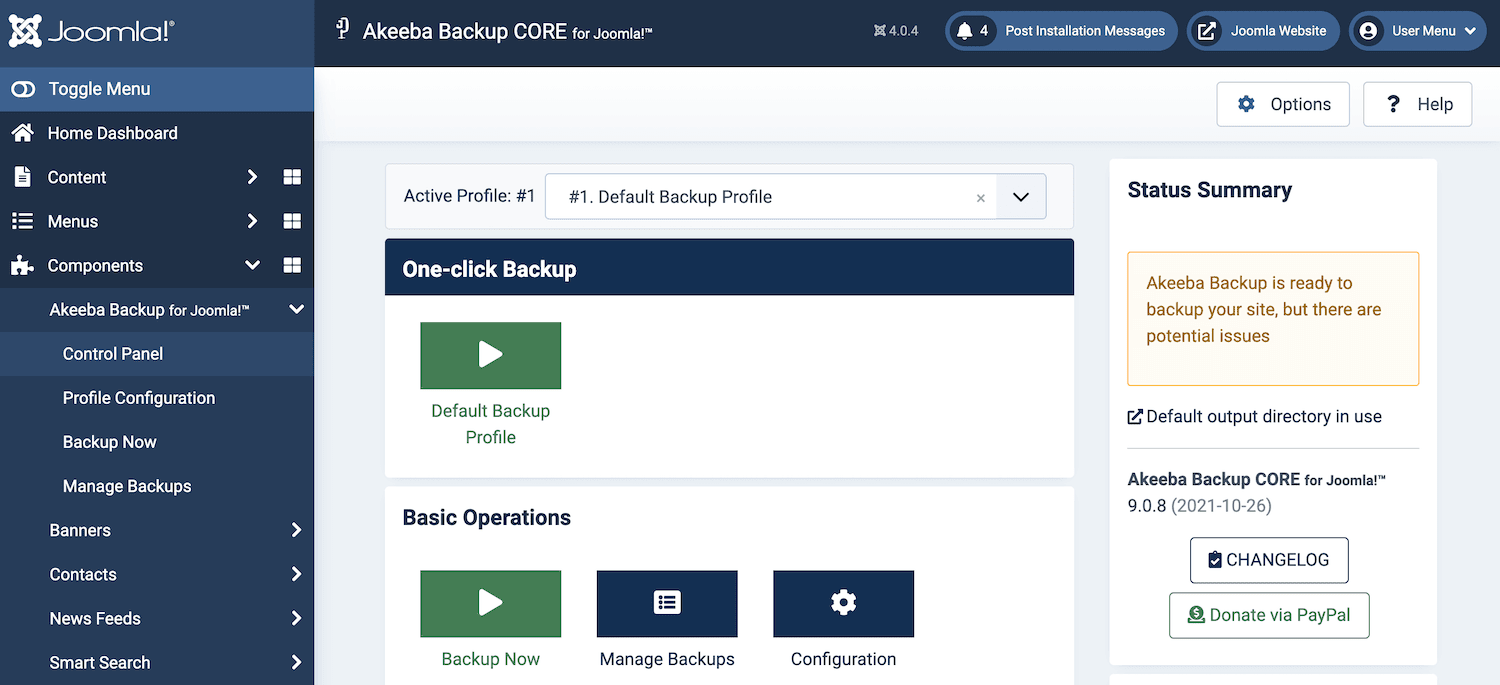
After installing this extension, select Home Dashboard from Joomla’s left-hand menu. Your Notifications section should now contain a new Backup up to date option:
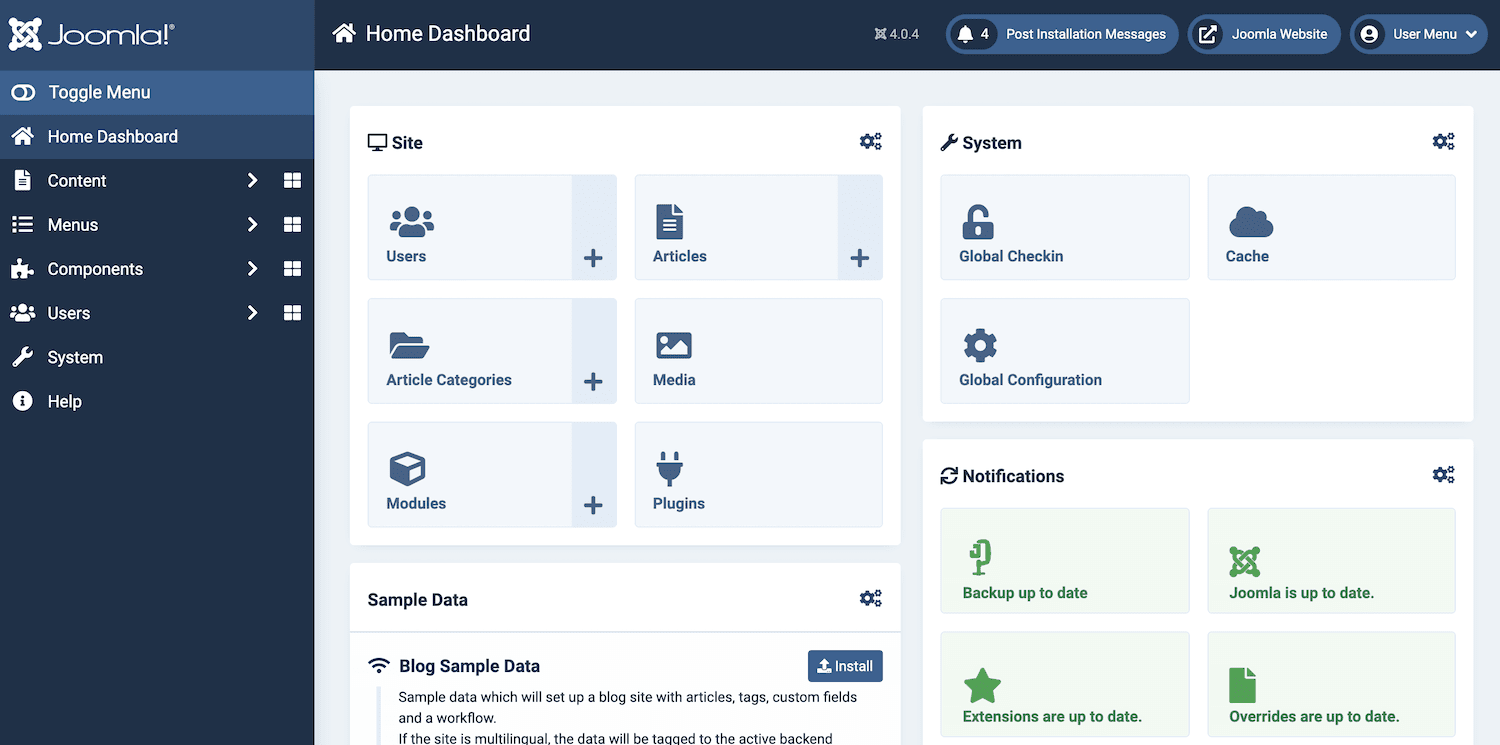

Give this notification a click. If this is your first time accessing the Akeeba Backup settings, then Joomla will ask you to configure this extension.
Akeeba Backup can handle all of the setup for you, so select Configuration Wizard when prompted:
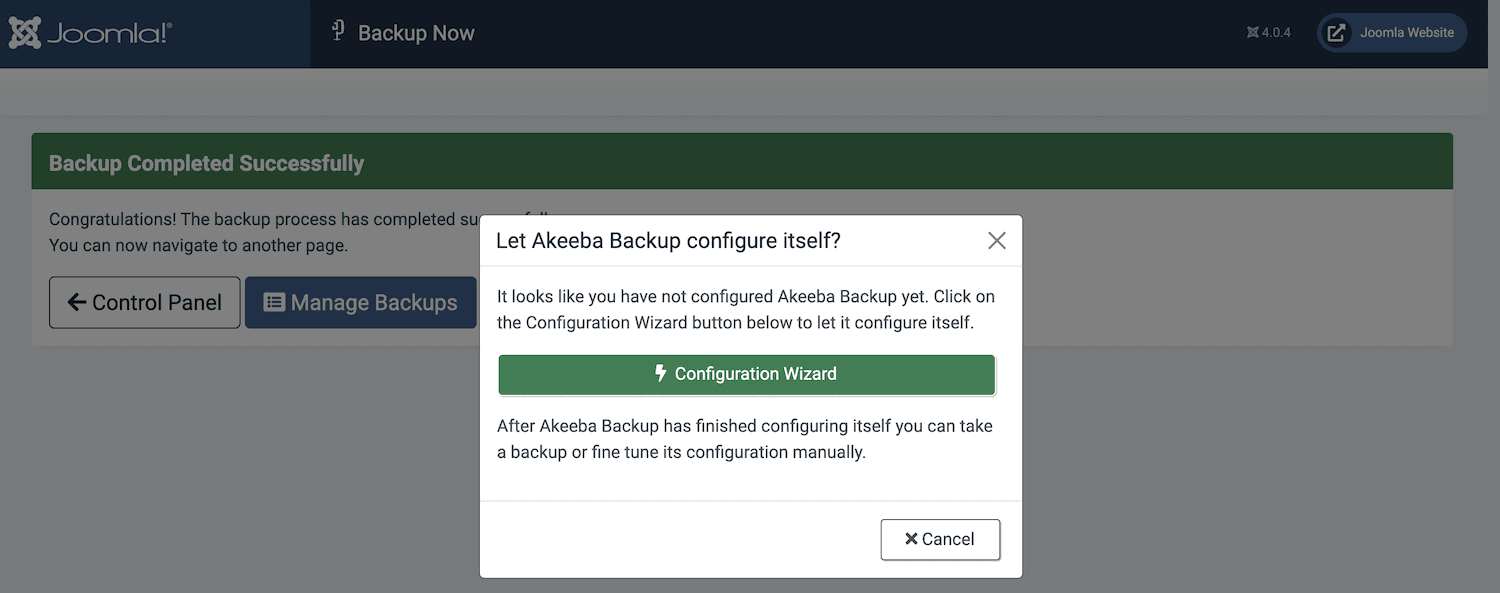

The configuration wizard will now determine the optimal backup settings for your site by running a series of benchmarks on your server. Once this test is complete, click on Backup Now:
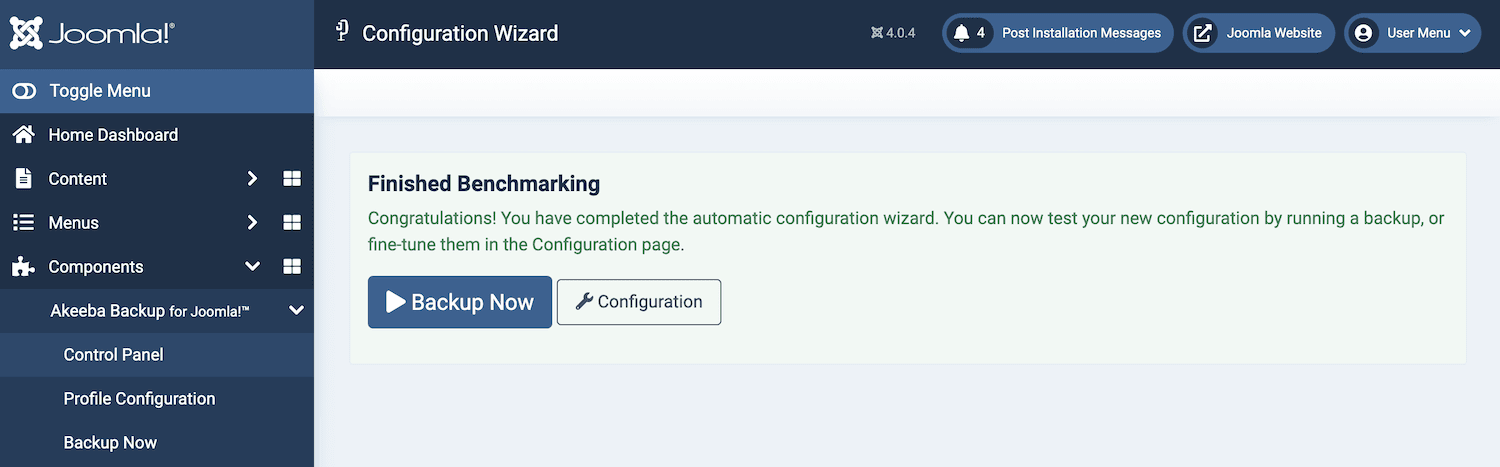

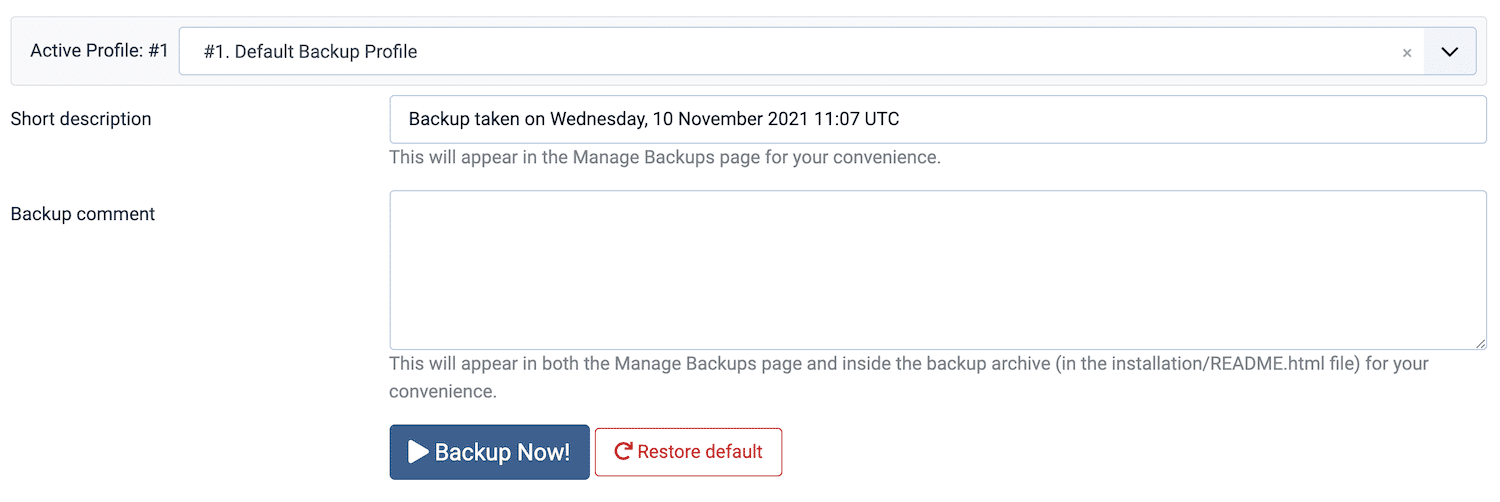
You can now name this backup and add a comment. When you’re happy with the information you’ve entered, click on Backup Now:

Now that this extension is configured, you can create a backup at any point. Navigate to Components > Akeeba Backup > Backup Now in your Joomla dashboard:

Although it’s not as vital as copying your Joomla content, you may want to back up your WordPress website before proceeding. This will give you a blank slate that you can restore if something goes wrong during the migration process.
Kinsta customers can create a backup on demand by logging into their MyKinsta accounts. Here, you can select the site in question, followed by Backups:
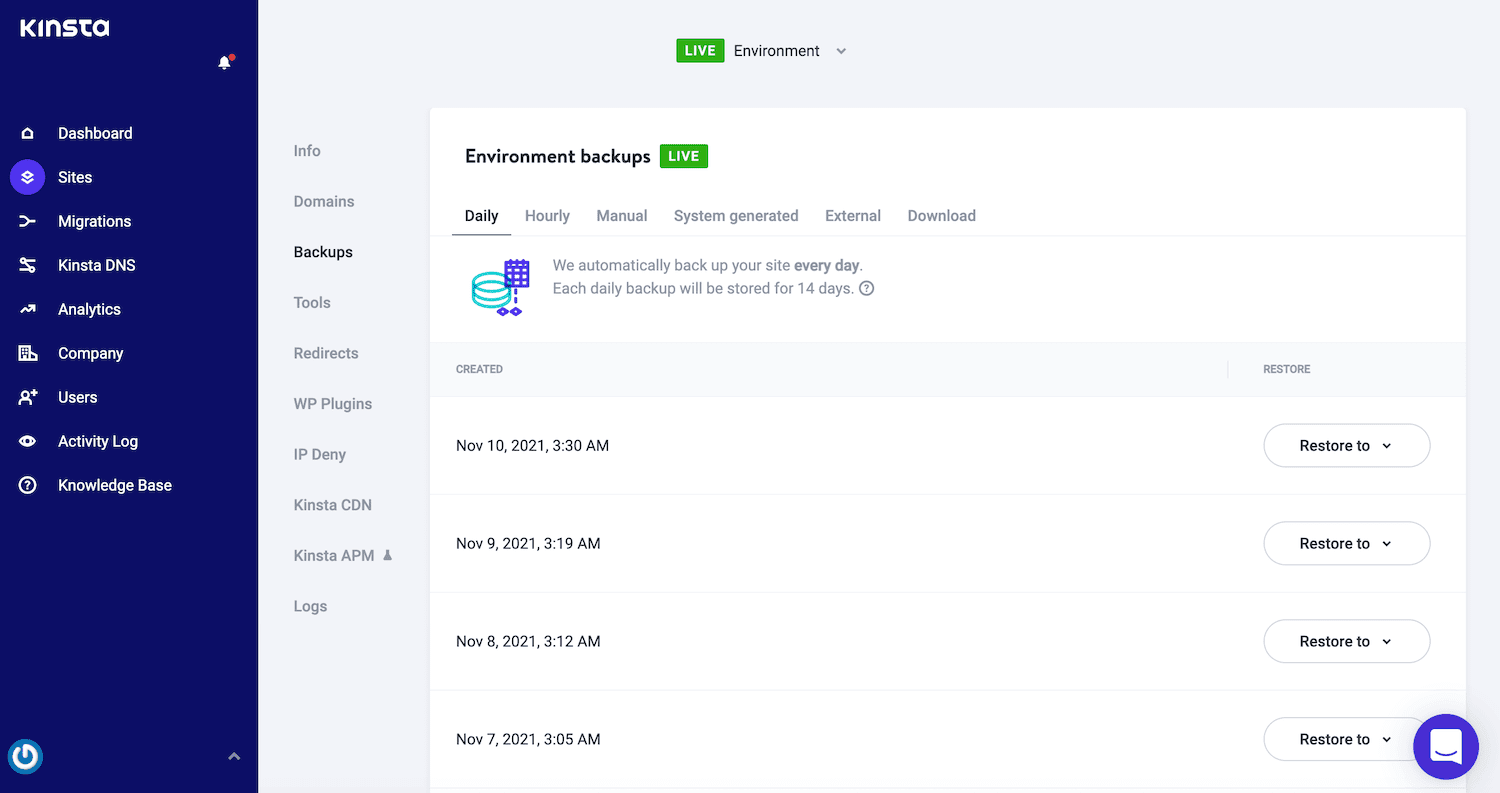

Then, select the Manual tab, followed by Back up now. The program will now create a complete backup of your WordPress website.
Step 3: Migrate Your Joomla Content
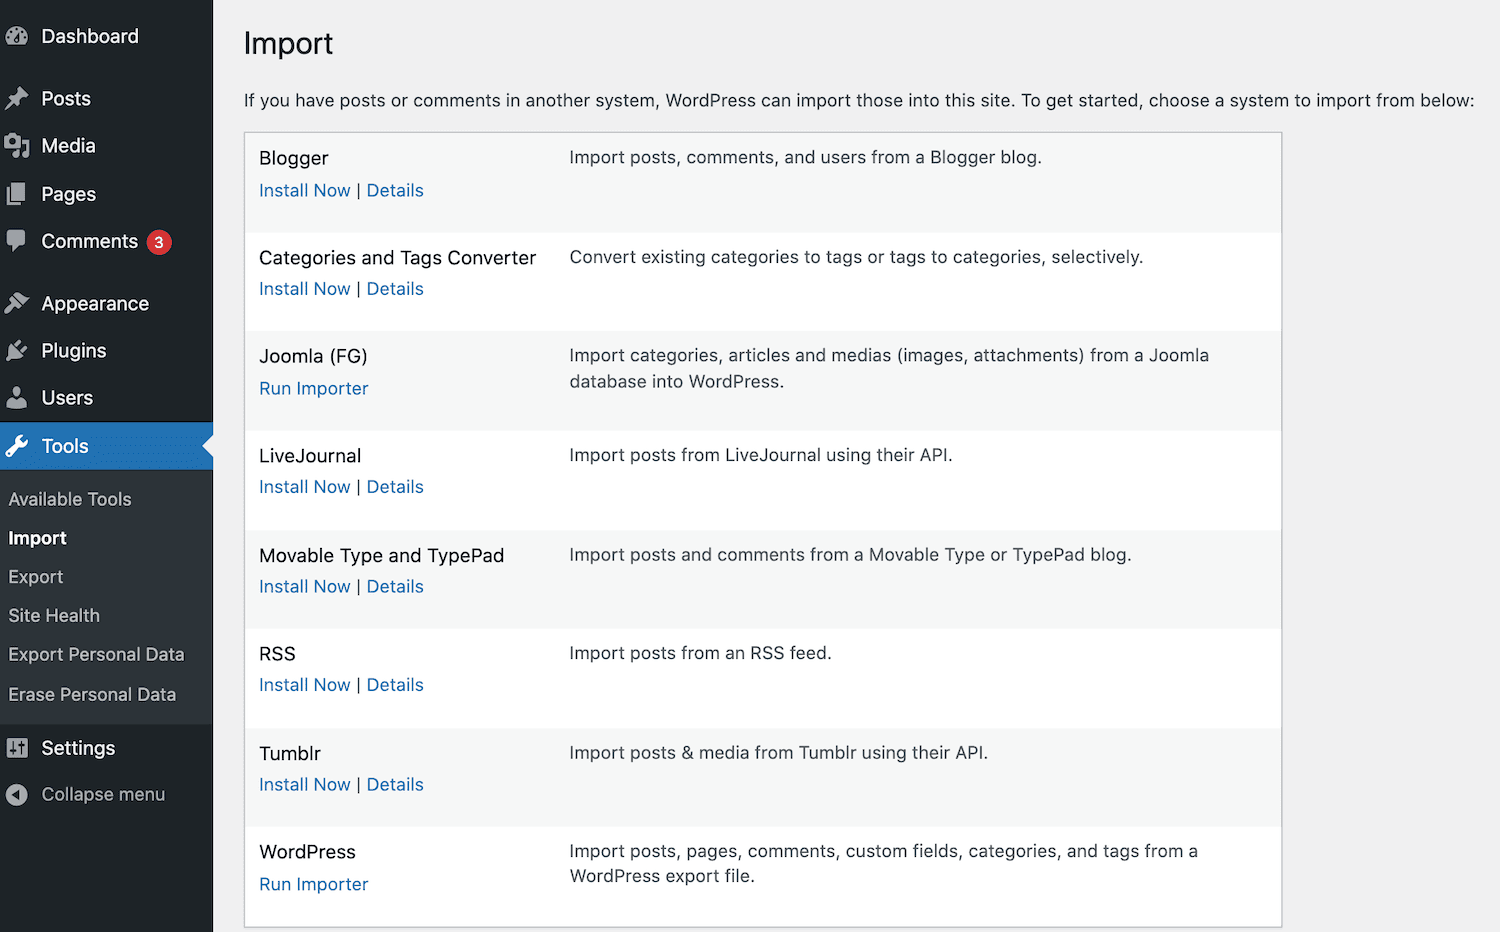
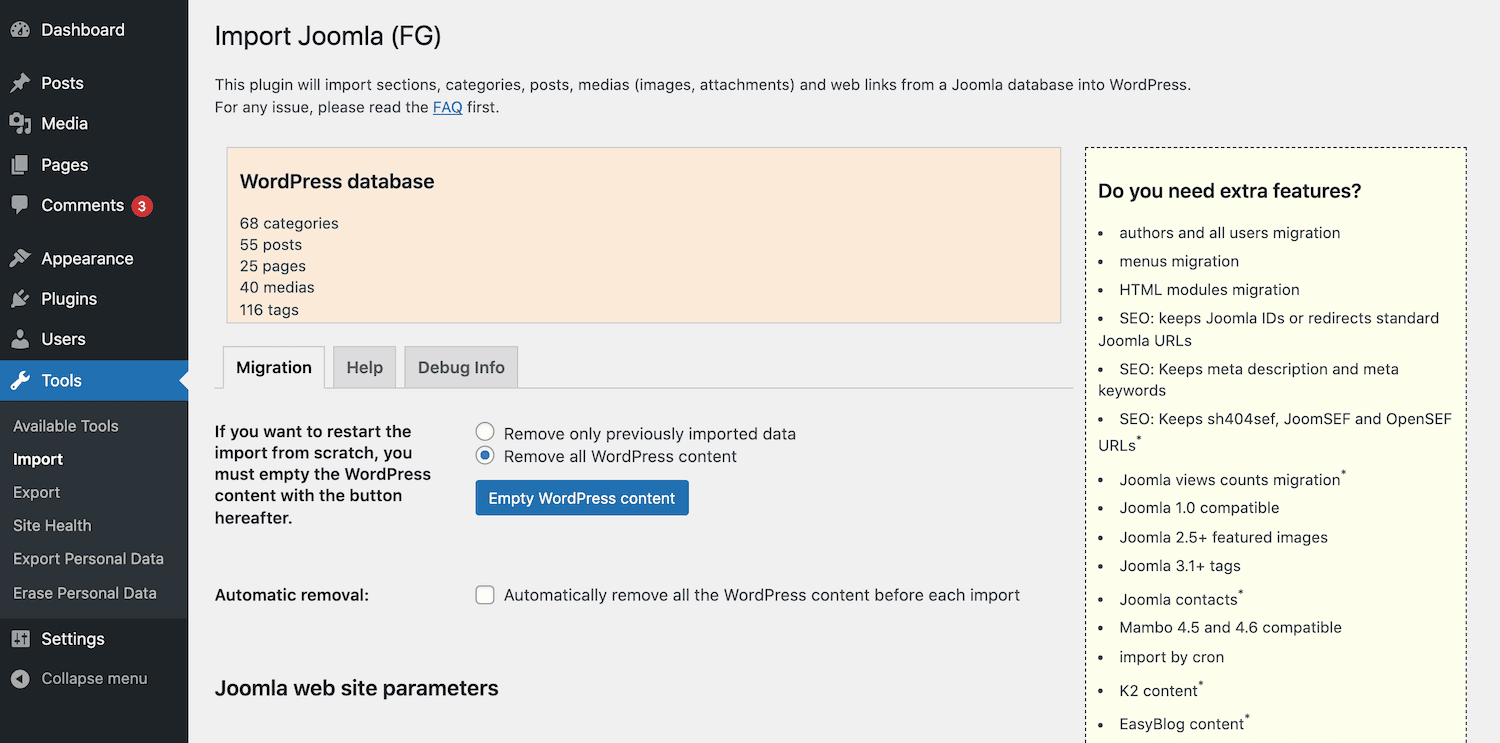
In your WordPress dashboard, navigate to Tools > Import. Now find the Joomla (FG) option and click on its accompanying Run Importer link:

The subsequent screen displays all categories, posts, pages, media, and tags in your site’s underlying database. Even a fresh WordPress installation may contain some content, such as a default category and some sample web pages:

Most of the time, you’ll want to import your Joomla content into an empty site. For this reason, we recommend using the Empty WordPress content button to wipe the slate clean.
Just be aware that doing this will permanently delete all the content from your WordPress site, with zero chance of recovering it. If you want to hang onto any of these categories, posts, pages, media, or tags, you must create a backup.
When you’re ready to proceed, select Remove all WordPress content. Then, click on Empty WordPress content.
After a few moments, the plugin will display a message confirming that it’s successfully purged your site:
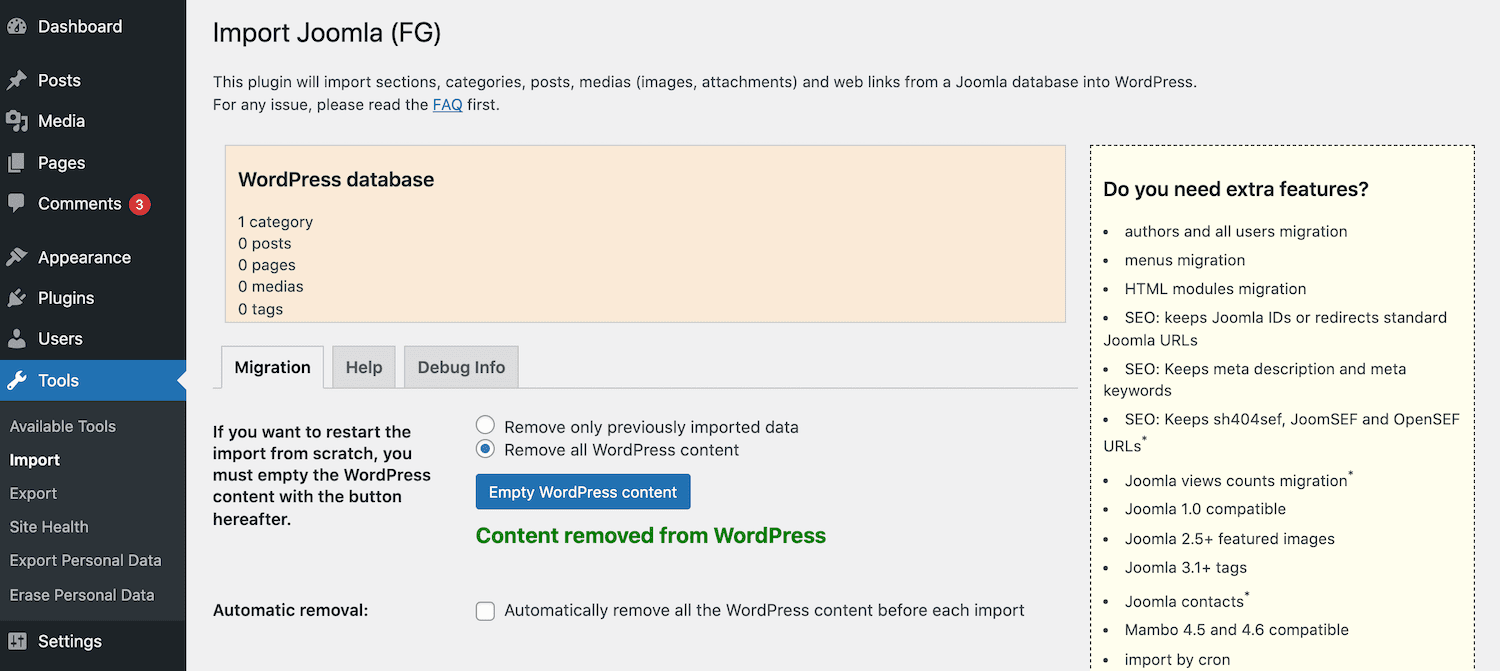

Your posts, pages, media, and tags should now be zero. WordPress has an Uncategorized category by default. Therefore, yourCategory tally will remain at one, even after deleting all of your content.
Step 4: Enter Your Joomla Database Parameters
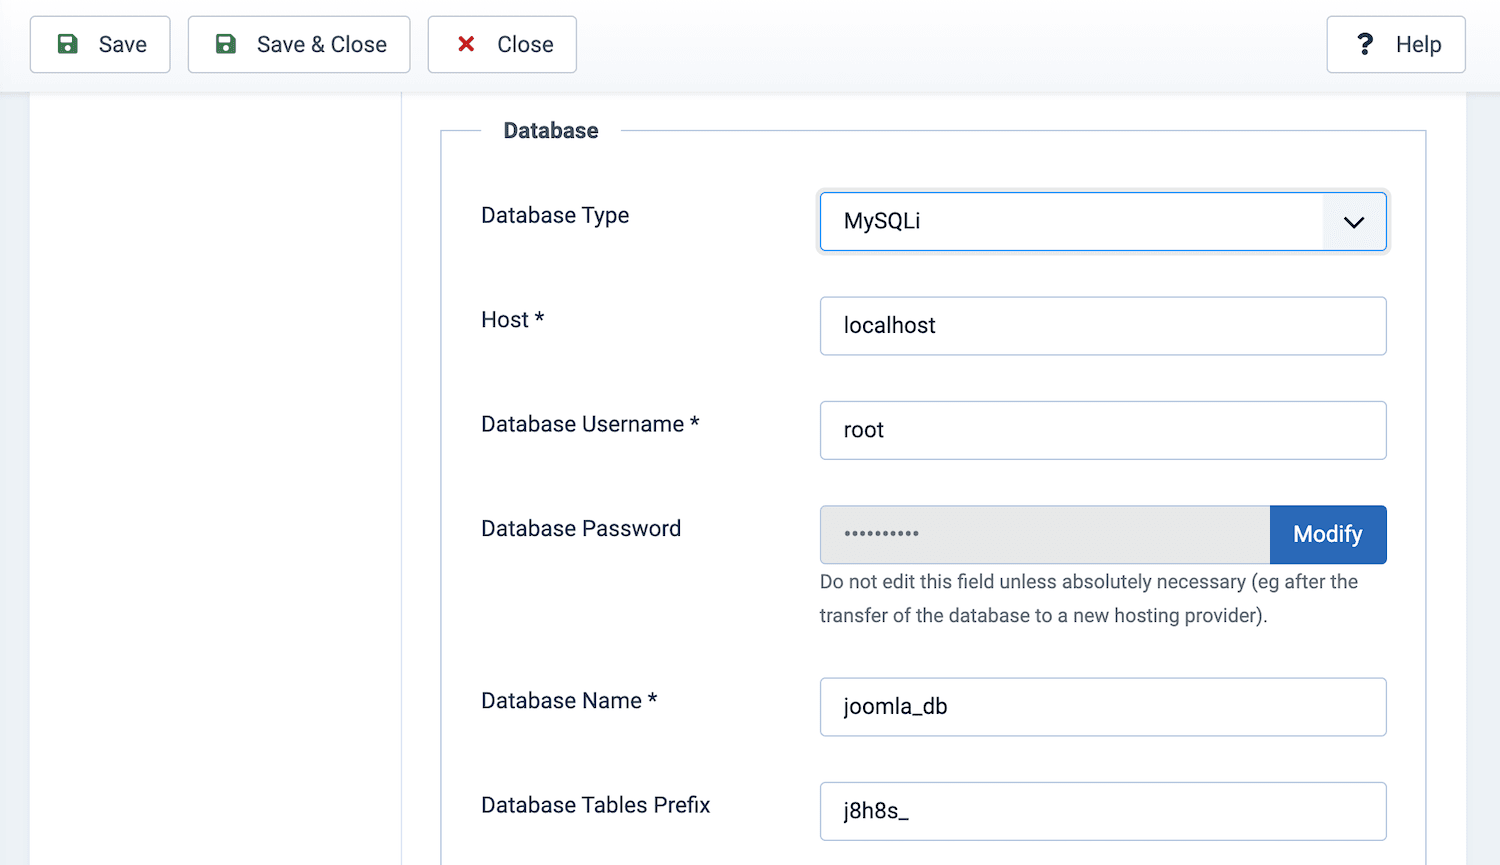
The next step is entering your Joomla database parameters. In a new tab, log in to your Joomla account. In the left-hand menu, select System:
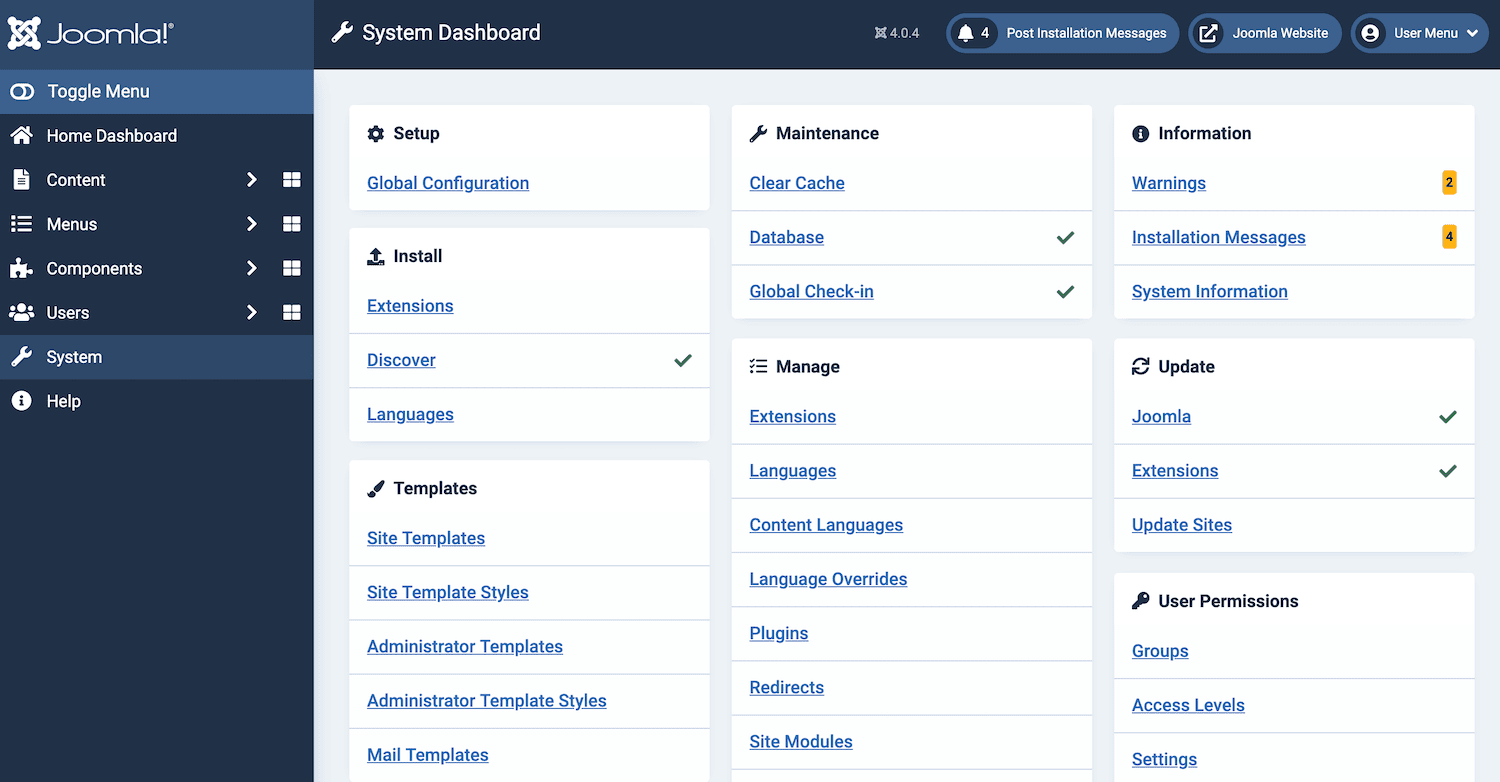

Then, click on Global Configuration. You can now select the Server tab:
Sign Up For the Newsletter
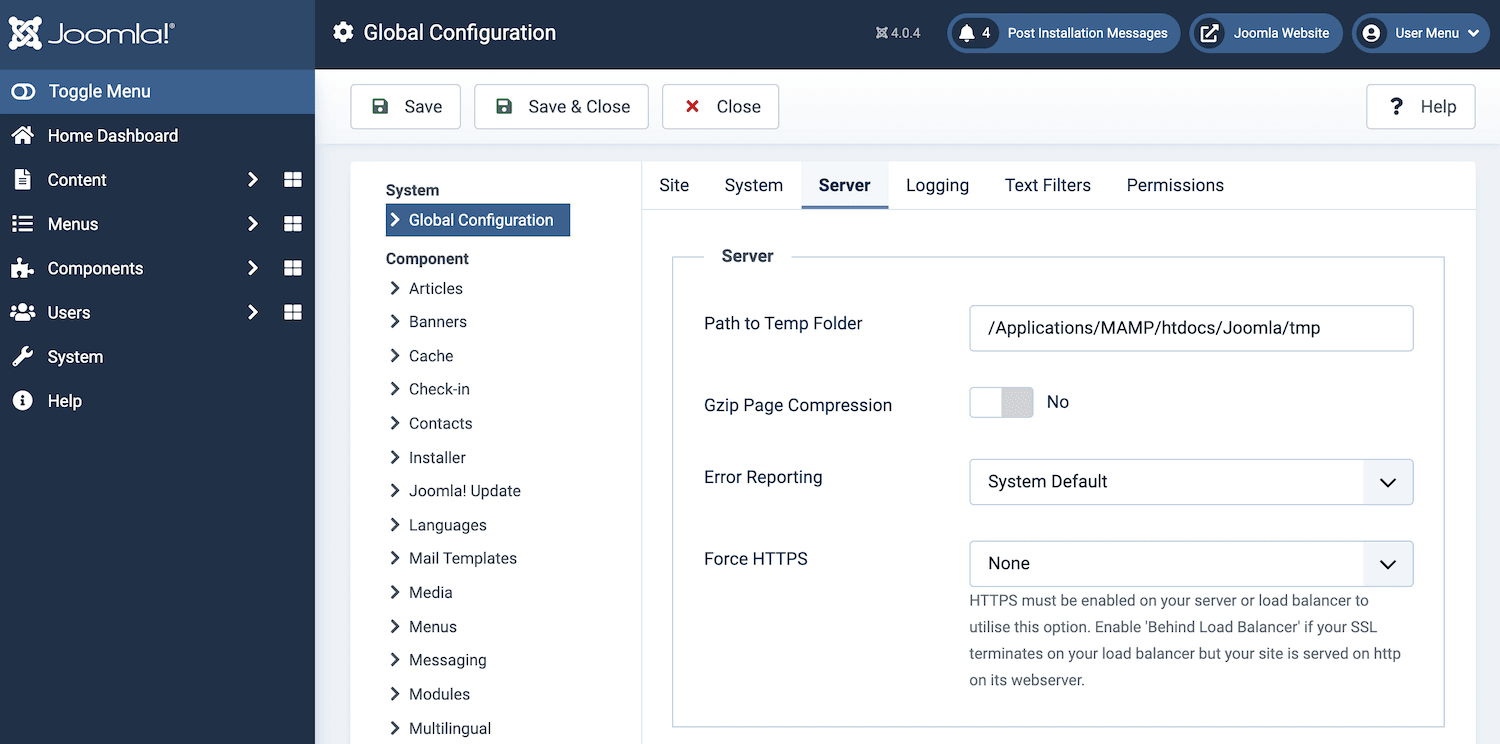

Next, scroll to Database Settings. This section contains your Host, Database Username, Database Password, Database Name, and Database Tables Prefix:

These values are essential for migrating your data, so switch to your WordPress dashboard and scroll to the Joomla web site parameters section. Find the following field: URL of the live Joomla website. In this field, enter the URL of your Joomla website and opt to transfer your data over HTTP:
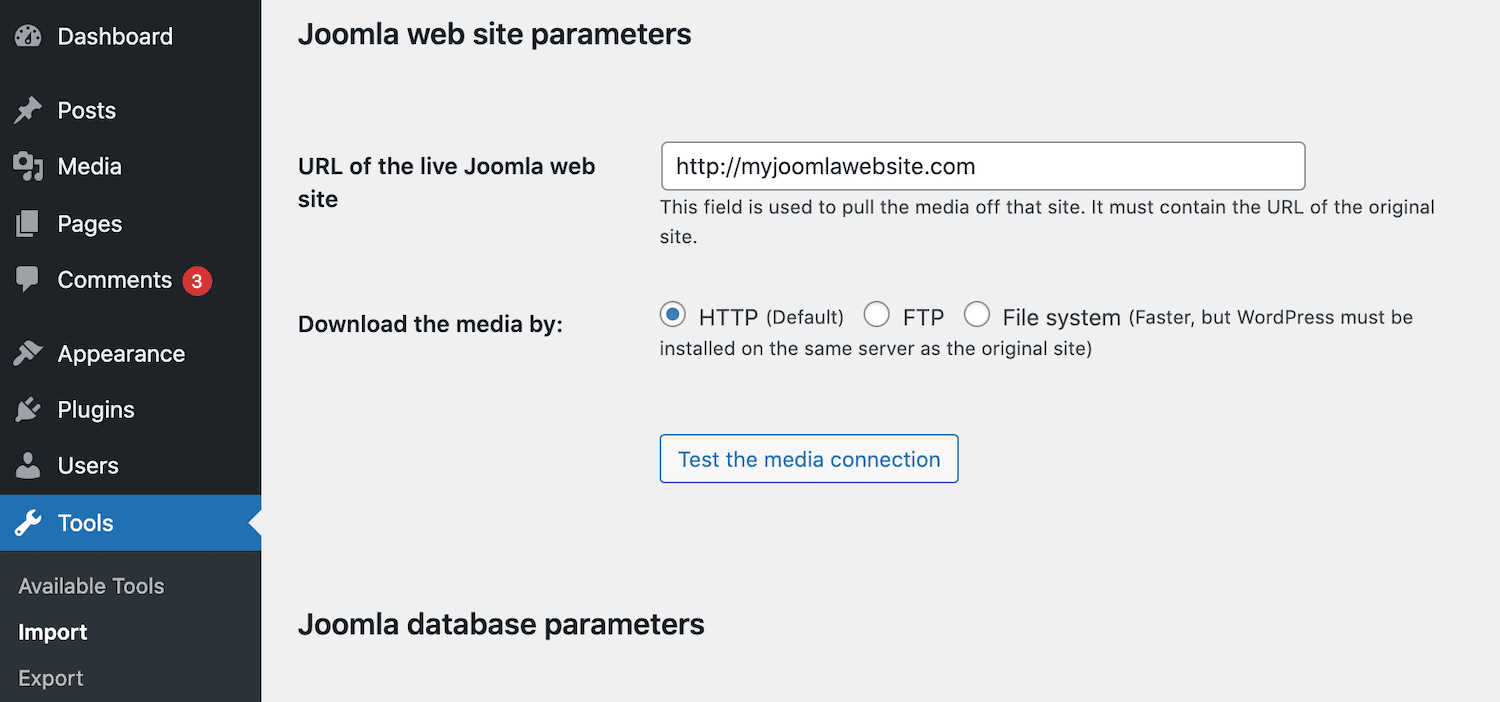

Now, click on Test the media connection. Doing this will check for any potential issues during the import process.
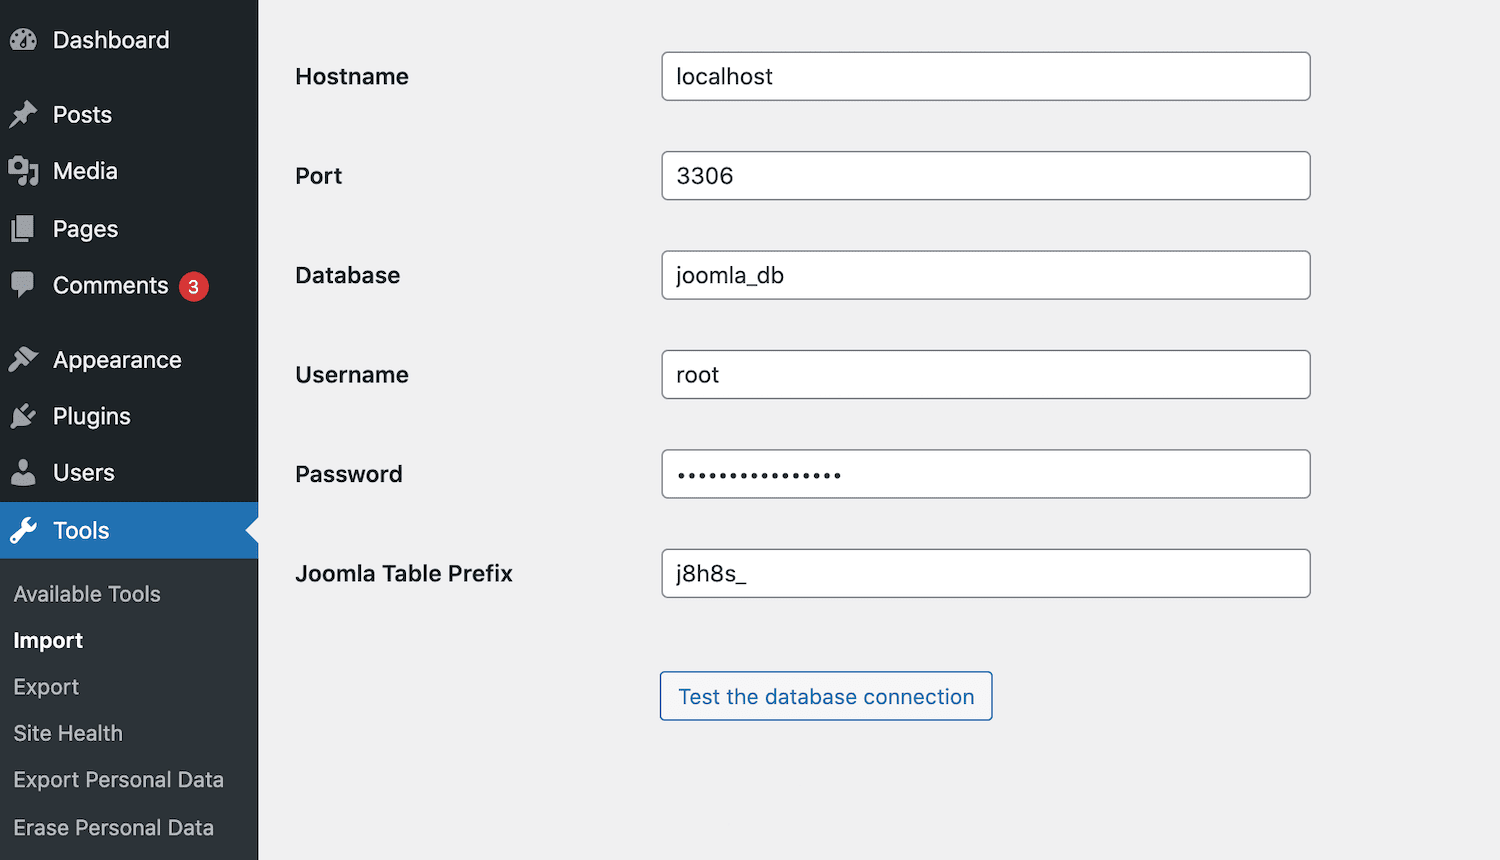
Assuming that you pass the test, you’ll then need to provide all of the information about your Joomla database. This means entering your hostname, database name, username, password, and Joomla table prefix.
You can copy each piece of information from the Joomla dashboard and paste it into the appropriate field in WordPress:

The Joomla Global Configuration page displays your database information apart from your database password. If you cannot remember this password, you can connect to your server via File Transfer Protocol (FTP) using a client such as FileZilla.
Then, navigate to your Joomla website’s root folder. You’ll find the database password in your configuration.php file.
After entering these database parameters into WordPress, click on Test the database connection. WordPress will now check whether these parameters work. If the connection is a success, you’re ready to import your content.
Step 5: Import Your Joomla Content
In your WordPress dashboard, scroll to the Behavior section. It contains all of the settings that you’ll use to configure your import:
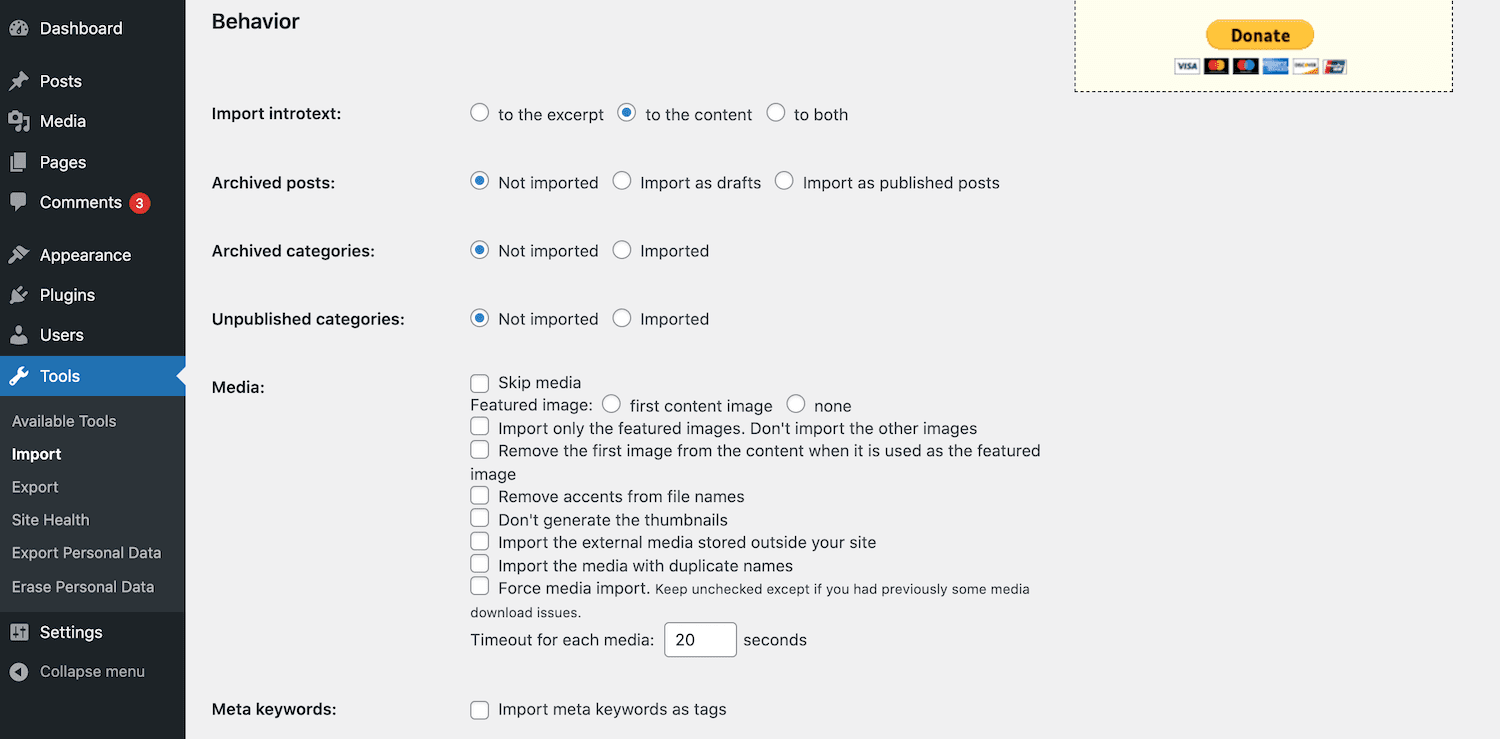

You can now choose which content you want to migrate. It includes archived posts, media, and meta keywords.
You can also configure how to handle your site’s media. For example, you might opt to import featured images only. By being selective, you may be able to accelerate the migration process.
At this point, you also have the option to migrate your Joomla site’s intro text. This short snippet teases visitors with a preview of the full article. You can choose to transfer this content as an excerpt, combine it with the full content, or both.
After making your selection, scroll to the bottom of this screen and click on the Start / Resume the import button. The plugin will now import all of the content from your Joomla site. FG Joomla to WordPress will notify you once this process is complete.
You may have transferred your content, but there’s a chance that the internal links within your pages and posts won’t work. Broken internal links can seriously damage the visitor experience. They can also impact your site’s Search Engine Optimization (SEO).
When the search bots index your content, they have a limited crawl budget. The last thing you want is to waste this precious budget on broken URLs. Thankfully, the migration plugin can scan for broken internal links:
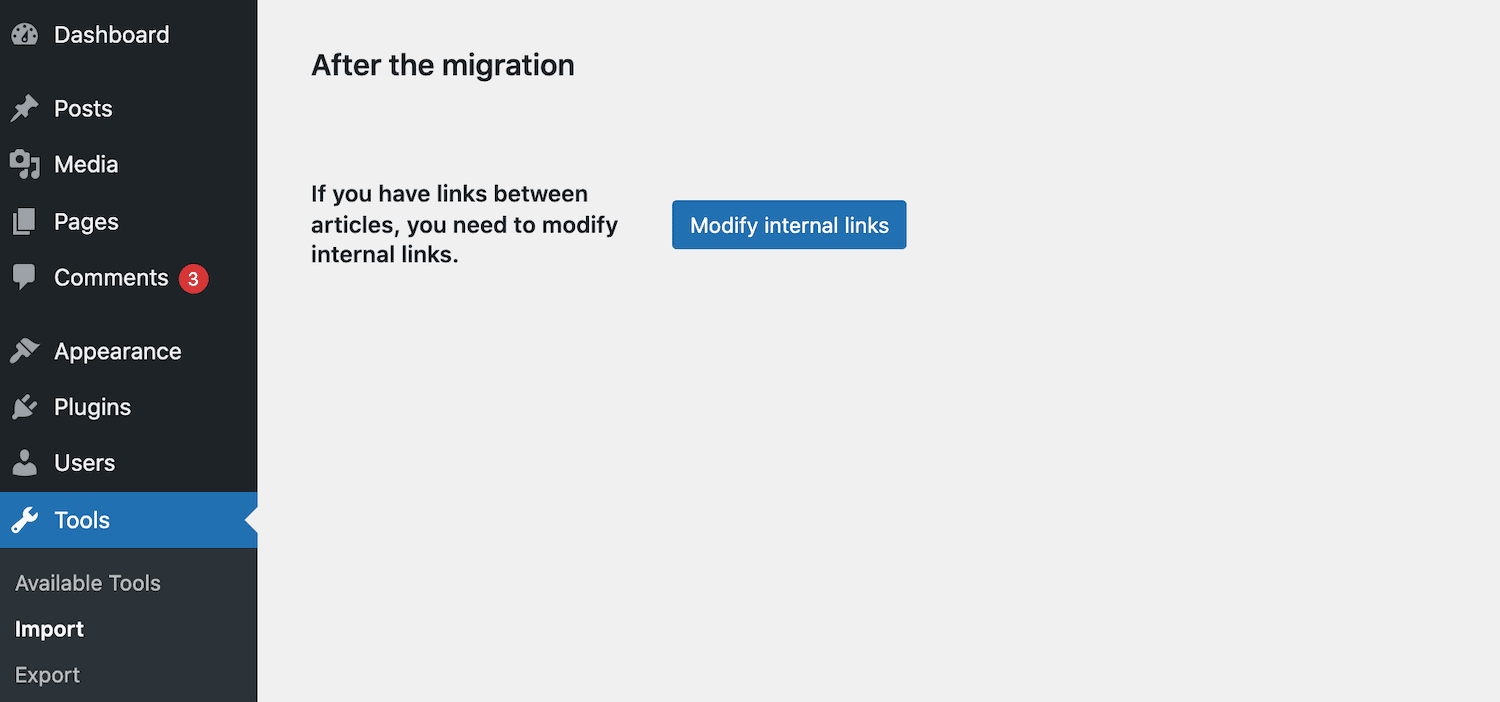
To perform this check, click on the Modify internal links button. FG Joomla to WordPress will now scan your site for dead URLs.
Need top-notch, fast, and secure hosting for your new WordPress website? Kinsta provides blazing fast servers and 24/7 world-class support from WordPress experts. Check out our plans
Step 6: Choose a New WordPress Theme
WordPress comes with a default theme pre-installed. However, it may not be the best fit for your migrated Joomla content. You can check to see how your site appears and functions with the default WordPress theme by visiting it in a new tab.
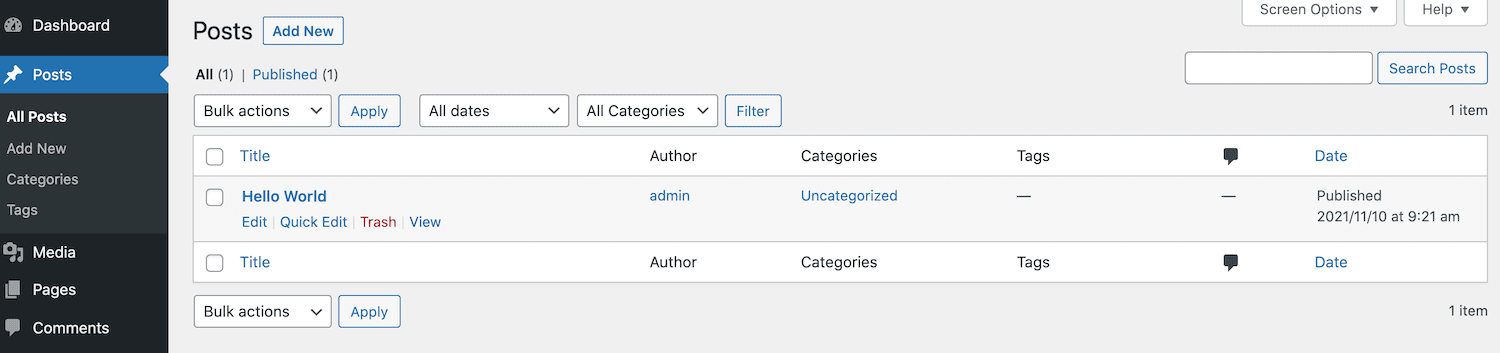
Alternatively, you can look at a specific webpage by navigating to Posts or Pages. Then, hover over the webpage in question and select View:

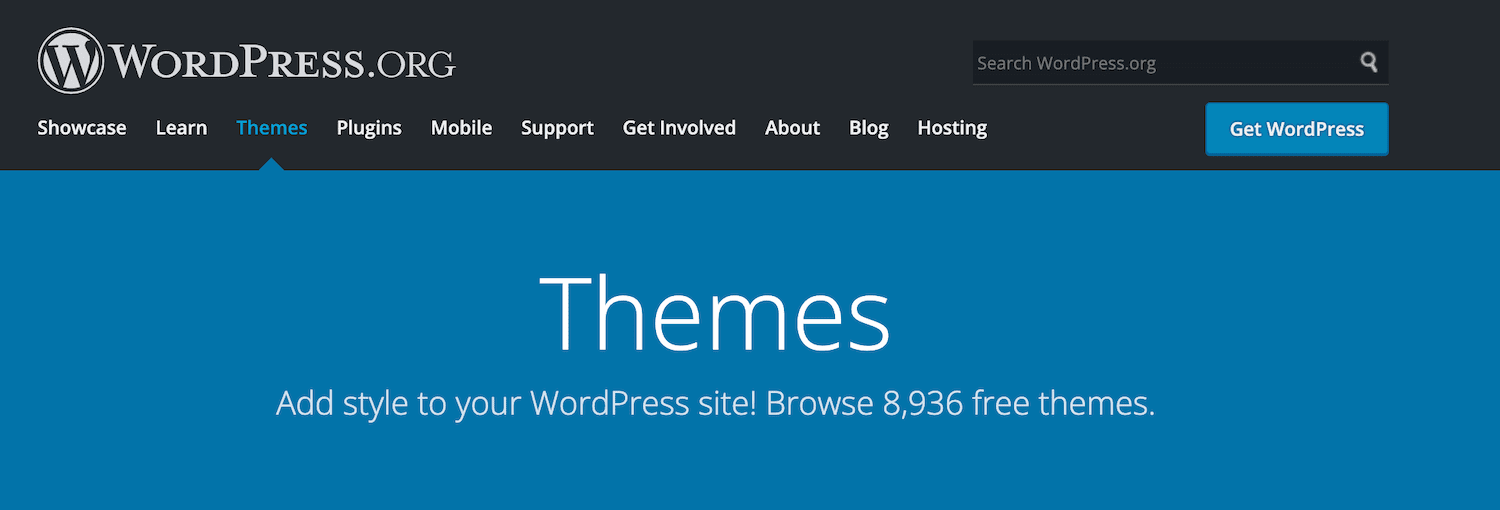
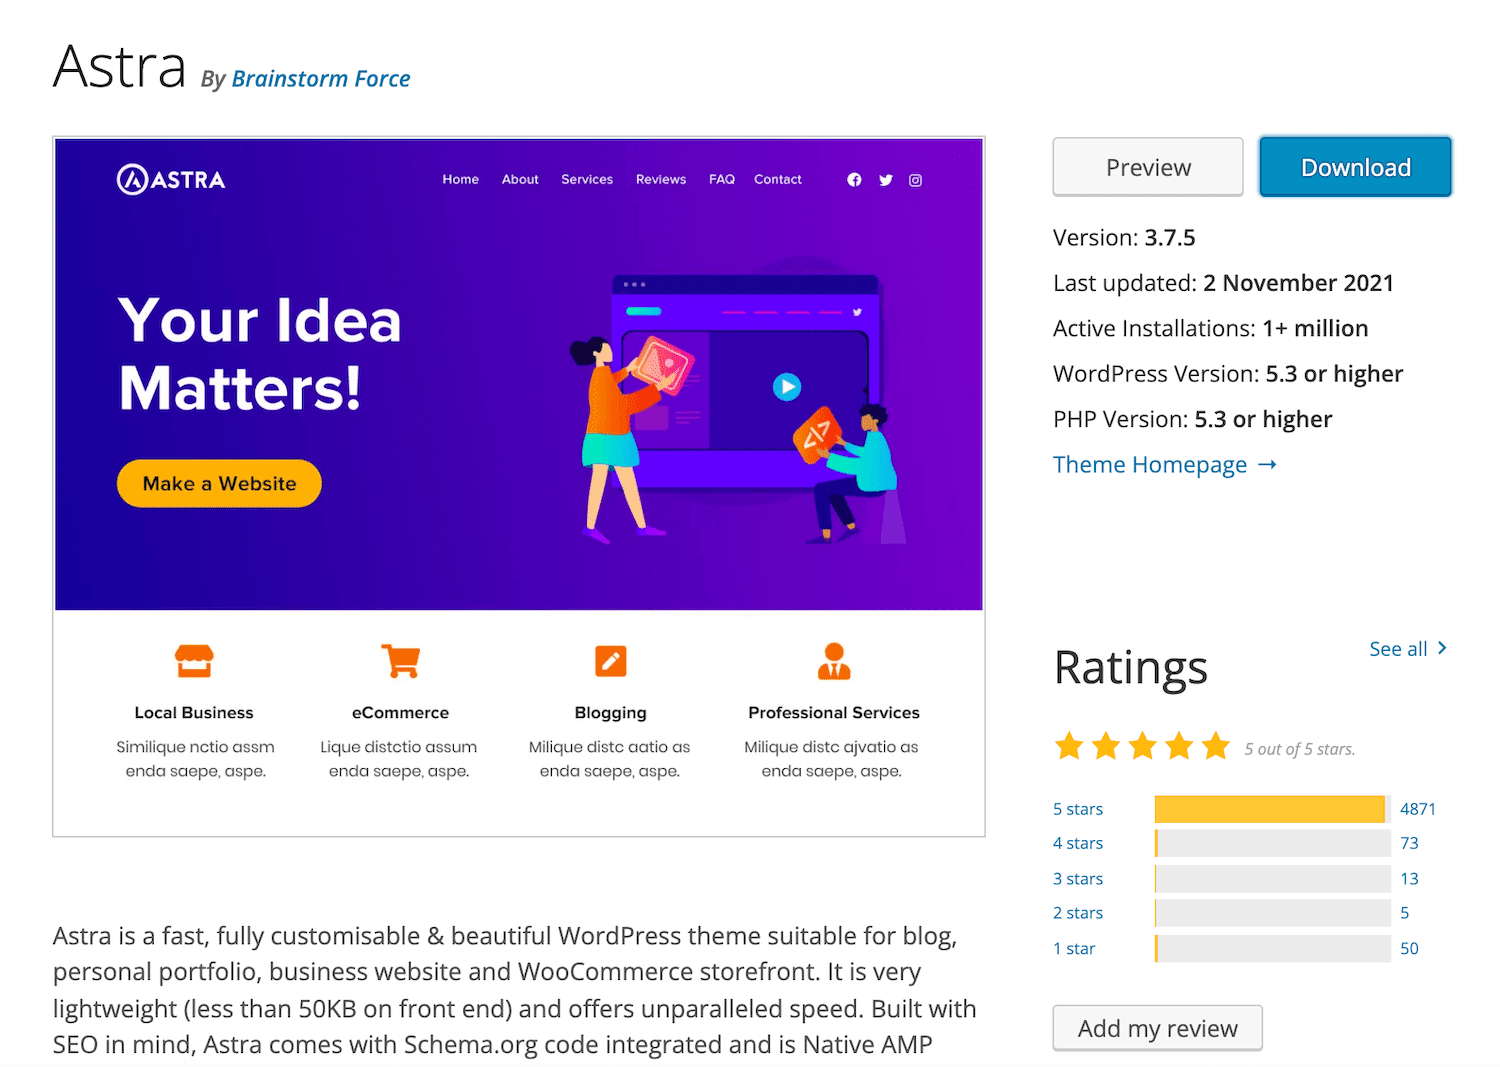
If you’re unhappy with the default look, then it’s time to install a new theme. When it comes to choosing a WordPress theme, there’s no shortage of options:

To install a theme from the official repository, navigate to Appearance > Themes in your WordPress dashboard. You can then select Add New and start exploring the available options:
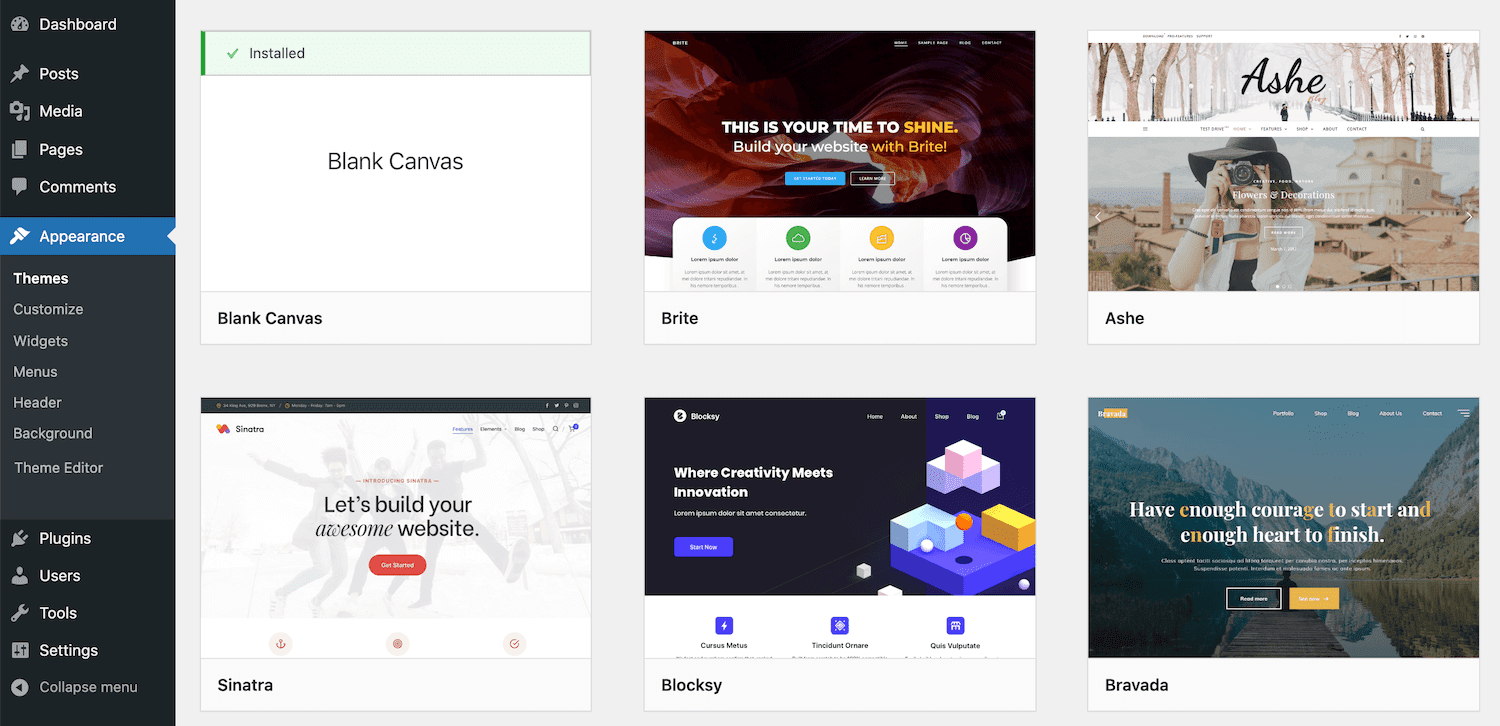

When you find a theme that catches your eye, hover over it and then click on Preview. This will display your site as it will appear with the new theme applied.
When shopping around for a theme, it’s wise to pay attention to the average star rating and the reviews, particularly the most recent feedback. A theme can have a positive average star rating. However, a large number of recent negative comments may suggest there’s a problem with the latest update:

With over three billion smartphone users worldwide, your theme should also be responsive and mobile-friendly. This quality is critical for an online store, as mobile devices accounted for 65 percent of all e-commerce traffic in 2019.
When you find your perfect theme, select Install > Activate. Your migrated Joomla content will now be using this new theme.
Step 7: Set Up Permalinks
Permalinks are the permanent URLs that lead users and search engines to your pages and posts. As the name suggests, these links are supposed to remain unchanged.
While it is possible to edit your permalinks later, this can result in broken links. It may also damage your SEO. Therefore, picking the right permalink structure is essential for setting up a new WordPress website.
WordPress supports six different permalink structures. To take a look at your options, navigate to Settings > Permalinks:
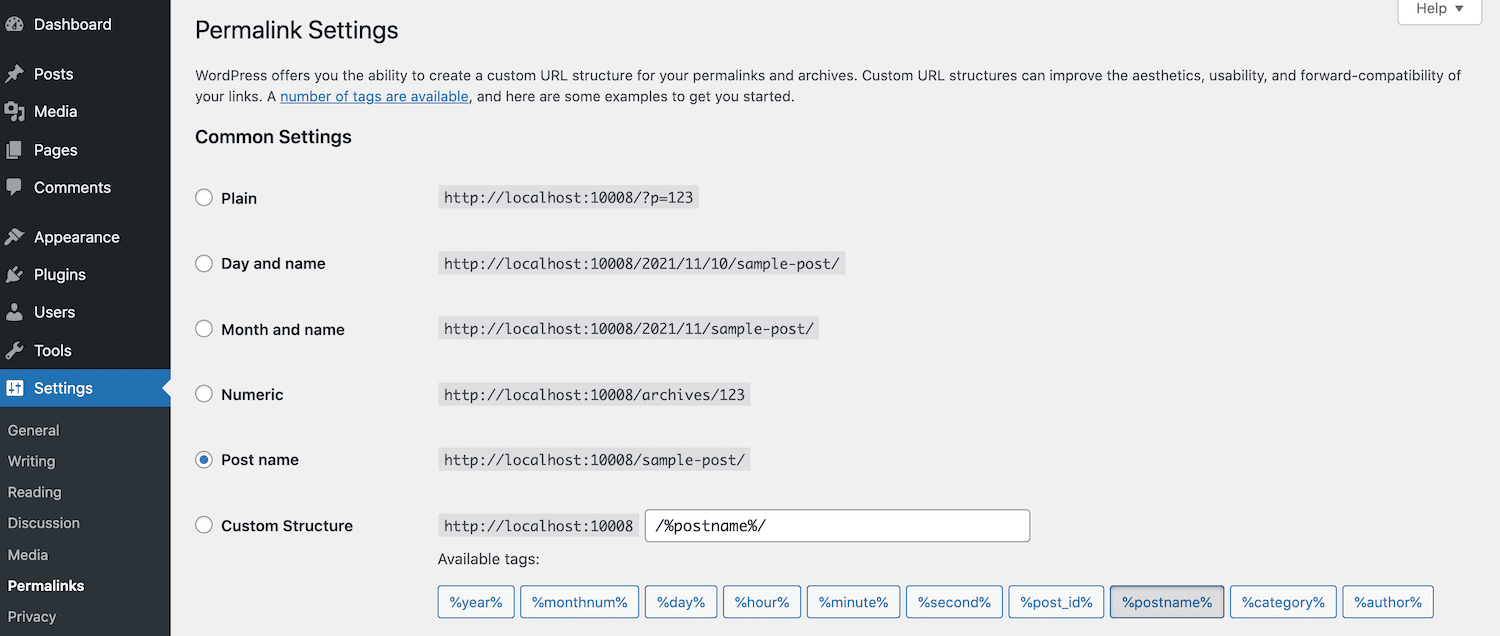

By default, WordPress uses the Plain structure. It includes an ID-based slug, such as mywebsite.com/?p=123. However, this structure doesn’t tell the search engines or visitors anything useful about the page, which is bad news for SEO and the user experience.
For this reason, we recommend switching to the Post name permalink structure. It will generate a URL slug based on the page or post’s title. This setup is much better for visitors and can provide an SEO boost.
To change your permalink structure, select the Post name button. Then, click on Save Changes.
Step 8: Repoint Your Domain
Every domain points to at least two nameservers. Depending on how your site is set up, you may need to connect your domain name to your host’s server. This process is known as repointing your domain.
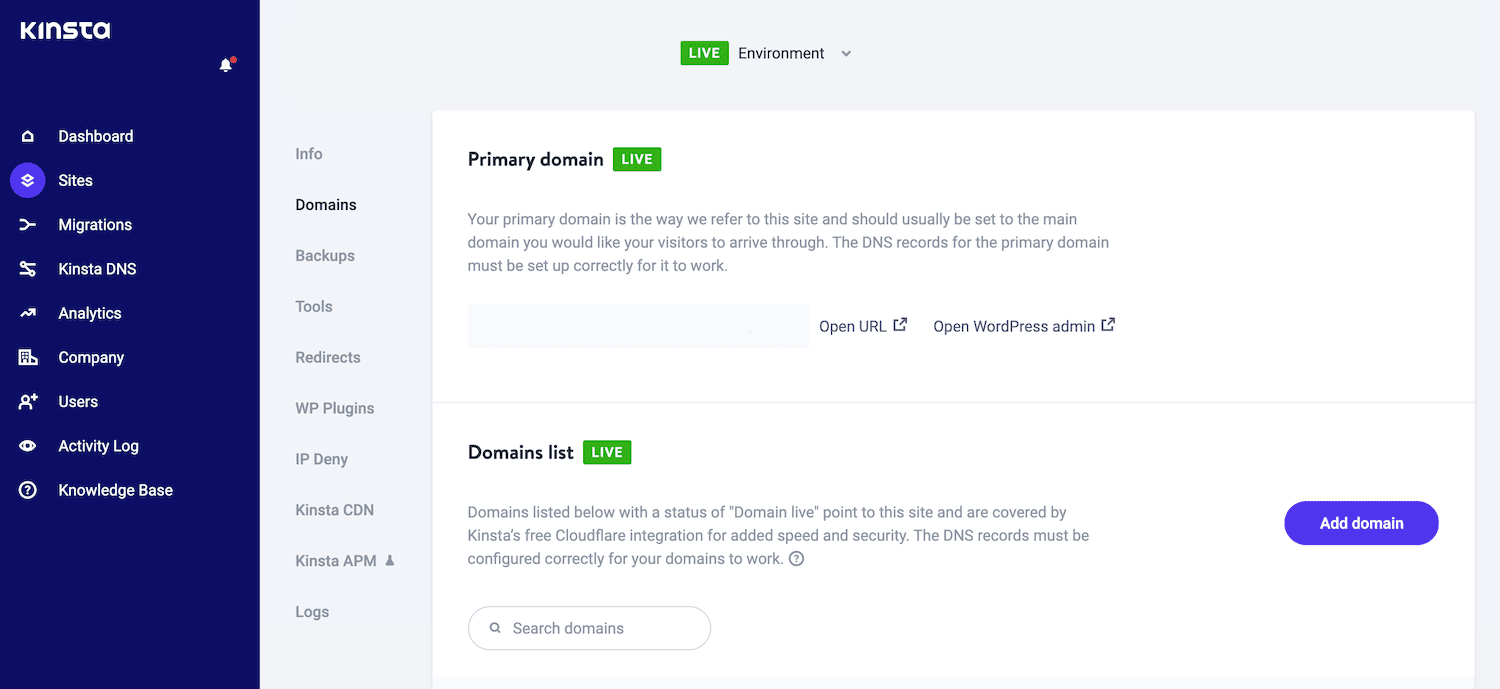
Kinsta customers can repoint their domains from the MyKinsta dashboard. In the left-hand menu, select Sites followed by the name of your website. Then, click on Domains:

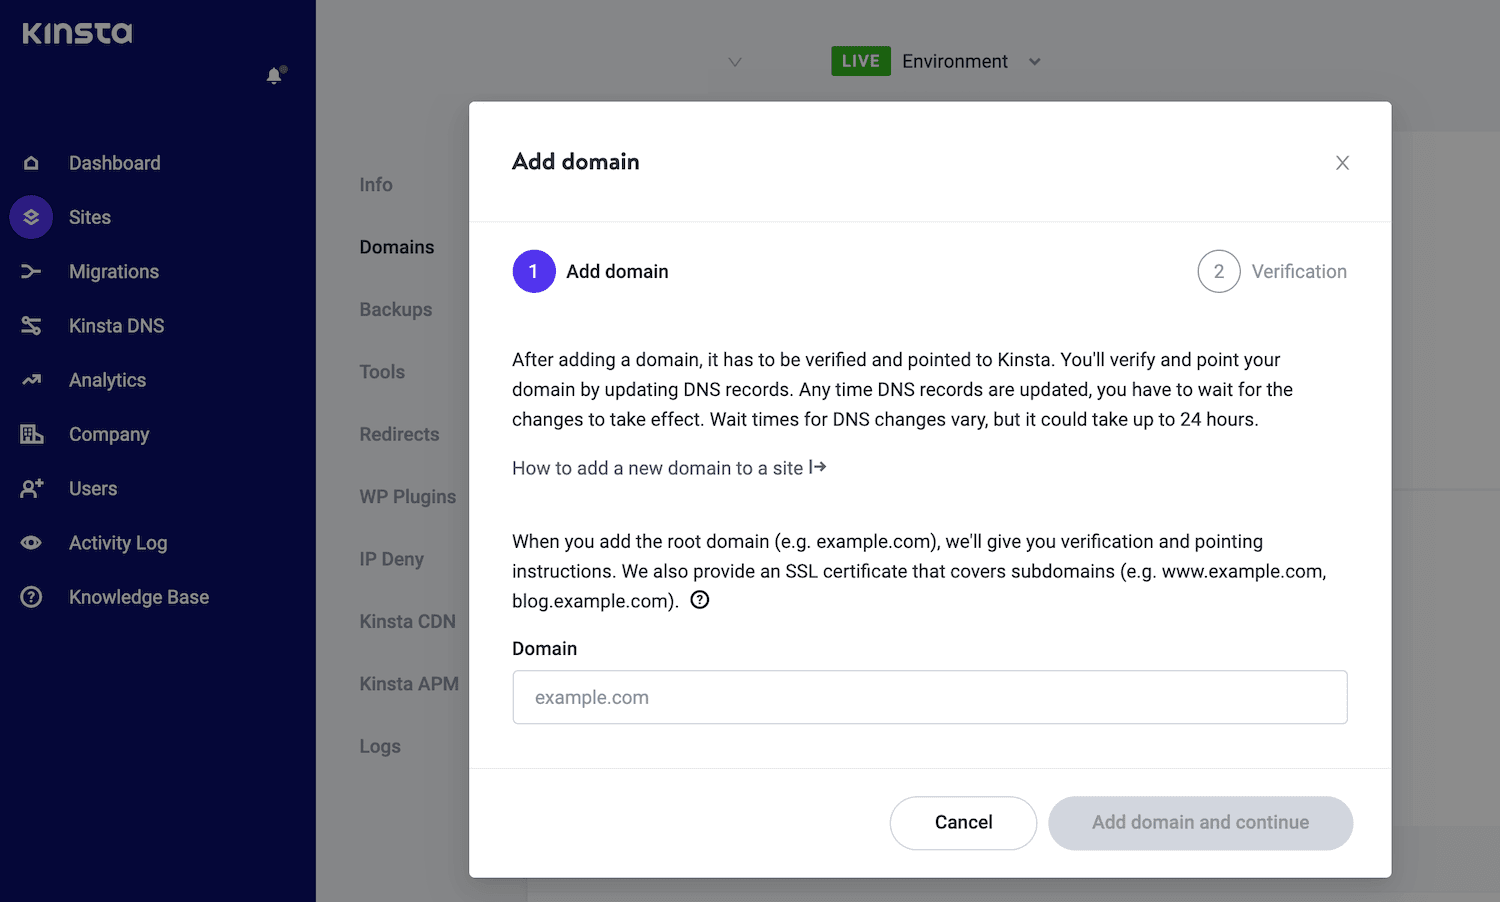
Next, click on Add Domain. In the subsequent popup, enter your domain and select Add Domain and continue:

You’ll now need to verify that you own this domain. You’ll add two TXT records to your domain’s DNS to achieve this.
Your DNS provider is where your domain’s nameservers point to. It may be your domain’s registrar or another DNS provider. If you’re using Kinsta DNS, we automatically add these TXT records for domain verification.
In your DNS provider’s management panel, add a new TXT record. For the first TXT record, use _cf-custom-hostname for the Hostname field and your unique UUID value for the Content/Text field.
For the second TXT record, use @ in the Hostname field. For the Content/Textfield, use your unique UUID value.
After adding these TXT records to your DNS provider, switch back to your MyKinsta tab. Then, click on OK, I’ve Done It in the Verify domain modal window.
Depending on your provider, the TXT records may take up to 24 hours to propagate. Once you’ve successfully verified your domain, switch back to your hosting provider’s dashboard. In MyKinsta, click on the Point Domain button, which appears alongside your custom domain.
As part of this process, you may need to point your root and www domain to MyKinsta. To ensure you’re not missing out on any traffic, you can also add support for wildcard domains.
Step 9: Become a WordPress Expert
WordPress is designed to be an intuitive and user-friendly platform. However, when it comes to mastering new technology, you may benefit from expert advice.
Fortunately, there’s no shortage of resources that can help you get to grips with the WordPress fundamentals and beyond. To start, the official WordPress Codex has an in-depth Learn To Use WordPress section. It can be invaluable for first-time WordPress users:

There are also some quality WordPress courses. These courses have a lot of information to help you get up to speed with your new platform.
Alternatively, if you prefer a more hands-on approach, you may want to try out our free DevKinsta tool:
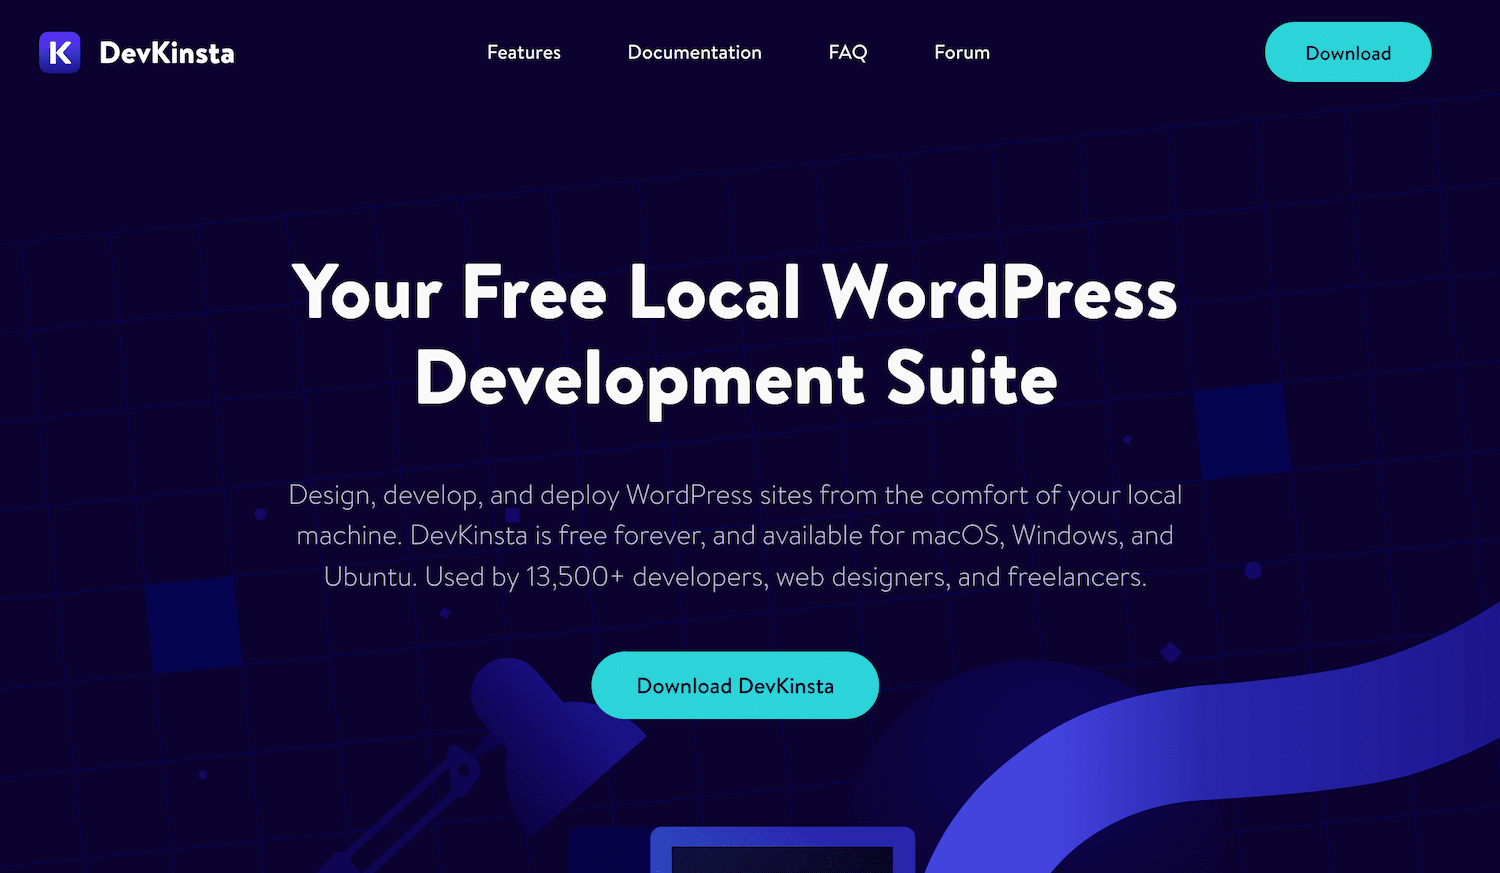

You can use this tool to quickly and easily create a local WordPress installation. This setup is perfect for experimenting with the platform in a private, secure environment without affecting your live site.
Want to make moving your site from Joomla 
Summary
Moving from one Content Management System (CMS) to another can be a daunting prospect. Fortunately, with the right tools, you can migrate from Joomla to WordPress without having to start from scratch.
When you’re planning a move, a good migration plugin such as FG Joomla to WordPress is essential. We also recommend opting for a managed WordPress provider such as Kinsta. With the right host, installing and configuring the WordPress software can feel like a breeze, which is one less thing to worry about!
Do you have any questions about how to migrate your website from Joomla to WordPress? Let us know in the comments section below!
The post How to Migrate Your Website From Joomla to WordPress (in 9 Steps) appeared first on Kinsta®.