

Search Engine Optimization (SEO) techniques are essential for increasing your online store’s visibility. By using WooCommerce product tags, you can assign specific traits to your items and make them more searchable for customers. Furthermore, the Products by Tag WooCommerce block can create a grid of these similar items and enable consumers to browse them easily.
In this article, we’ll explore the Products by Tag block, and explain how you can use and configure it. Then we’ll discuss some best practices for using this element and answer any lingering questions you might have.
Let’s get started!
How to Add the Products by Tag WooCommerce Block to Your Post or Page
Before adding this block to your posts and pages, you’ll need to ensure that you’re using tags in your WooCommerce store. If you don’t yet have any, you can create them by navigating to Products > Tags in your WordPress dashboard.
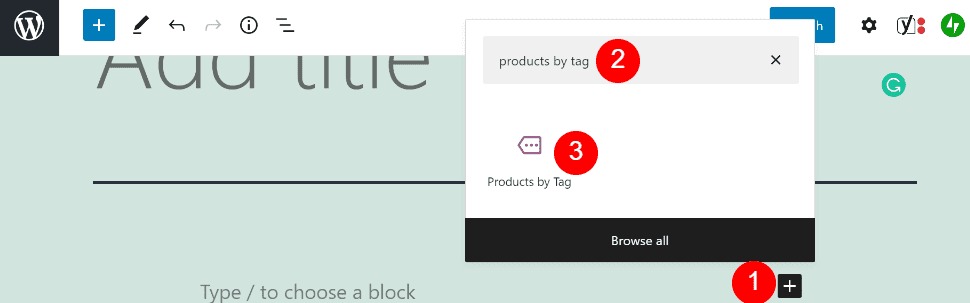
Once you’re happy with your tags, navigate to the post or page where you want to use this WooCommerce element. To start, click on the + button (1), type “products by tag” into the search bar (2), and select the block (3):

Alternatively, you can type “/products by tag” into a Paragraph block and hit your Enter key. This method will also insert the element into your post or page.
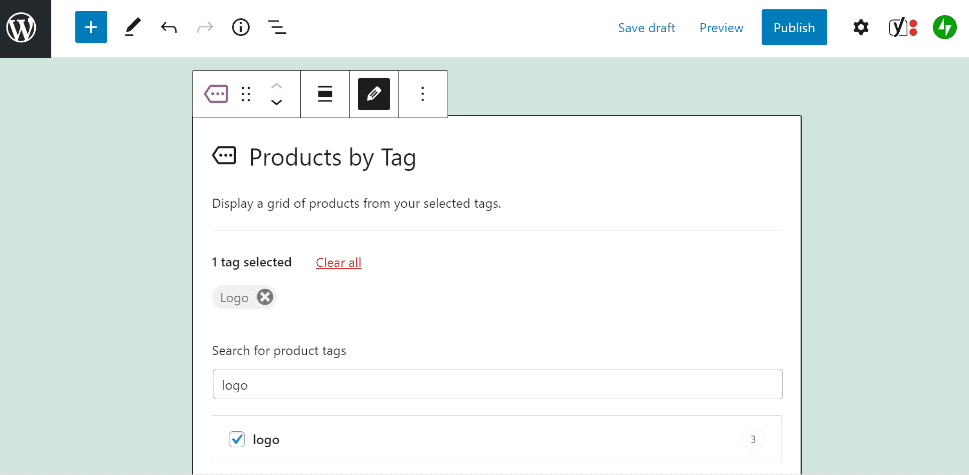
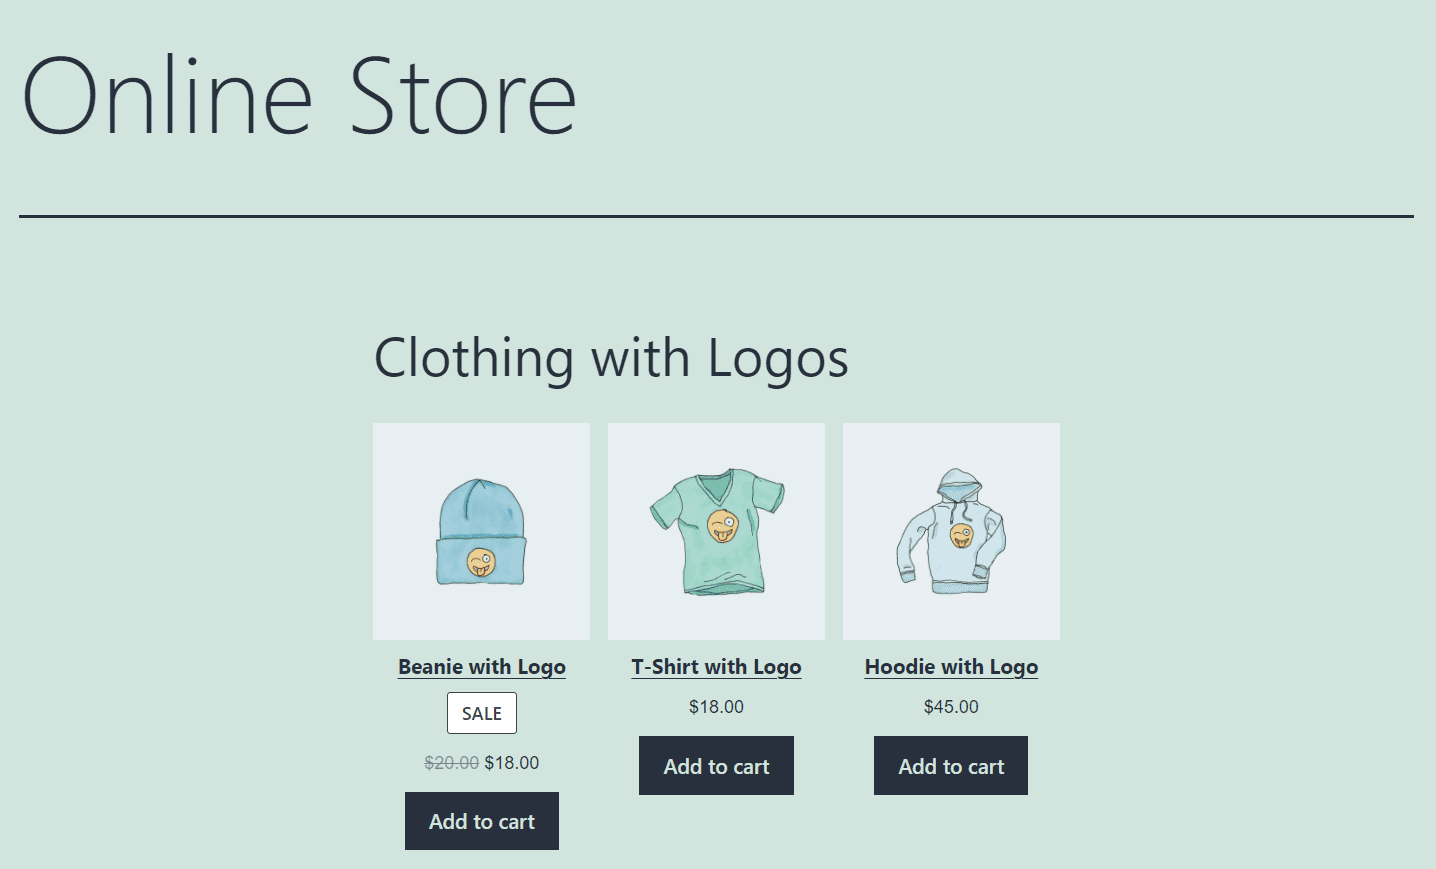
Next, choose your tag from the list of options that appears. In this tutorial, we will be working with the “logo” tag:

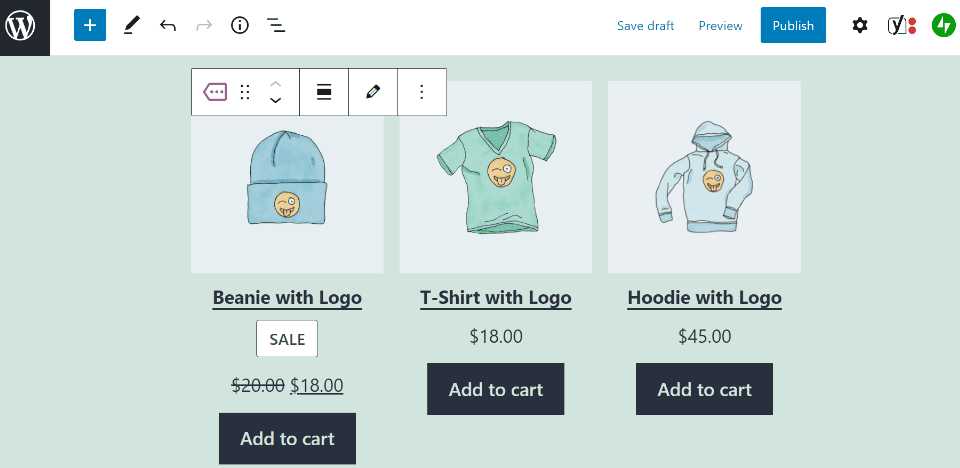
Click on Done, and the block will create a grid with the items that carry your chosen tag:

As you can see, inserting this block is straightforward. However, you might want to adjust its settings to control how it displays in your WooCommerce store. We’ll take a look at the different configuration options that are available in the next section.
Products by Tag WooCommerce Block Settings and Options
The first thing you’ll want to do is check out the settings menu that sits at the top of the Products by Tag block. It has various icons that control different options:
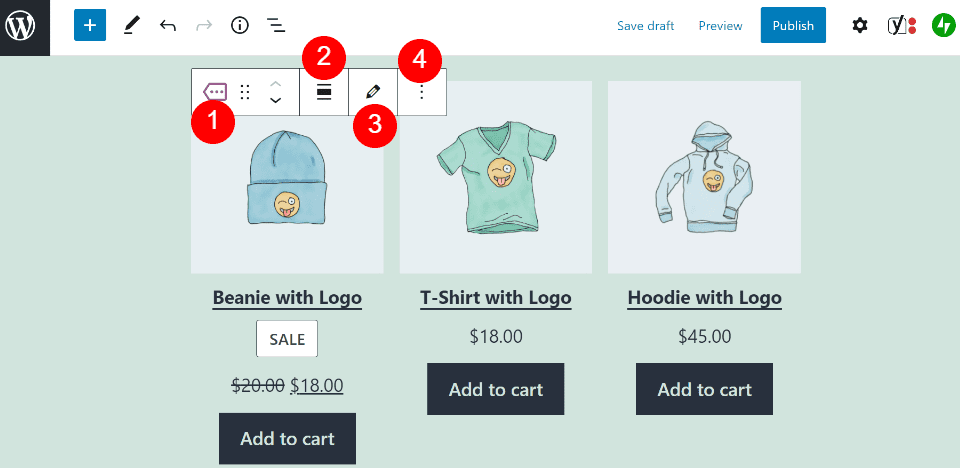
Here is a quick overview of each of the settings on offer:
- Change block type or style: You can transform the element into a Columns or Group block.
- Change alignment: This setting applies a wide or full width design to the block.
- Edit: Here, you can edit your chosen tag.
- Options: This menu enables you to copy, duplicate, or add the element to your Reusable Blocks.
You can access a second settings menu by clicking on the block and then the gear icon in the top-right corner of the editing screen. You’ll then see a short list of configuration options:
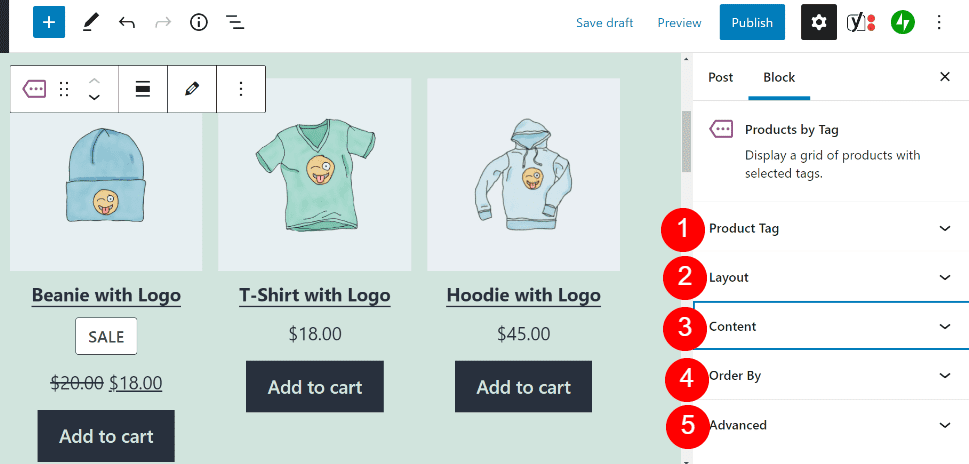

Let’s look at each one in detail:
- Product Tag: Here, you can change or add product tags to the block.
- Layout: This setting controls how many columns and rows make up the product grid.
- Content: This setting enables you to display different product data, such as titles, prices, ratings, and Add to cart buttons.
- Order By: Here, you can order the products by newness, rating, price, or sales.
- Advanced: You can enter custom CSS into this box to change the style of the block.
Once you’re happy with the settings, click on Save Changes or Publish to make the block live. Your customers can now browse products according to their tags!
Tips and Best Practices for Using the Products by Tag WooCommerce Block
There are some tips you might want to consider when using the Products by Tag WooCommerce block. First, we recommend pairing this element with a Heading block. Otherwise, your customers might not understand why your items are grouped in this particular grid:

Furthermore, you might consider removing product reviews from your displayed items. Customer reviews can boost your brand’s trustworthiness. However, if your items lack consumer feedback, there’s little point in showing this empty field.
Moreover, we recommend carefully considering which tags you apply to your products. These classifications enable you to use keywords that can boost your store’s visibility in search engines. Therefore, you might want to conduct keyword research before choosing your tags.
Finally, we recommend only using one tag per block. You can select multiple classifications when inserting the element. However, this overload of information could be overwhelming for your customers, and prevent them from finding their desired products.
Frequently Asked Questions About the Products by Tag WooCommerce Block
By now, you should feel relatively comfortable using the Products by Tag element. However, this section should answer any questions you might still have about this WooCommerce block.
Can I Add New Tags With the Products by Tag Block?
Unfortunately, you can’t add new tags while using this block. You’re limited to the taxonomies that you already use in your WooCommerce store.
Instead, you’ll first need to navigate to Products > Tags in your WordPress dashboard and create a tag. Then you can assign it to specific products in your inventory.
What Is the Difference Between the Products by Tag and Products by Category Blocks?
Categories and tags are similar taxonomies in WooCommerce. However, they have subtle differences.
Categories are the primary classifications for products. For example, you might have “t-shirt” and “jeans” categories, which are assigned to different clothing items. The Products by Category block can group items according to these broad characteristics.
In contrast, tags denote smaller classifications that help consumers filter your products. For instance, you might use “logo” to show clothing items that carry your store’s branding.
What Is the Difference Between the Products by Tag and Products by Attribute Blocks?
Attributes are different classifications that you can apply to WooCommerce products. They describe particular features of your items, such as colors, sizes, and brands.
As such, the Products by Attribute block enables customers to browse your inventory for items that meet those specific needs. This element works similarly to the Products by Tag block, but it simply uses data from a different classification system.
Conclusion
When you have a large WooCommerce store, you likely stock many types of items. To make them more searchable for your customers, you can separate your products into groups and organize them using tags. Even better, these tags can boost your SEO efforts.
As we’ve seen, the Products by Tag WooCommerce block makes it easy to organize your store’s items according to their tags. This element displays the products in a user-friendly grid, so customers can easily browse your offerings. Fortunately, this block is also very simple to customize to meet your store’s needs.
Do you have any questions about using the Products by Tag WooCommerce block? Let us know in the comments section below!
Featured image via xalex / shutterstock.com
The post How to Use the Products by Tag WooCommerce Block appeared first on Elegant Themes Blog.