

On virtually each web site you go to, parts pop up and keep on with the web page. Cookie warnings and opt-ins, e mail signups, and chat packing containers. All of us are inclined to ignore them in some unspecified time in the future, turning into blind to regardless of the web site is making an attempt to inform us. We simply click on the X with out studying. However that doesn’t imply these kinds of parts can’t be helpful nor have a spot. With Divi, you’ll be able to simply create a floating about card that provides worth to your web site, unobtrusively explaining who you might be and what your model does. Let’s see how straightforward it’s.
Preview
Desktop

Cell

1. Create a Web page Template
The very first thing you wish to do is determine what pages you wish to embrace this floating about card. You may want it on each web page of your web site, otherwise you would possibly solely need it on particular touchdown pages. Both approach, you need to use the Divi Theme Builder to set it up. Both as a world template or a template that applies to solely sure pages.
Use the Theme Builder to Create the Template
To start out, go to Divi – Theme Builder in your WordPress dashboard. Select the Customized Physique part of the pages to which you wish to apply the floating about card or the World Physique to use it all over the place.


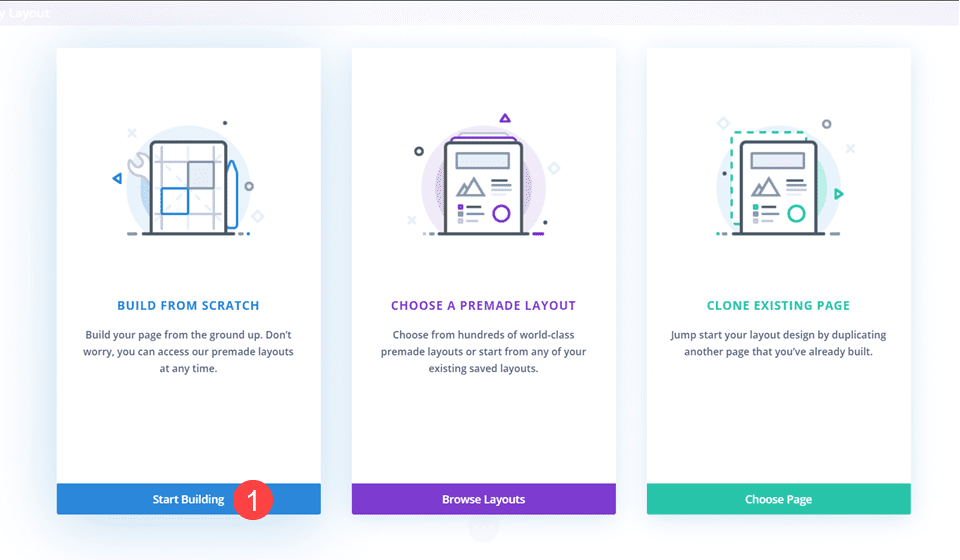
When you’ve loaded the Divi Visible Builder, select Begin from Scratch when given the selection.

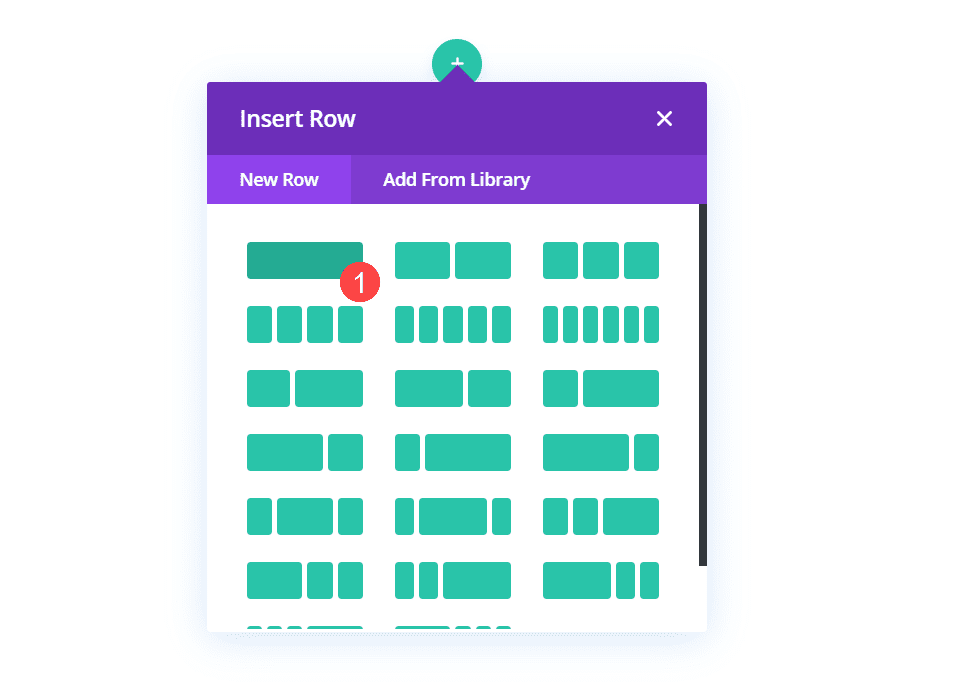
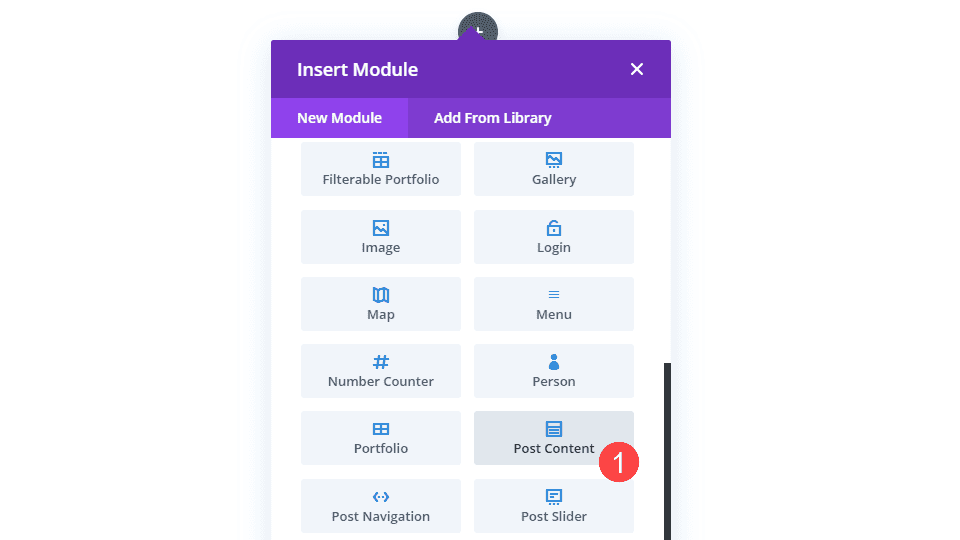
Add a 1-Column Row and Submit Content material Module
After which select a single-column row when prompted.

Subsequent, you wish to select the Submit Content material module. That is an instance of our dynamic content material function. The module shows the accompanying design constructed contained in the Divi web page itself, that means that this module will present completely different content material for various pages with this template. For weblog posts, it will likely be the weblog content material. For store pages, it will likely be the merchandise. And for particular person pages, the customized content material you’ve made utilizing Divi.

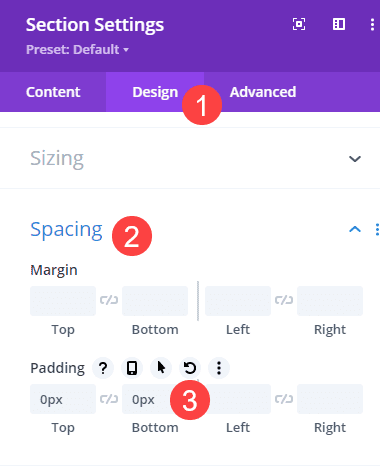
Alter Part and Row Spacing
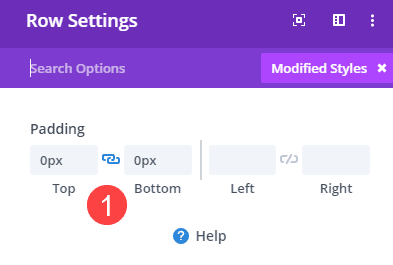
With these in place, we have to make a pair spacing changes. Go into the Part settings (blue border within the Divi builder) and take away all high and backside padding. You do that beneath the Design tab, the Spacing heading, after which setting 0px to Prime and Backside beneath Padding.

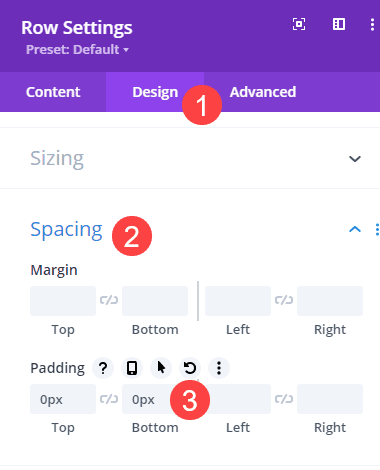
Save your modifications and enter the Row settings. Once more, set the Prime and Backside Padding to 0px.
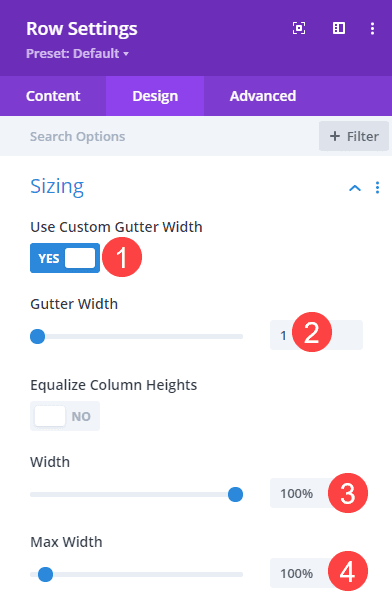
Subsequent, discover the Sizing heading and toggle Use Customized Gutter Width on and set its worth to 1. Subsequent, set Width and Max Width to 100%.

With the prep finished, let’s get into making the floating about card!
2. Add Floating Card
Add a New Part and Row
First, it would be best to add a brand new part. Do that by scrolling to the underside of the web page and clicking the blue + circle and selecting Common when prompted for the kind of part.
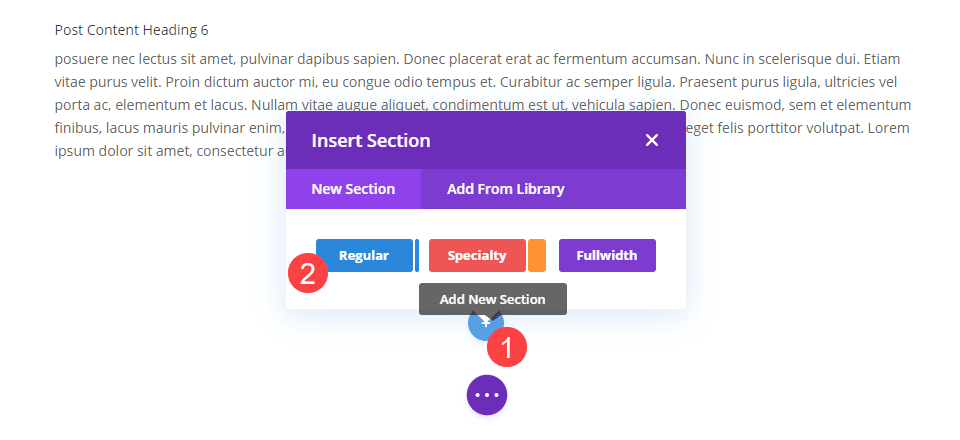

Add a Blurb Module
This would be the part that’s devoted to the floating card. Inside, we wish to add one other single-column row. And inside that, we wish to use a Blurb module for the floating card itself. The Divi Blurb module is likely to be essentially the most versatile module within the builder, so we wish to benefit from what it affords for this function.

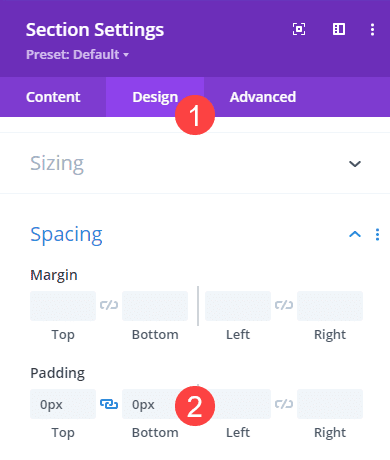
Alter Part and Row Settings
With that in place, we have to regulate the padding and positioning of this row and part. So first, go into the Part settings and set the Prime and Backside Padding to 0px beneath Show – Spacing.

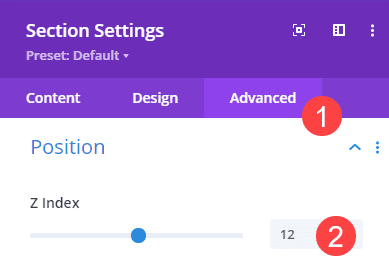
Then, beneath the Superior tab, discover the Place heading. Set the Z Index to 12. The upper the quantity, the additional “front” the part and its contents will sit. And because it’s a floating card, we would like it to drift on high of all the opposite parts.

Lastly, go into the Row settings and set its padding on Prime and Backside to 0px as soon as extra.

The Blurb Module Content material
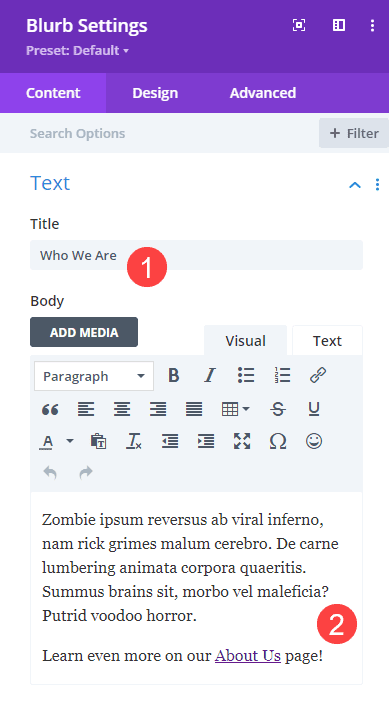
Now it’s time for us to model the cardboard itself. Enter the Settings for the Blurb module. Because it’s a component that describes what you are promoting, it would be best to have a quick point out of what your organization or model does. As a result of that is an instance publish, we crammed it with some zombie-flavored lorem ipsum. You may set the title and physique content material beneath the Content material tab.

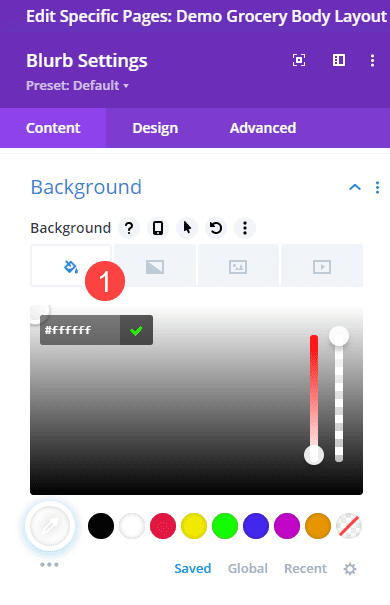
Set the Background Shade
You clearly need the floating card to visually match your web site, so selecting the best background coloration issues so much. We’re going with #ffffff (white). The Content material tab homes this, too, and you can see it beneath Background heading and the Paint Can.

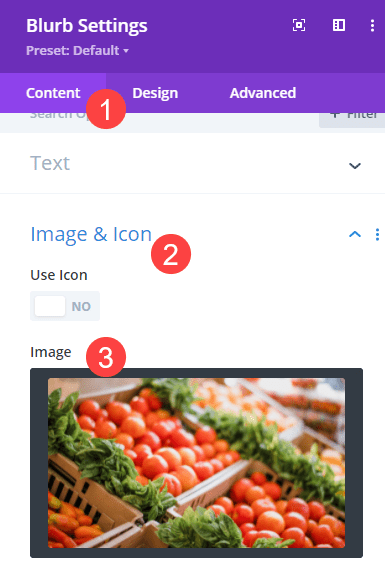
Select a Card Picture
The Blurb module provides you the choice to incorporate a picture or an icon for the module, and we would like a picture that represents our firm. Once more, beneath the Content material tab, discover Picture and Icon and easily add the picture that works in your module.

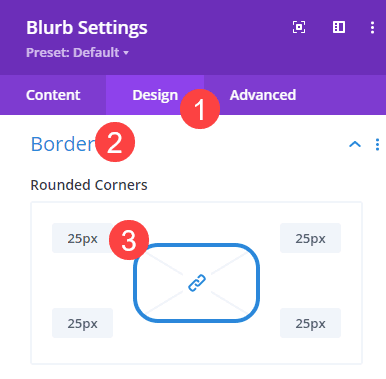
Form the Card Corners
Subsequent, go into the Design tab and into the Border heading. Discover the Rounded Corners choices and set every nook at 25px. This may easy out the sharp, squared edges with out altering the form of the general card.

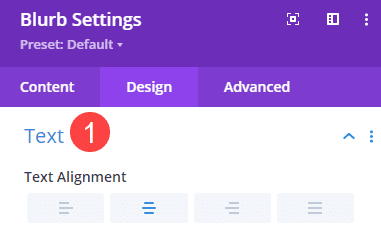
Textual content Alignment
Beneath the Textual content heading, set the Textual content Alignment to heart.

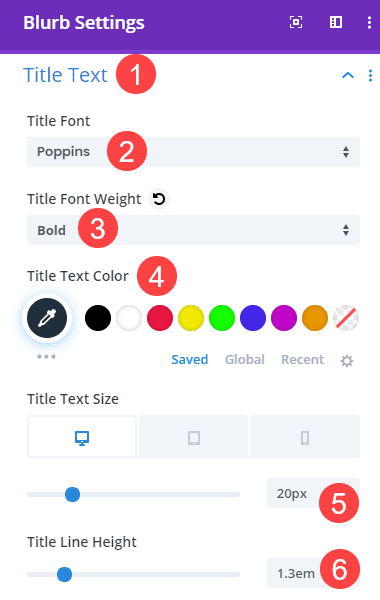
Fashion the Floating Card’s Title Textual content
The title textual content that you simply set earlier defaults to H4. To model it, go into the Title Textual content heading, select the H4 tab, and alter the next Title choices:
- Font: Poppins
- Font Weight: Daring
- Textual content Shade: #22303f
- Textual content Measurement: 20px
- Line Top: 1.3em

Then, we have to go into the Responsiveness settings and alter the scale of the title for cell gadgets. Change the Title Textual content Measurement to 14px.
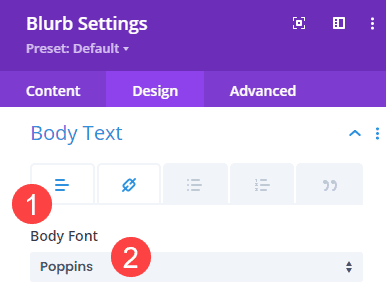
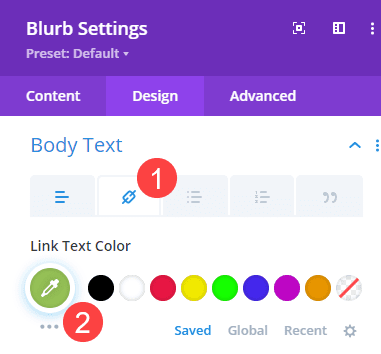
Fashion the Card’s Textual content
Subsequent, navigate to Physique Textual content and alter the Physique Font to Poppins to match the title font.

Then click on on the Hyperlink tab (chain icon) and swap the Hyperlink Textual content Shade to a complimentary coloration in your web site. We selected #97c357.

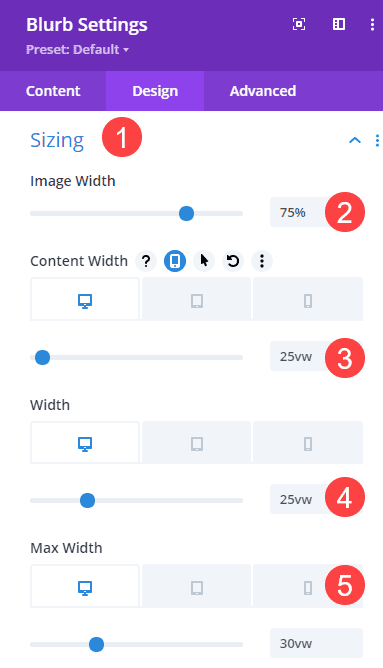
Sizing the About Card
Beneath the Sizing heading, add the next values to those settings:
- Picture Width: 75%
- Content material Width: 25vw
- Width: 25vw
- Max Width: 30vw

Beneath the responsiveness settings, regulate the next values:
- Content material Width: 90vw
- Width: 90vw
- Max Width: 95vw
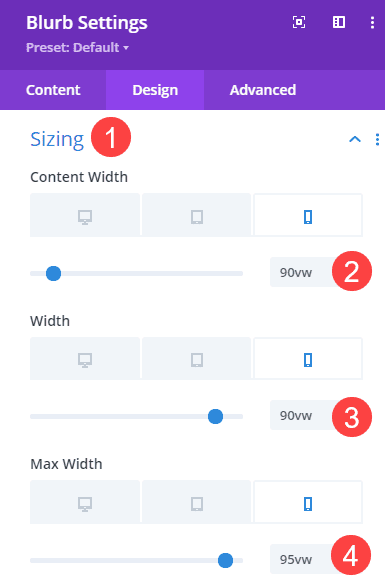

These values will be sure the cardboard takes up your complete width of the display on cell gadgets as a result of a floating card within the nook is often inconceivable to learn.
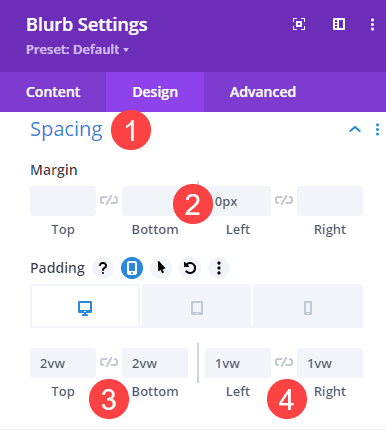
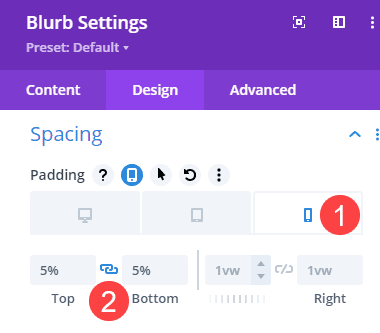
Spacing for the Blurb
The Spacing heading is a fast repair, the place you should set the Left Margin to 0px, the Prime and Backside Padding to 2vw, and the Left and Proper Padding to 1vw.

For responsive settings, solely the Prime and Backside Padding will change. We are going to set these at 5%.

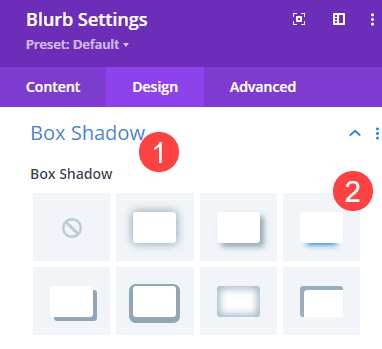
Add Field Shadow
As a result of the floating about card goes to remain fastened in its location, we would like it to look as if it’s truly floating above your content material. This impact is easy sufficient by including a fundamental field shadow to the module. This selection could be discovered beneath Field Shadow, and we selected the essential backside shadow.

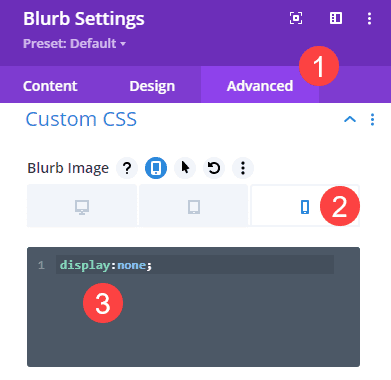
Adjusting Responsive CSS
Now could be the enjoyable half. We’re transferring into the Superior tab the place we are going to make the floating card affix itself to the web page. To do that, our first step is to show off the picture we added for desktop. Pictures within the Blurb module can actually have an effect on measurement and value on cell, plus it’s one thing else for the web page to load.
So we wish to add show:none; beneath the mobile-only Blurb Picture subject beneath Customized CSS.

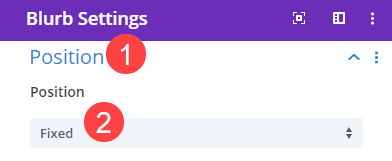
Repair and Float the Card with Place Setting
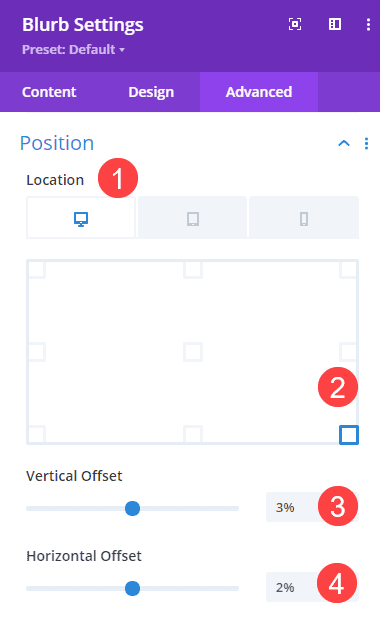
Lastly, we’re going to place the cardboard the place we would like it to drift. First, we wish to head to the Superior tab and scroll to Place. Choose Mounted from the dropdown menu.

Subsequent, discover the Location choices. That is the purpose on the display the place the floating card will keep. For desktop, we would like it to be within the decrease nook of the display. So we click on the sq. that correlates with that. We additionally need it to be barely offset from the window border, so we are going to change the Vertical Offset to 3% and Horizontal Offset to 2%.

Subsequent, we wish to create a special location and offset for cell. Above, we set the width of the cardboard to stretch your complete width of the display. With that in thoughts, we are going to change the Mounted Location to the bottom-center so the cardboard will simply float on the backside of the display always.
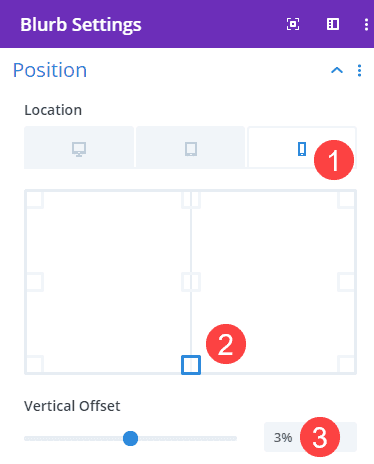

Moreover, we’re solely going to alter the Vertical Offset for cell. Set this worth to 3%. There isn’t a want for horizontal offset as a result of it’s the width of the cell display and centered.
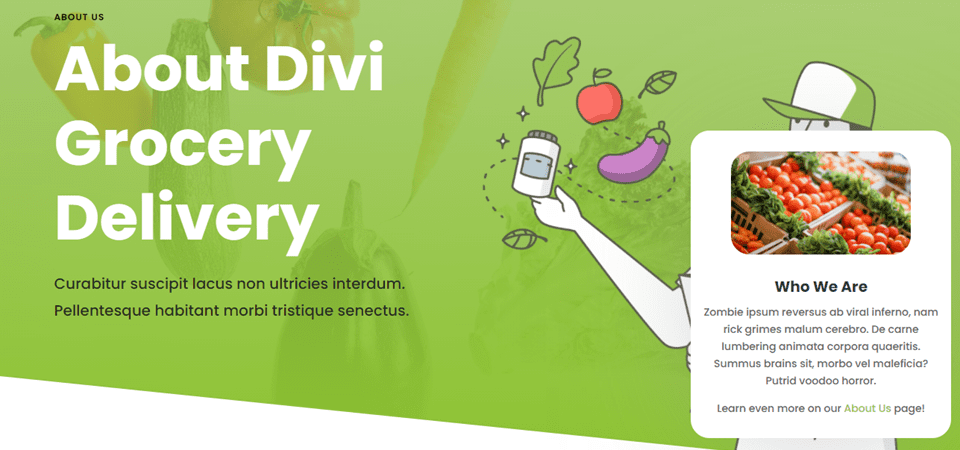
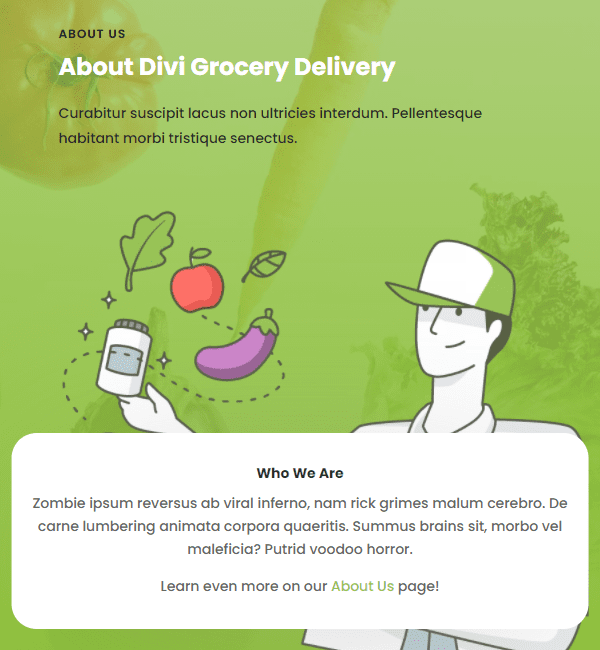
Last Outcomes
When all the things is ready correctly and adjusted in your private web site, the ultimate product ought to look just like this.
Desktop
Cell
Conclusion
With Divi’s highly effective choices and intuitive interface, you’ll be able to design and affix a floating about card in your web site very quickly. By letting your customers know who they’re coping with from the start, you’re certain to garner some model loyalty.
What have you ever used floating playing cards for in your web sites? Tell us within the feedback!
The publish Methods to Add a Floating About Card to Your Divi Web site appeared first on Elegant Themes Weblog.