

Including a sticky footer disclose to your web site can convey that additional little contact you have been seeking to give to the footer of your web site. The footer reveal impact opens and closes the visibility of the footer as you scroll to and from the underside of the web page (unveiling the footer like a shutter on a window). Normally, this impact requires customized CSS that’s limiting and laborious to work with. However with Divi’s theme builder choices, you’ll be able to simply add a footer reveal impact to any customized footer design constructed with Divi’s built-in choices.
In at this time’s Divi tutorial, we’re going to indicate you learn how to create a sticky footer reveal in Divi. All it takes is a number of simple steps.
Let’s get began!
Sneak Peek
Here’s a fast have a look at the sticky footer reveal design we’ll construct on this tutorial.
Obtain the International Footer Template with the Sticky Footer Reveal for FREE
To put your arms on the template from this tutorial, you’ll first have to obtain it utilizing the button beneath. To realize entry to the obtain you will want to subscribe to our Divi Day by day e mail checklist through the use of the shape beneath. As a brand new subscriber, you’ll obtain much more Divi goodness and a free Divi Format pack each Monday! If you happen to’re already on the checklist, merely enter your e mail handle beneath and click on obtain. You’ll not be “resubscribed” or obtain additional emails.
@media solely display screen and ( max-width: 767px ) {.et_bloom .et_bloom_optin_1 .carrot_edge.et_bloom_form_right .et_bloom_form_content:earlier than { border-top-color: #ffffff !vital; border-left-color: clear !vital; }.et_bloom .et_bloom_optin_1 .carrot_edge.et_bloom_form_left .et_bloom_form_content:after { border-bottom-color: #ffffff !vital; border-left-color: clear !vital; }
}.et_bloom .et_bloom_optin_1 .et_bloom_form_content button { background-color: #f92c8b !vital; } .et_bloom .et_bloom_optin_1 .et_bloom_form_content .et_bloom_fields i { colour: #f92c8b !vital; } .et_bloom .et_bloom_optin_1 .et_bloom_form_content .et_bloom_custom_field_radio i:earlier than { background: #f92c8b !vital; } .et_bloom .et_bloom_optin_1 .et_bloom_border_solid { border-color: #f7f9fb !vital } .et_bloom .et_bloom_optin_1 .et_bloom_form_content button { background-color: #f92c8b !vital; } .et_bloom .et_bloom_optin_1 .et_bloom_form_container h2, .et_bloom .et_bloom_optin_1 .et_bloom_form_container h2 span, .et_bloom .et_bloom_optin_1 .et_bloom_form_container h2 robust { font-family: “Open Sans”, Helvetica, Arial, Lucida, sans-serif; }.et_bloom .et_bloom_optin_1 .et_bloom_form_container p, .et_bloom .et_bloom_optin_1 .et_bloom_form_container p span, .et_bloom .et_bloom_optin_1 .et_bloom_form_container p robust, .et_bloom .et_bloom_optin_1 .et_bloom_form_container type enter, .et_bloom .et_bloom_optin_1 .et_bloom_form_container type button span { font-family: “Open Sans”, Helvetica, Arial, Lucida, sans-serif; } p.et_bloom_popup_input { padding-bottom: 0 !vital;}


Obtain For Free
Be part of the Divi Publication and we are going to e mail you a duplicate of the last word Divi Touchdown Web page Format Pack, plus tons of different superb and free Divi sources, ideas and methods. Observe alongside and you may be a Divi grasp very quickly. If you’re already subscribed merely sort in your e mail handle beneath and click on obtain to entry the format pack.
You have got efficiently subscribed. Please test your e mail handle to substantiate your subscription and get entry to free weekly Divi format packs!
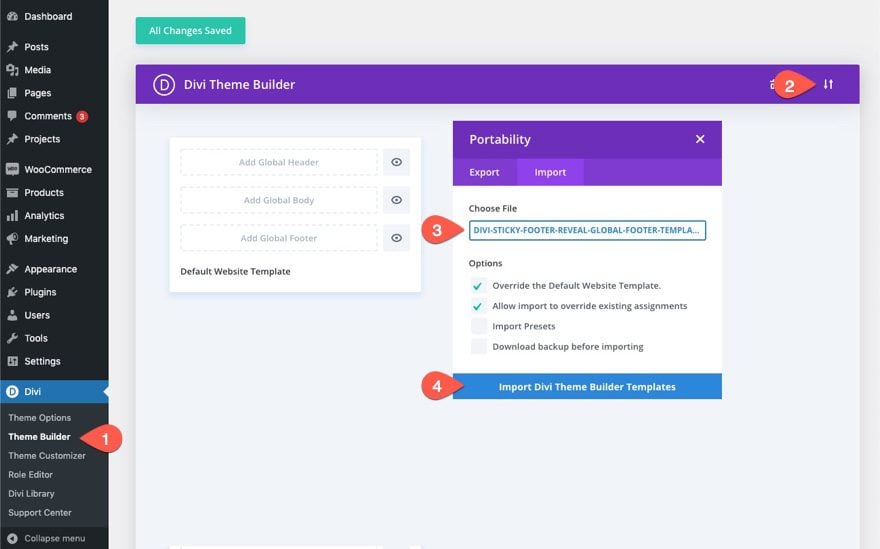
To import the template format to your web site, you will want to go to the Divi Theme Builder and use the portability choice to import the .json file to the theme builder.

Let’s get to the tutorial, lets?
Making a Sticky Footer Reveal with the Divi Theme Builder
Create New Footer Template
Begin by going to the Divi Theme Builder within the backend of your WordPress web site. There, add a brand new international or customized footer.


Construct the Footer Format
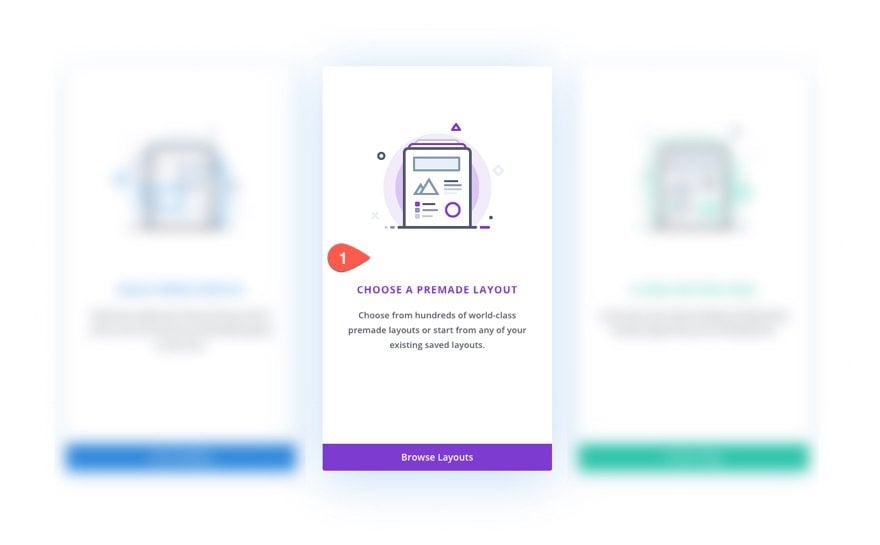
Subsequent, choose the choice “Choose A Premade Layout”. For this tutorial, we’re going to use a premade format to hurry up the design course of. However, you can begin constructing one from scratch in order for you.

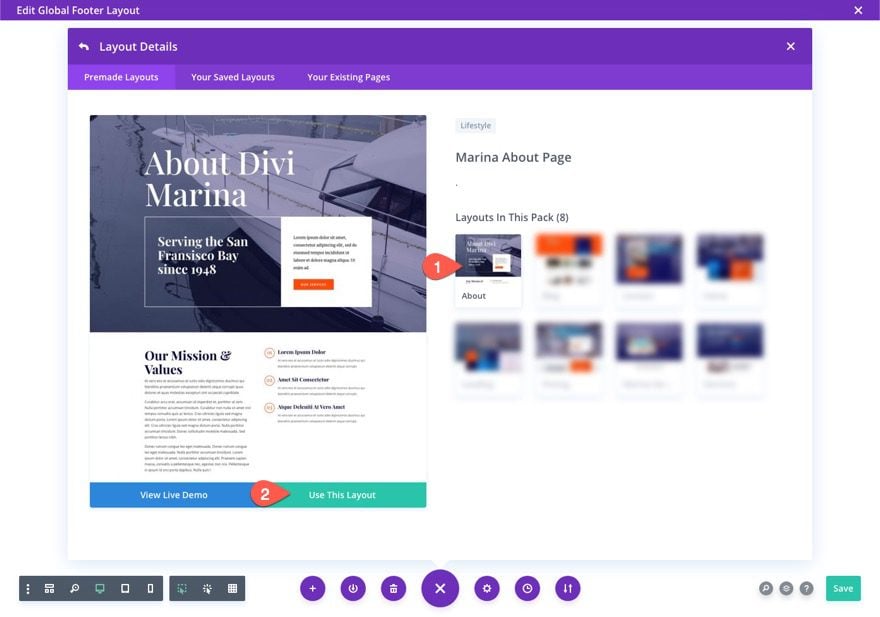
Underneath the Add From Library popup, discover and use the Marina About Web page Format from the Marina Format Pack.

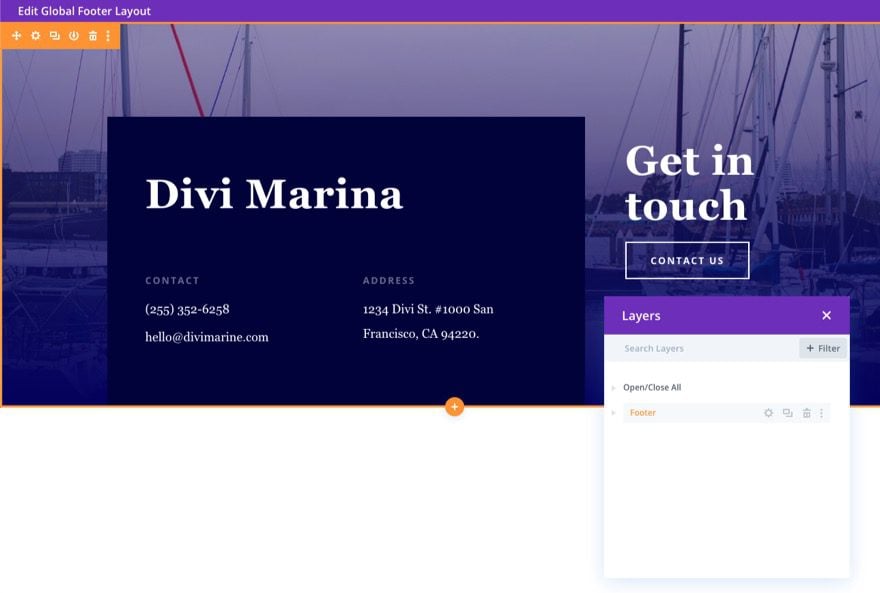
As soon as the format has been loaded, delete all of the sections besides the underside footer part. We are going to use this footer part so as to add the footer reveal impact.

Add the Sticky Footer Reveal Impact to the Footer Part
So as to add the footer reveal impact to the footer part, we might want to do the next.
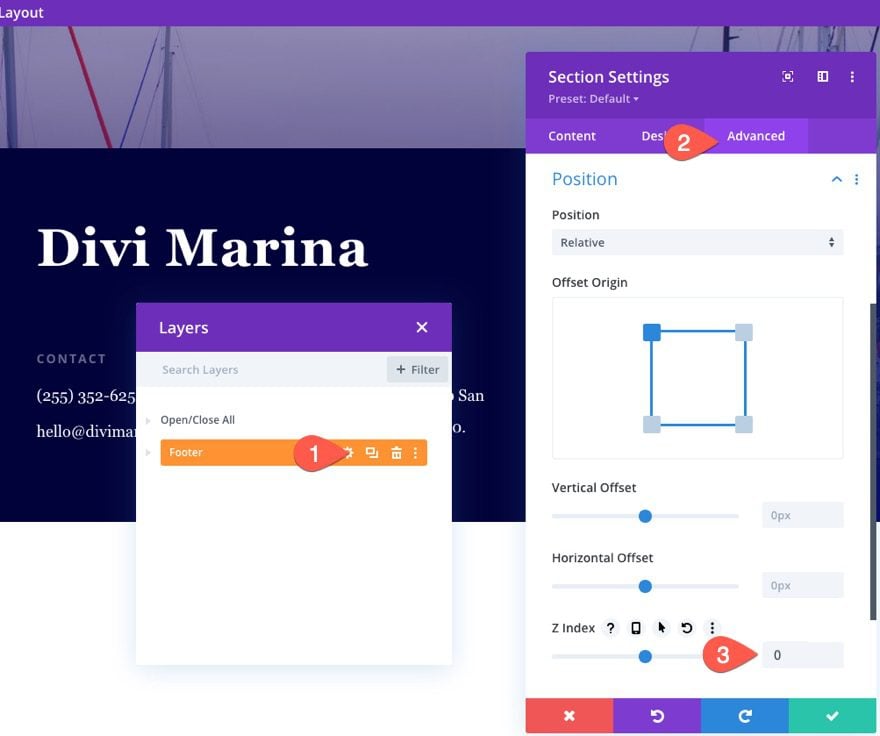
1: Replace Footer Part Z-Index
First, we have to give our footer part a z-index of 0. This may enable the part to sit down behind different sections or parts on the physique of the web page.
Open the settings for the footer part. Underneath the Superior tab, replace the next:
- Z Index: 0

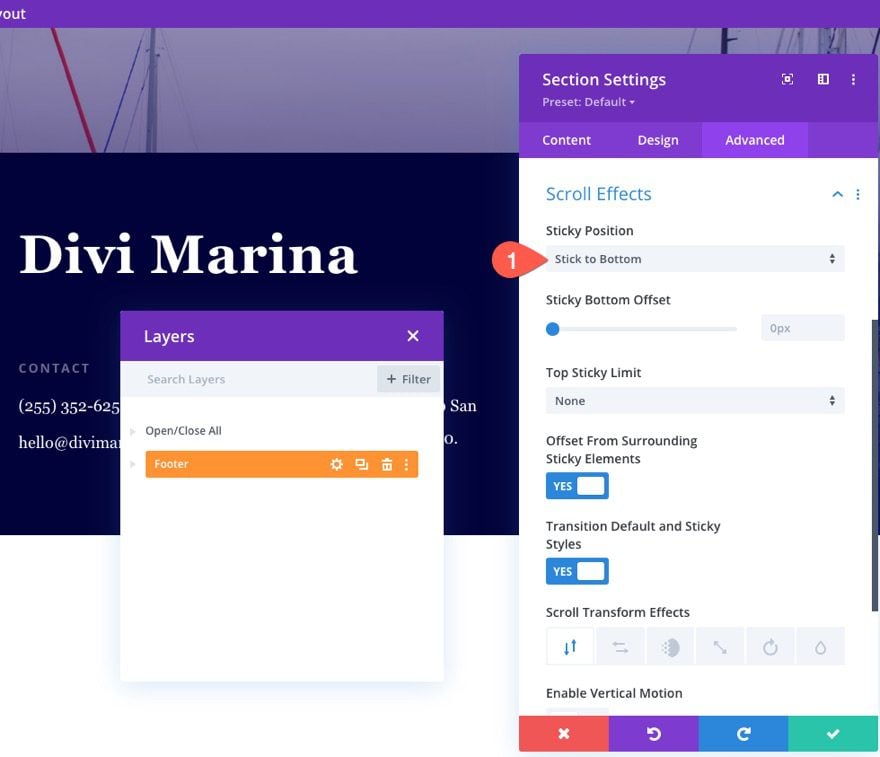
2: Add Sticky Place to Footer Part
Subsequent, we have to give the footer part a sticky place. Underneath Scroll Results, replace the sticky place in order that it sticks to the underside:
- Sticky Place: Follow Backside

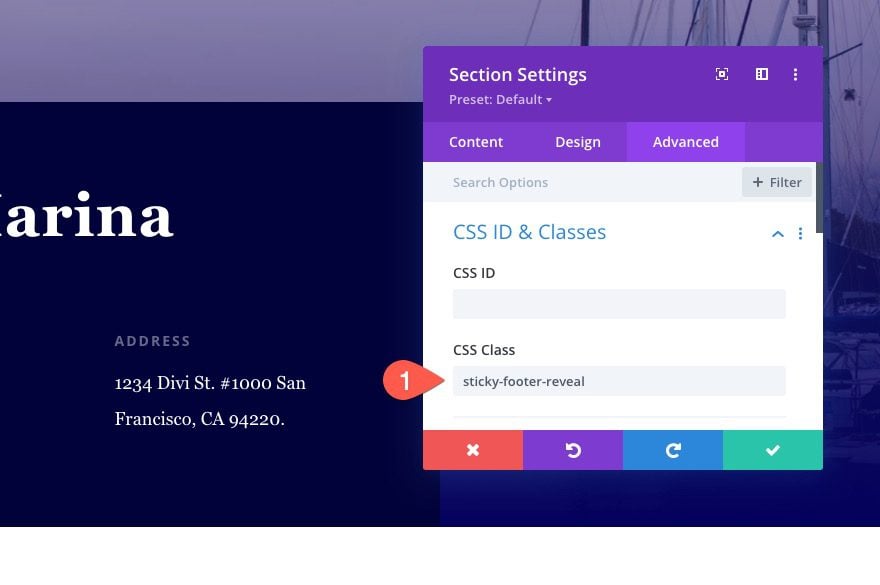
3: Replace Sticky Footer Placeholder Z Index
When a component is given a sticky place in Divi, a replica placeholder ingredient can also be created mechanically behind the scenes. This helps ship the performance wanted for positioning and designing the sticky parts utilizing the Divi Builder. On this occasion, a footer part placeholder is created with a default z-index of 1. We don’t need our precise sticky footer part (now with a Z Index of 0) to sit down behind the placeholder part, so we have to replace the placeholder’s Z Index to -1.
To do that, first add a customized CSS Class to the footer part as follows:
- CSS Class: sticky-footer-reveal

Then open the web page settings of the footer template utilizing the builder settings menu. Within the Footer Template Settings modal, choose the Superior tab and enter the next CSS within the Customized CSS field:
.sticky-footer-reveal.et_pb_sticky_placeholder {
z-index:-1;
}
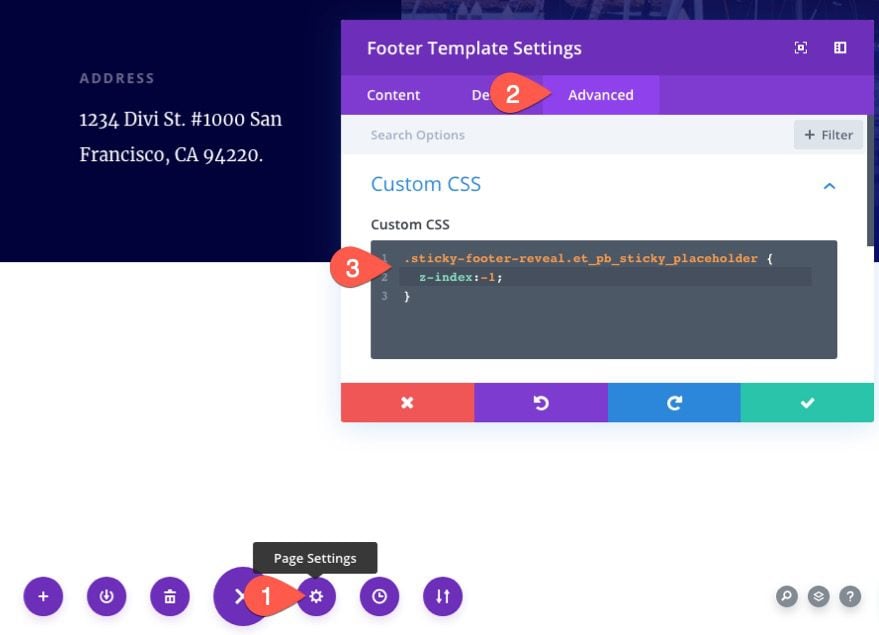

This may drive the placeholder part to sit down behind the footer with the sticky footer reveal impact in an effort to work together with the footer part content material.
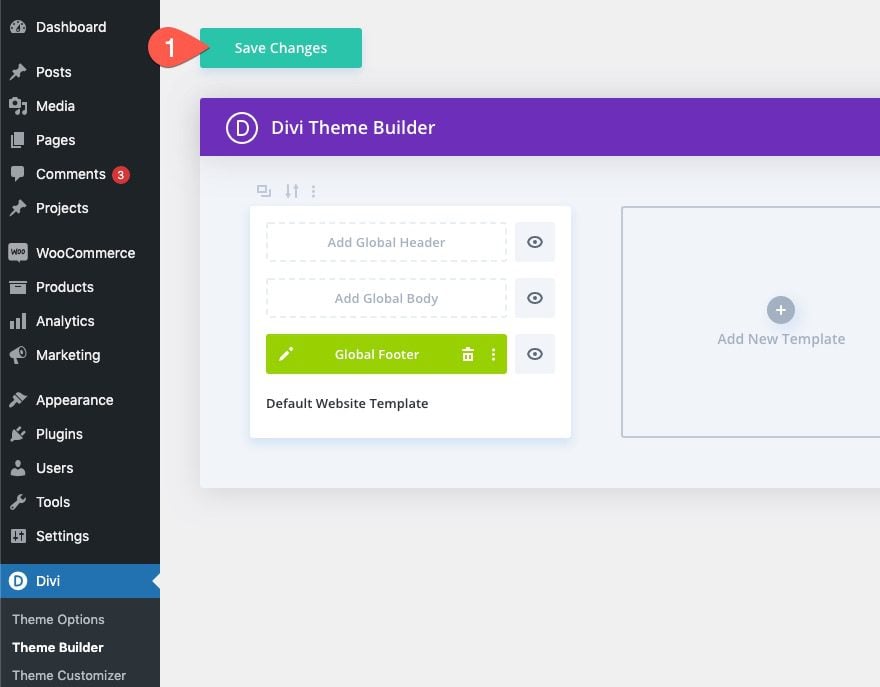
4: Save Modifications
As soon as accomplished, save the adjustments to the footer template and theme builder.

Remaining Outcome
To view the ultimate consequence, take a look at a dwell web page and scroll away. Right here it’s!
Remaining Ideas
In Divi, including a sticky footer disclose to your web site doesn’t require a plugin or sophisticated customized CSS. Utilizing the theme builder, you’ll be able to simply create a footer template and design a footer part with the footer reveal impact in minutes. Hopefully, this may present a delicate enhance to the design of your footer with an attractive interplay guests will take pleasure in.
I stay up for listening to from you within the feedback.
Cheers!
.inline-code{padding: 0px 4px; colour: crimson; font-family: Monaco,consolas,bitstream vera sans mono,courier new,Courier,monospace!vital} video.with-border {border-radius: 8px;box-shadow: 0 8px 60px 0 rgba(103,151,255,.11), 0 12px 90px 0 rgba(103,151,255,.11);show:block;margin: 0 auto;}
The submit The best way to Create a Sticky Footer Reveal with Divi appeared first on Elegant Themes Weblog.