


Not each customer involves your web site for a similar motive. You most likely supply a variety of services or products, not only a single possibility for purchasers and purchasers. That’s why having a number of focused contact varieties can assist clean out your web site’s UX in order that your prospects (and potentials) can get in contact with you about precisely what they want with as little friction as potential. Utilizing the Divi contact type module and our conditional logic characteristic, we’re going to stroll you thru creating the most effective pipeline between you and your customers as potential.
Preview of the Conditional Contact Type
When the whole lot is alleged and executed, you’ll have one thing much like this in your web site, prepared on your guests to make use of.
Desktop
Cell
What’s Conditional Logic?
First, we wish to briefly deal with what we imply by conditional logic. What we’re going to do on this tutorial is about up a collection of contact varieties that seem based mostly on what selections the consumer makes or doesn’t make.
As an illustration, you’ll be able to have a single contact type that adjusts based mostly on what service or product the customer wants. That approach, you will get the knowledge within the format you want as a substitute of them having to put in writing it out. Conditional logic on contact varieties can improve communication and expedite your capacity to offer on your customers.
With that in thoughts, let’s dig into creating the focused contact varieties.
The way to Create Contact Varieties Utilizing Conditional Logic
Load the Divi Builder
Since we’re utilizing the Divi Contact Type module, we’re going to wish to enter into the Divi Builder. We’re going to be utilizing the Panorama Upkeep structure pack as the instance on this tutorial. You should utilize any structure or design you need, however you will have to have the ability to use and elegance the Divi Contact Type Module.
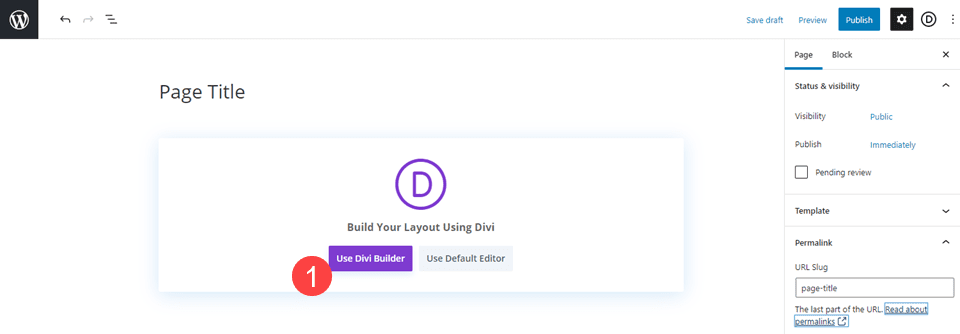
To begin with enter the Divi Builder from the backend of your WordPress web site. Contained in the Web page Editor, you will notice a purple button that claims Use Divi Builder (or Edit with Divi Builder if in case you have already created the Web page).

Add or Discover the Contact Type Module
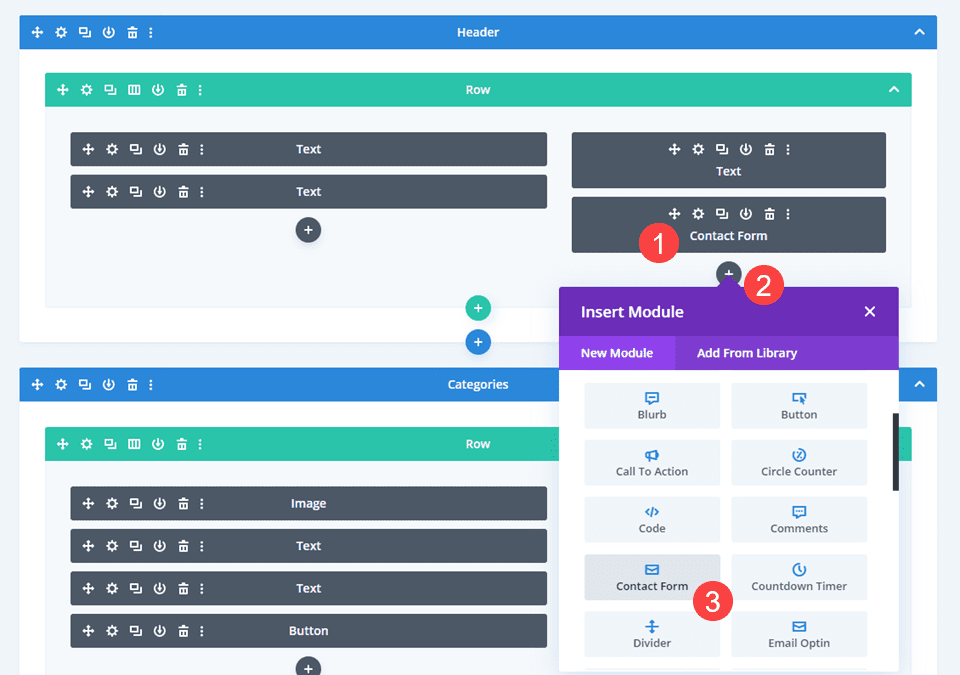
Then you’ll want to discover the Contact Type Module that already exists on the web page or click on the Black + Circle icon and discover the Contact Type within the dropdown menu.

Enter the Contact Type Settings
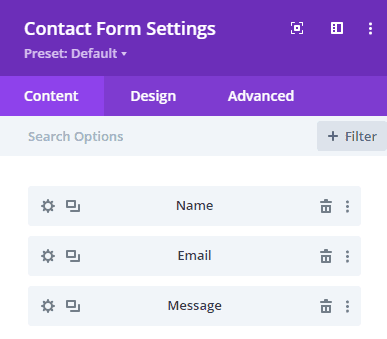
The Divi Contact Type module comes with 3 fields by default: Title, E mail, and Message. What we’re going to do is create a contact type the place these choices don’t seem till the customer has given us sufficient info to have the ability to direct their question.

Add the First Conditional Query
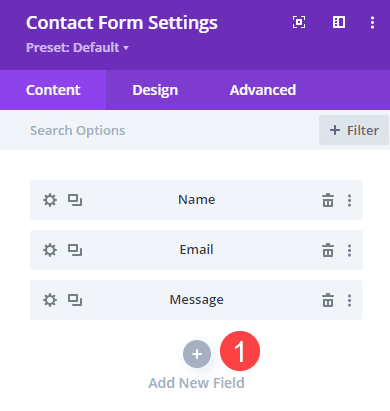
Below the Content material tab and beneath any fields already within the type, you will notice the Add New Discipline button. Click on that.

Doing so opens the Discipline Settings window, and you must see locations for Discipline ID and Title entries. The Discipline ID is for you. That’s what seems contained in the module settings so that you can maintain monitor of. The Title is the textual content that your guests will see on the entrance finish of the shape. (The Title will seem within the e mail you get when the shape is submitted, too.)
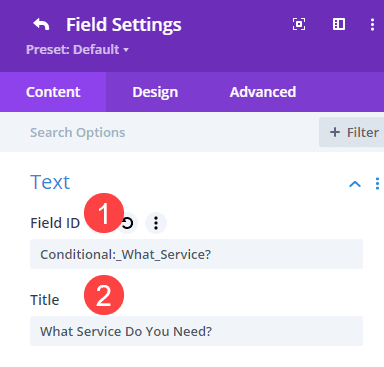

We’ve got labeled the Discipline ID with “Conditional” as a result of that is the primary query the customer will see on the shape. Their response to it can decide what they see subsequent. That is a simple approach to monitor the movement of the shape’s query and solutions.
Add Discipline Choices
Subsequent, scroll below the Content material Tab to the Discipline Choices part. That is the place you’ll add the alternatives for the consumer to select from. Every of those can be a set off for sure follow-up questions. For this instance, we’re utilizing Checkboxes as our enter kind. This implies the consumer can select as many as they need.
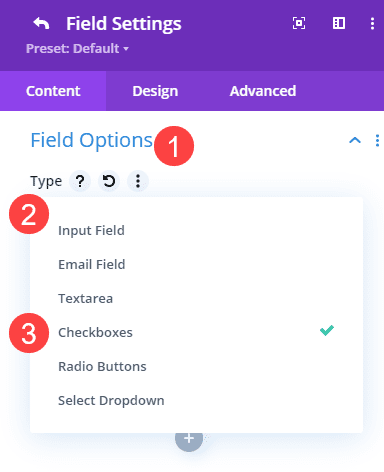

Along with Checkboxes, Divi additionally permits for different choices: Enter Discipline and Textarea for the consumer’s personal typed responses, Choose Dropdown and Radio Buttons for singular selections you present, in addition to E mail Discipline for e mail deal with entry. The default Title subject is an Enter Discipline, and Message is a Textarea.
With Checkboxes chosen, we’ll enter the alternatives that we wish to set off totally different choices later. We then wish to be certain this can be a Required Discipline so the consumer can’t submit the shape prematurely.
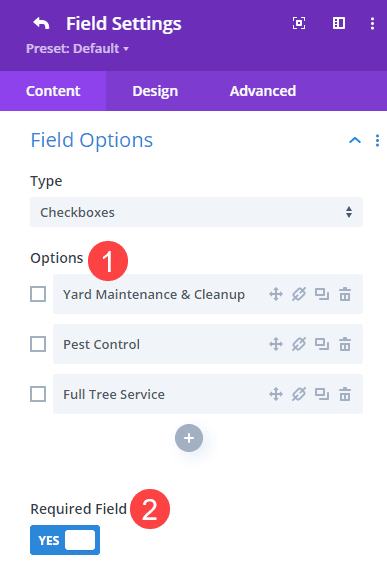

It’s necessary to notice right here that we don’t add Conditional Logic to this step. That is the set off, so it seems to the consumer regardless.
Add New Fields for Conditional Responses
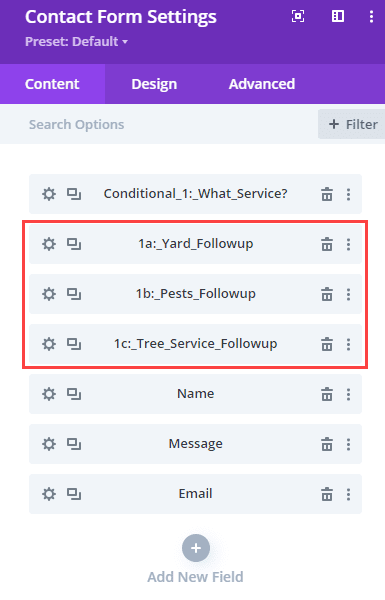
Subsequent, nevertheless, we’ll add Conditional Logic for the brand new Fields we add as follow-up responses. As a result of we included 3 choices for the preliminary query, we’re going to add 3 new corresponding fields to the shape. You’ll repeat the next steps for every one.

Title the Conditional Responses within the New Fields
Be aware that we have now used a naming conference of Conditional 1 (to point the primary conditional set off) after which 1a, 1b, and 1c for follow-up responses. We’ve got additionally labeled them appropriately so we will maintain monitor of what they’re.
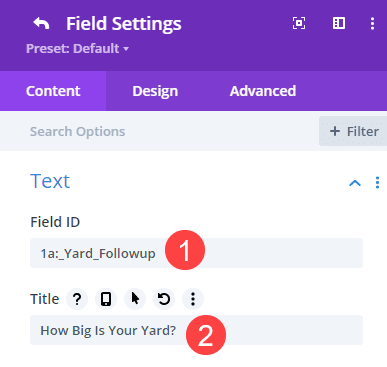

Like the primary query, we may also enter the Title because the query the customer will see.
Add Conditional Logic to the Response Fields
After that, scroll right down to the Conditional Logic part below the Content material tab of that subject. Allow the toggle for Conditional Logic. Then, select the Relation for this one, that means which you could set it to any (any variety of responses could make this feature pop up) or all (solely the particular mixture of responses make this subject seem).
For those who’re simply utilizing a single set off rule like we’re, both any or all will work.
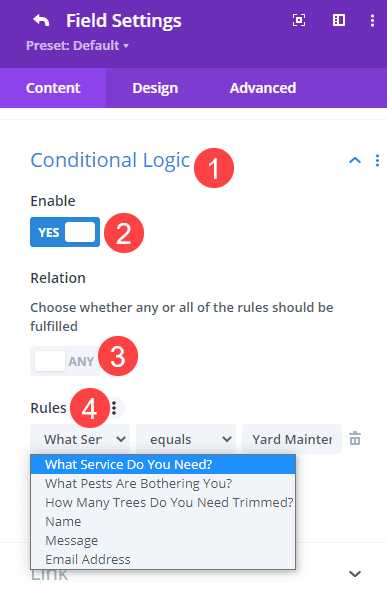

Below Guidelines, you will notice the sphere that triggers this one, and on the correct, you’ll be able to choose which alternative will set off it. The middle is the qualifier, resembling equals, doesn’t equal, is lower than, is larger than, and so forth. For this specific subject, we’re choosing the query that we set as Conditional 1 after which the choice inside it that particularly triggers this subject to look.
Repeat this for All Conditional Responses
Since we added three totally different responses to our single conditional query, we’re going to repeat this actual course of for the opposite fields, too. Solely creating the suitable correlative responses for that choice.
Set Contact Type Fiends ‘Title/E mail/Message’ to Seem
After you have the responses arrange for the conditional logic, we would like the customer to really have the ability to submit the shape. For that, we’re going to alter the Conditional logic within the Title, E mail, and Message fields. The setup for every of those is precisely the identical, so as soon as once more, you’ll repeat this 3 instances.
Contained in the Title, E mail, and Message fields settings, go into Conditional Logic. Allow it and add as many as you will have remaining responses to your conditional follow-up questions. In our case, we have now 3 follow-up questions, so we’re utilizing 3 guidelines.
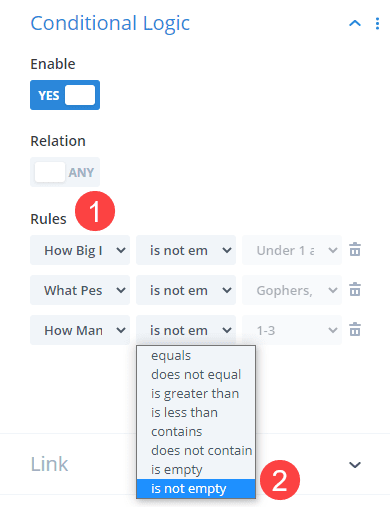

For every rule, select the follow-up query because the set off. Set the qualifer to isn’t empty, that means that so long as the customer answered the query, the situation is met. That may gray out the ultimate field, indicating that any reply is enough.
Save your modifications, and repeat this for any fields you wish to seem to permit type submission. And that’s it! Your type will alter itself to the wants of your customers instantly.
Remaining Outcomes
You’ll be able to see beneath how the conditional logic works in follow.
Desktop
Cell
Wrapping Up
The contact type is among the most ubiquitous components of a web site. Just about each web site has one, and just about each web site wants one. However not each consumer involves your web site for a similar motive. Through the use of Divi’s conditional logic characteristic, you’ll be able to customise your contact varieties into a flexible device on your customers to speak with.
What sorts of varieties have you ever made utilizing the Divi Conditional Logic characteristic?
Article featured picture by Kubko / shutterstock.com
The publish The way to Create a Versatile Divi Contact Type with Conditional Logic appeared first on Elegant Themes Weblog.